
James Wood gets to work priming and painting the antifouling onto the PBO project boat Maximus and shares some advice on how to antifoul a boat
As we’d scraped back the hull and were starting afresh, the idea of releasing biocides into the water, albeit very slowly, was something we wanted to avoid. Also, it seemed a good opportunity to try out a brand new antifouling product, so we opted for Seajet Bioclean Eco.
What we didn’t bargain for was just how involved the process of antifouling a boat would be! Instead of the usual primer followed by antifouling we had to factor in two coats of tie coat before applying the antifouling.
In total, Seajet sent us 3 litres of Seajet 117 epoxy primer, 6 litres of black Seajet Tie Coat and 5 litres of Seajet Bioclean Eco, which would have cost around £650.
When to antifoul a boat
The one thing we’d got wrong with every aspect of Maximus’s restoration was the timing. Despite our best efforts, everything took longer than expected.
We’d acquired the boat in May 2021 and had hoped to get her afloat in July. Already it was August, and the electrician couldn’t start work until September.
We scraped the hull and primed it, but had delayed antifouling because the topsides needed a polish, and we didn’t want to damage them by transferring new black antifoul to freshly cut gelcoat.
Article continues below…
Antifouling: Everything you need to know
Here’s PBO’s guide to preparing for, choosing and using antifouling paints

Best antifouling paint: 8 leading options in head-to-head test
In June 2021 we coated the hull of a Hardy Commodore 42 with eight of the best antifouling paint products.…
How soon before launch should we antifoul?
If applied too early before entering the water, even the best antifouling paint can start to break down prematurely, reducing any protection afforded when afloat. On the other hand, if applied too close to launch it wouldn’t have time to dry.
Most antifoul coatings require a minimum of eight hours to dry, but that depends on temperature and humidity. Leaving it for a day is a safer bet.
“You often hear of boats putting the antifouling on between tides but that’s not ideal because the antifoul doesn’t have time to fully dry,” Laurie Brebner told us.

Beautiful Dell Quay – such a lovely place to work
What are the right weather conditions for antifouling?
Equally, it was important to get the right weather conditions; if the surface of the hull is wet, or if it’s reaching dusk and you find yourself within 4° of the dew point, you risk unsuccessful application. At best this means patchy paint, at worst it means it doesn’t stick properly and starts to peel.
But then applying antifouling paint in warmer temperatures can bring its own challenges (something we found with the primer, which cured very quickly on a hot day!).
While most people in the UK would apply antifouling in the winter, we did it in the middle of summer. In 28° heat the pot life was dramatically reduced, and we had to be quick with the application. On the plus side, the drying time between coats was much less.
Don’t forget the metal bits!
Maximus has a Volvo saildrive engine, and the saildrive has an aluminium leg and bronze propeller.
We had to remember to treat this differently to the rest of the hull, and Seajet supplied us with Pellerclean propeller antifoul for protecting the saildrive.
How to antifoul a boat in 5 steps

Priming in progress: two coats would be required before the first of three applications of tie coat.
STEP 1: Applying the primer x 2
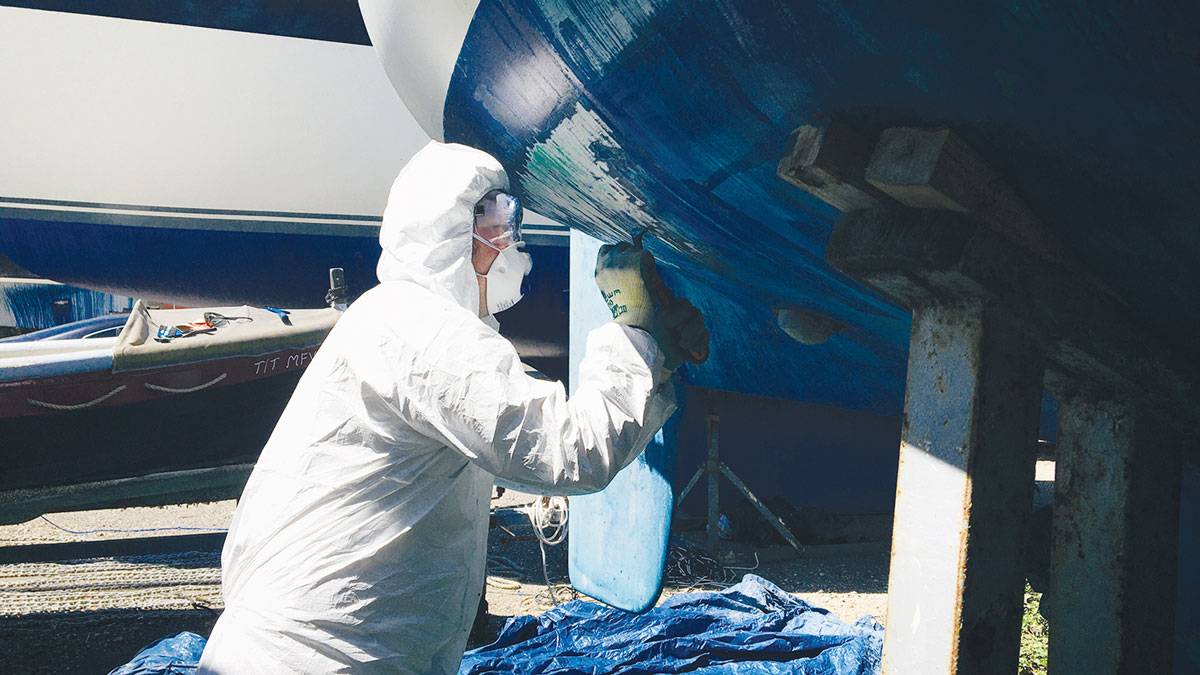
Like any decorating, applying antifouling paint is a messy business requiring goggles and gloves.
Ali had already applied one coat of primer to protect the newly scraped hull. Seajet advised applying three to four coats to achieve the recommended 180 micron thickness.
However, after further discussion, we agreed we could do two coats if applied with a high volume 12in mohair roller brush, which would offer a thicker coat with each application.
I tried using a roller handle extension to apply the antifoul system, but given the curve of Maximus’ hull, found it too awkward to get to the bottom of the hull, so had to remove the extension.
I found it easiest to work from the keel upwards. This meant my face wasn’t in close proximity to recently applied antifoul, and that I didn’t risk getting it in my hair when I (regularly) stood up slightly too quickly and banged my head!
Maximus is 28ft, with a draught of 1.8m, so we needed a fair amount of the 117 primer. Luckily, the Seajet website offers a coverage calculator to calculate exactly how much you’ll need.
Including the keel, it took about 45 minutes for one person to apply a full coat. In the warm sun, it only needed two hours between coats, and then three hours after the second coat before applying the tie coat.

STEP 2: Applying the tie coat x 2
Seajet’s tie coat can go over any stable coat of antifoul which isn’t flaking or peeling, including a Teflon-based system. The Bioclean Eco can then be applied over the top.
In Maximus’s case, however, we were applying on top of the primer as we’d already scraped off the old antifouling.
We were given a black tie coat, which is an important detail as the Bioclean Eco antifouling is translucent!
Whichever tie coat colour you choose will therefore be your final hull colour. There’s also a white, navy blue and red option depending on your preference.
We quite liked the ‘killer whale’ appearance the black tie coat gave Maximus when it was finished!

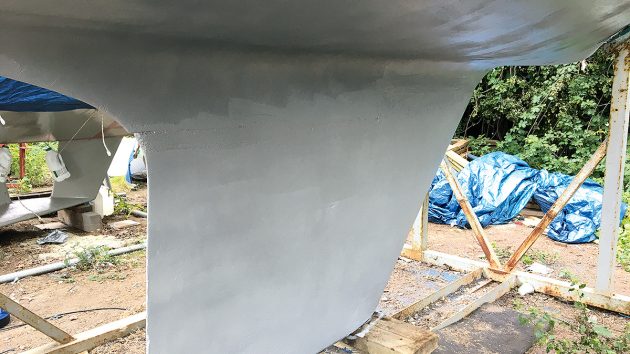
Maximus is beginning to look pretty smart with her coat of black tie coat applied over the primed surface of the hull.
I gave the primer a rub down to remove any loose dust, then reapplied the masking tape just above the existing bootline to protect the gelcoat.
I used the same application method as with the primer, using a 12in mohair roller, which I spurred beforehand to remove any loose fibres. I used a 1in brush for the areas tricky to reach with the roller.
The Seajet tie coat went on very easily, and the high contrast between the silver grey primer base and the black tie coat made it easy to ensure consistent coverage.

James carefully masked off the waterline before applying the tie coat.
Again, it took around 45 minutes to apply, with a three-hour wait before the second coat was applied.
Luckily, Ali had given me a long list of jobs to do ‘twixt’ coats, so I happily applied another (fifth) coat of varnish to the tiller and companionway woodwork, removed the shabby name decals and recovered the forepeak cushions with the covers that we’d had mended at our dry cleaners.

Half way through decal removal. James degreased the area with Clean to Gleam boat wash, next he used a heat gun to carefully soften the decals, then the letters then peeled off easily between finger and thumb. Nail polish remover (acetone) helped remove the residue.
The second and final coat of tie coat went on easily; the high gloss of the newly applied paint contrasted well with the dry first coat, so achieving an even coverage wasn’t too difficult.
This final coat required 12 hours to dry so, having done that and after cleaning up, I relocated for the evening to the Crown and Anchor pub for a pint of Youngs and a bite to eat.

The Seajet Bioclean Eco antifouling was a transparent paste.
STEP 3: Applying the antifoul x 2
I slept on board Maximus and the next day got to work with the Bioclean Eco foul-release coating. It was quite an eye opener.
For starters, it appears more like a thick translucent paste, and has a pleasant smell.
Using another 12in mohair roller head, I again masked off against the existing bootline, and applied the antifouling.

In the paint tray the silicone antifouling looked a bit like glue.
The Bioclean Eco went on well with the roller, and again the glossy paste-like texture meant it was easy to ascertain the areas that had been covered effectively.
It took between 30 and 45 minutes to apply a single coat, with three hours between the first and second coats on a warm summer’s day of around 20°C.
Note: Seajet Bioclean Eco requires a 24 hour drying time before launching.

Line-up of Pellerclean coats for the saildrive leg and propeller
STEP 4: Applying Pellerclean x 3
We decided to use Seajet Pellerclean on the aluminium saildrive and bronze propeller. Before application, I removed the old antifouling with a combination of my Clarke 150 sander with 80-grit discs, and my Bahco scraper for any hard to reach areas.
It was quite satisfying to bring it all back to gleaming aluminium! The Pellerclean kit consists of three components; a primer base, a primer hardener and a clean Pellerclean topcoat.
If it seems complicated, you’ll be pleased to know that Seajet have published a very helpful ‘How To’ video guide on YouTube. The kit they provide has everything you need, other than a brush.
The result was a fetching shade of gold, which looked really smart alongside my newly applied black antifoul!
After waiting an hour (I did this in between applying the antifoul patching) I applied a second coat, and left it to dry for a further hour.
I was then ready to apply the first of three coats of Pellerclean Clear, with two hours curing between each coat.

Oops. Spot the mistake: James had painted over the saildrive anode.
Application was simple using a 1in brush. Eight hours after the final coat has been applied, you’re ready to launch.
Top Tip: Don’t paint over the anodes on the saildrive leg like I did! It’ll cost you another hour’s work cleaning them all off again with wire wool.

Now it was time for abrading and repainting the chock patches.
STEP 5: Patching
Maximus was in a fixed cradle at Dell Quay boatyard, with no way to loosen off the struts. This meant we had to work out a plan for the patches of old antifouling underneath.
Typically this is done when the boat is lifted ready for launch. We spoke to Dell Quay, and they agreed to leave Maximus in the launching straps over the weekend, exposing the old patches, so we could get to work on them.
With no time to scrape back to gelcoat, I simply wetted an 80-grit wet and dry sandpaper and hand-sanded the old antifouling. I then applied a single coat of tie coat, followed by a coat of the Bioclean Eco three hours later, then a second coat three hours later again. With a 12-hour drying time minimum before launch, this was really the best I could do.

We have lift-off! Maximus is moved to the slipway ready for launch
Launching my freshly antifouled boat
Launching Maximus was only the beginning of the boat’s restoration – and there were many more jobs to do once we arrived at the marina, 20 minutes upriver.
Nonetheless, the launch date, being top of the spring tide, was only possible once a fortnight, and if we missed this, we missed our brief family holiday in Chichester Marina. A family holiday in a dusty boatyard cradle wasn’t quite so appealing!
As such, the week leading up to launch was incredibly fraught, not helped by us living a three-hour return trip away from the boatyard, and trying to calculate all the drying times between the coats.
Plus, one consignment of paint arrived spilled in the box and we had to wait for more! We worked to the wire – and just about made it – but in future I’d try and get antifouling finished much, much sooner.
How to antifoul a boat with silicone: Myths busted
Maximus’s silicone antifouling system was treated with a fair amount of suspicion from other boat owners and visitors to the yard. Perhaps they recognised I was a new boat owner, or perhaps people are just more comfortable with what they know.
While silicone alleviates the need for harmful biocides, the many drawbacks were gleefully offered to me. I put these to Seajet, and they explained as follows:
TRUE OR FALSE?
We’ll need to regularly sail Maximus at 8+knots in order to wash off marine organisms.
True. Seajet Bioclean Eco or any silicone coating are foul-release coatings. Marine organisms can adhere to the hull when static, but the use of silicone provides an ultra slippery surface.
Fouling detaches during the use of the boat. The flow of seawater against the hull cleans it. For inactive boats and those cruising below 5 knots, a quick wash or sponge off will remove any fouling and make the coating look like new.
TRUE OR FALSE?
The silicone antifoul can be scraped off if the hull comes into contact with an object, or cradle straps at lifting.
True. Most people use grease free paper or wet towels in between the straps at lifting to prevent damage. Then they tie the straps together so the boat doesn’t ‘slip’ out of them and this way they can paint to patches. There are tricks to accomplish this for every cradle.
TRUE OR FALSE?
Silicone is difficult, or can’t, be removed by blasting techniques so you have to scrape the hull if you want to remove it in the future.
False. Actually, we found a product. We are still developing it, but it works really well! We will call it Seajet Silicone Remover. After the boat is hauled out, high pressure wash the hull to clean it and break up the silicone.
Apply Seajet Silicone Remover and after 2-3 hours (depending on temperature), you can easily remove the Tie Coat and Bioclean. In spite of these points, Ali and I were willing to try the Bioclean Eco as we want to do our bit for the environment. Having removed the previous antifouling I know how nasty it can be to work with.
Call me sentimental, but as a parent of three young children, I have a relatively newfound focus on making sure the world they come into is left in as good a condition as possible, and I hope this foul-release coating without biocides helps. I’ll update PBO readers with my experiences down the line!
How to antifoul a boat on a budget: Top tips
Mohair rollers are expensive, and you’ll want a different one for each different product you apply. However, I found I could get multiple coats of the same product from one roller by removing as much as possible from the roller, and then wrapping it in a plastic bag or cling film. Then I put it in a shady place until ready for the next coat; I found that this also worked when waiting for a cure overnight.
Gelcoat definitely needs primer before antifoul! It seems obvious, but I learned this the hard way by not applying primer right to the edge of the cradle supports. There were areas where we’d scraped to bare gelcoat, but hadn’t quite got the primer on because the roller was too big. To avoid this use a small brush to get in close to the cradle supports.
How to antifoul a boat: Dos and don’ts
The British Coatings Federation advises the following when it comes to working with antifouling:
Do
- Choose an appropriate location
- Read labels and literature
- Follow marina and boatyard rules
- Wear all recommended PPE
- Keep PPE on until the end of application
- Capture all debris and scrapings
- Keep dust to a minimum
- Use wet sanding techniques
- Thoroughly clean up afterwards
- Use suitable tools
- Wash skin with warm soapy water or approved cleaners
- Dispose of all waste responsibly
Don’t
- Antifoul in a public place
- Allow bystanders
- Spray antifouling paint
- Eat, drink or smoke
- Remove PPE prematurely
- Use heat to remove paint
- Create dry paint dust
- Use dry sanding
- Allow waste to escape
- Reuse PPE (except goggles)
- Use solvents or thinners to wash paint splashes off skin
- Pour waste paint down drains
Why not subscribe today?
This feature appeared in the February 2022 edition of Practical Boat Owner. For more articles like this, including DIY, money-saving advice, great boat projects, expert tips and ways to improve your boat’s performance, take out a magazine subscription to Britain’s best-selling boating magazine.
Subscribe, or make a gift for someone else, and you’ll always save at least 30% compared to newsstand prices.
See the latest PBO subscription deals on magazinesdirect.com