
Nic Compton reports on PBO reader Jeremy Butler’s home build of the Western Skiff as he tackles the hull finish inside the boat and the timber fittings

The filleting on the inside took much, much longer than expected,” said a slightly weary-looking Jeremy Butler as he described the latest progress on building his 14ft Western Skiff. In Build your own Western Skiff – part 2, we left him with the hull only just turned over and still elated with how fast the boat was taking shape.

Download your own set of free plans today: pbo.co.uk/western_skiff
Browse the complete set of articles in this series online
It was a different story this month as he tackled the time-consuming tasks of filleting the inside of the hull and then cleaning it up for a full coat of epoxy.
“When I’ve filleted boats in the past, there weren’t any frames in the way, so I could mask off and fillet the whole plank length, then all you’ve got is a tricky bit at the start and a tricky bit at the end. Here, you’ve got lots of sections between the frames, with four times as many starts and ends. And, after you’ve done all that, you still have to fillet around the frames too.”
Despite the extra work (his time log shows he spent 9½ hours filleting the inside of the boat alone), he stuck with his self-imposed discipline of taping the edges of the seams first to achieve a neat finish.
Partly this was because he plans to varnish the inside of his boat, which means every blemish will be visible, but also because of something less easy to express: simple pride in your workmanship, or “satisfaction” as Jeremy puts it. I suspect even if he was building a potato crate which was never going to be seen again, he would still tape the seams and do the job properly.
Which is why he was visibly upset to have to admit that his epoxy coating was less than perfect.
“I used MAS low-viscosity epoxy, which is ideal; it’s more runny than regular epoxy, as it’s specifically designed for wetting out glass mat and being absorbed in timber. I put it on with a 1½in bristle brush, which I cut right down so the bristles were short and stubbly to create less drag. But I did go wrong getting the regular hardener rather than the slow-setting hardener, and I got a bit cocky making up big batches of glue so I had to slap it on quickly, and it ended up a bit thick in places.
“It was only when I was making the centreboard case that I remembered what I should have done: used a squeegee like I did on the bottom of the hull. It spreads the epoxy over the surface really fast, like a window cleaner, and you get fantastic coverage, really thin and even.”
Jeremy didn’t bother using a roller, because of its tendency to disintegrate on the job and because of the waste of epoxy every time you change the roller. He also (rather sensibly it seems to me) rejected the suggestion in the original skiff building manual of applying the epoxy with a rag.
The final big pieces of plywood to go in were the lids for the fore and aft buoyancy tanks, which were duly sealed in neat epoxy (using the squeegee this time) before being bedded in epoxy thickened with colloidal silica and microballoons and gently held in place with some weighs – too much weight and you risk squeezing out all the epoxy and weakening the joint.
Eventually, it might make sense to fill the buoyancy tanks with something buoyant to guard against water ingress – I filled mine with expanding foam and used a couple of empty ice cream pots pressed into the access hatches to create two cavities where I can keep my rowlocks. Another option being mooted was to fill the space with ping pong balls!
Cutting the timber

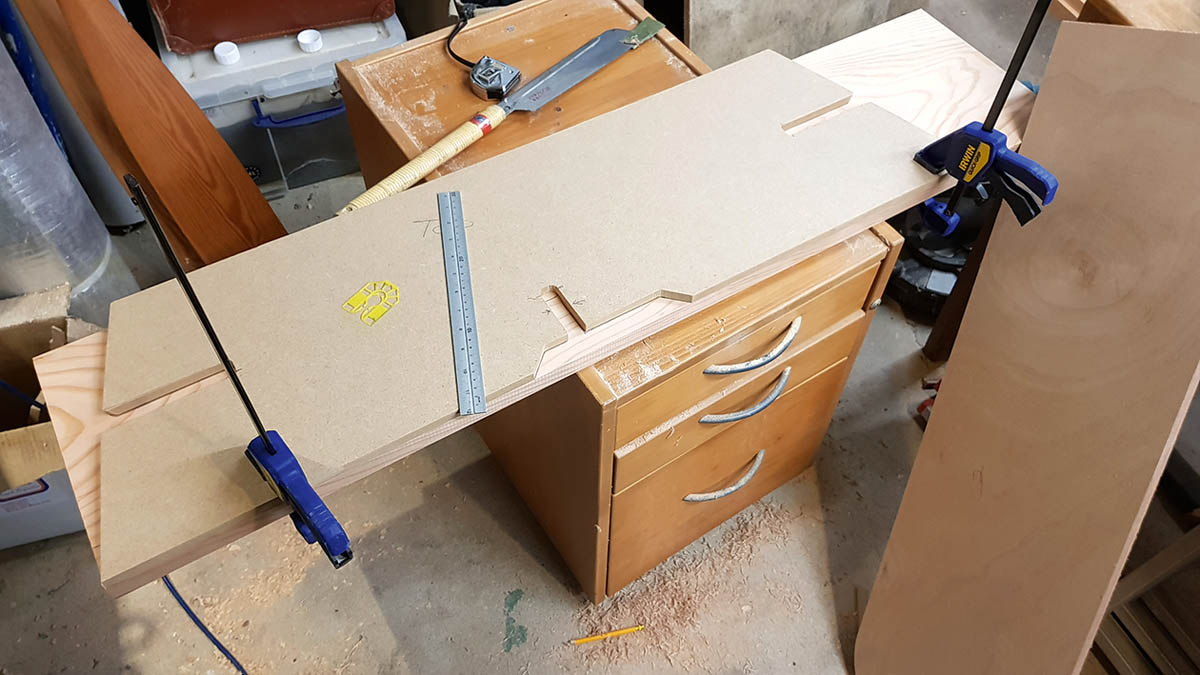
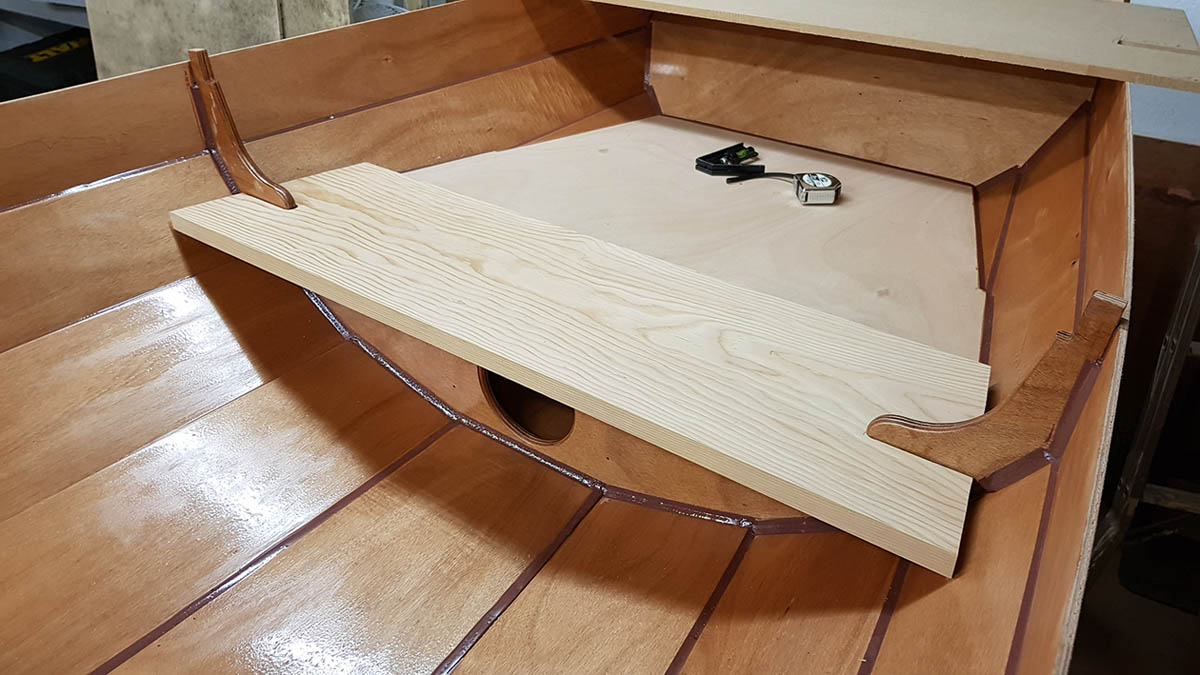
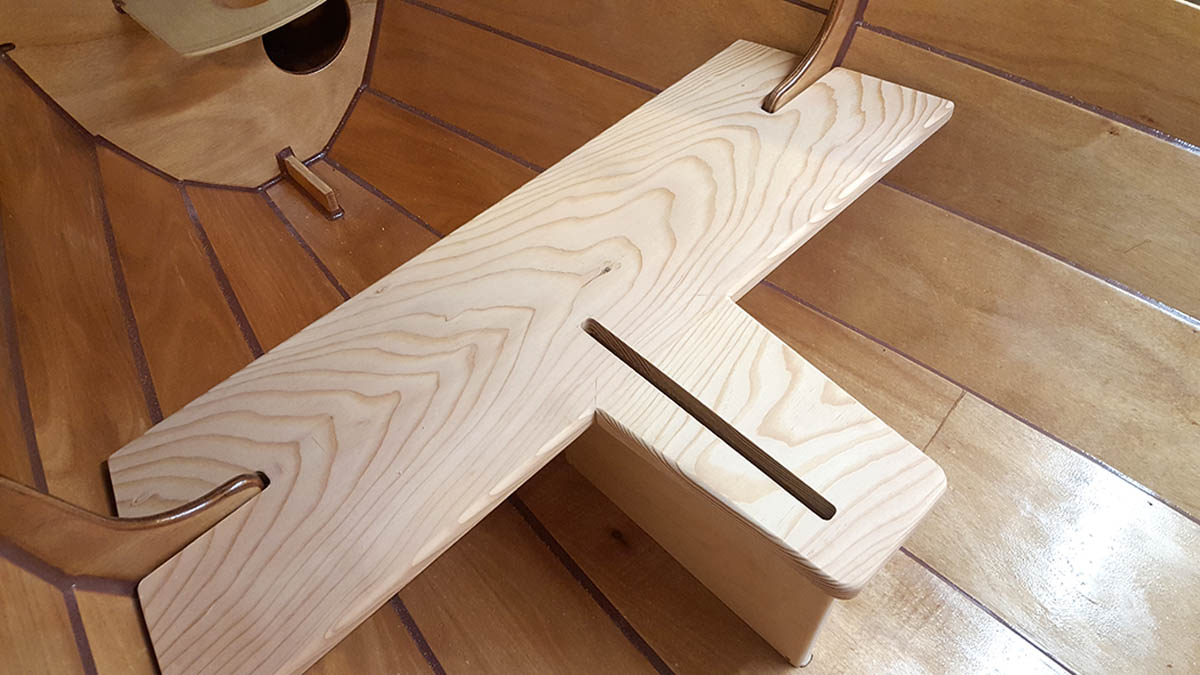
A very neat finish to the solid timber thwart. The centreboard slot is still to be cut
With the plywood structure complete, it was time to make and fit the solid timber pieces. In the original Classic Boat magazine kit of 22 years ago, the timber parts were all supplied cut and ready to fit. To make the Mk II kit more affordable, Jordan Boats only supplies the plywood components, along with an MDF jig and MDF templates for the timber parts. As for the free plans (available from pbo.co.uk/western_skiff), the timber parts are displayed as full-size templates grouped together on the final sheet, tiled together from the paper templates printed on A-zero sheets.
Jeremy ordered the timber for his boat from John Moody Marine Timbers in Ivybridge, Devon, (tel: 01548 831075) who supplied it in the recommended Douglas fir for a very reasonable £220. John has agreed to supply the wood for other skiff builders for the same price, using Jeremy’s cutting list, though delivery will have to be negotiated on top of that price.
Thwarts:
1 unit of: 24 x 280 x 1,400mm
3 units of: 24 x 280 x 1,200mm
Keel:
1 unit of: 24 x 300 x 3600mm (note this is a correction to what was published in PBO Jul19 issue)
Gunwales and inwales:
4 units of: 24 x 16 x 4,400mm
1 unit of: 24 x 25 x 3,200mm
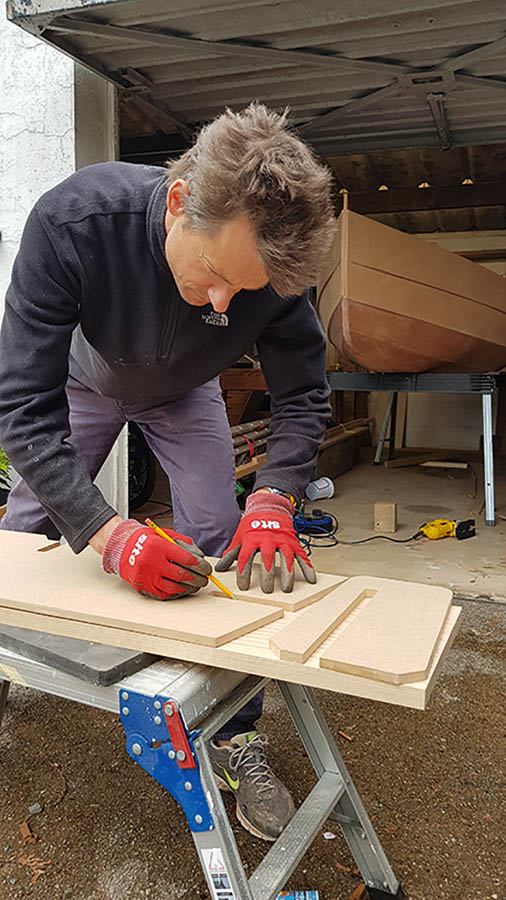
MDF templates make transferring basic shapes to the timber a simple process.
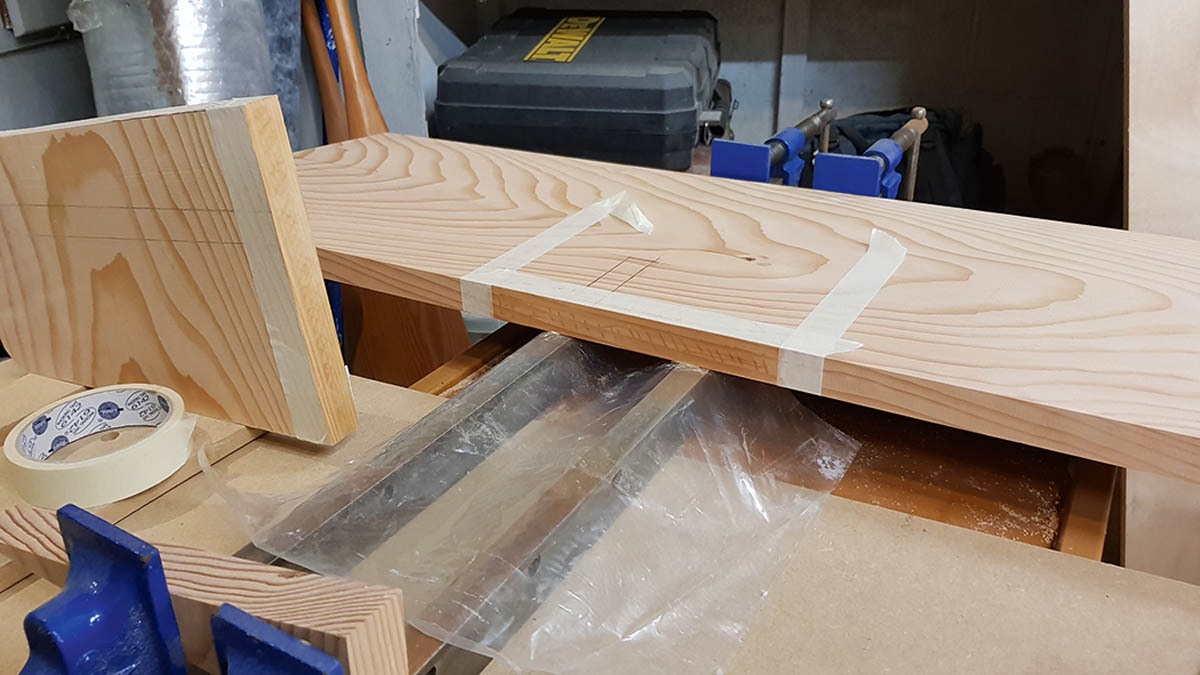
Once Jeremy had got hold of his timber, cutting the basic shapes was a simple process of transferring the shape from the MDF templates (or, in the case of the free plans, from the paper templates) and cutting with a handsaw, circular saw and/or jigsaw. The tricky bit was cutting the slots in the ends which the frames fit into. If it had been me, I’d have drilled a hole of the appropriate diameter at the end of the slot and then cut the line to the hole with a circular saw and/or handsaw. But Jeremy had a more sophisticated approach.
“Getting the saw cut to match exactly with the edge of the hole is really hard and if you miss it looks really bad,” he explains. “Plus I don’t feel comfortable with circular saws. Making a simple template and cutting the slot using a router fitted with a bush was a no-brainer for me. You get a consistent shape quickly and it’s really satisfying because the result is so nice and clean – you can almost varnish it straight off.”
Again, the fact that Jeremy was varnishing the inside of his boat made such small details more important – even down to the shape of the curve at the end of the slots, which he decided looked better as a portion of a circle (ie flatter) rather than a full half-circle. But there was another reason why it was important to get it looking right. Unlike the original boat, on which the thwarts are fixed in place with large epoxy fillets, Jeremy has decided to make his thwarts removable.
Weight reduction
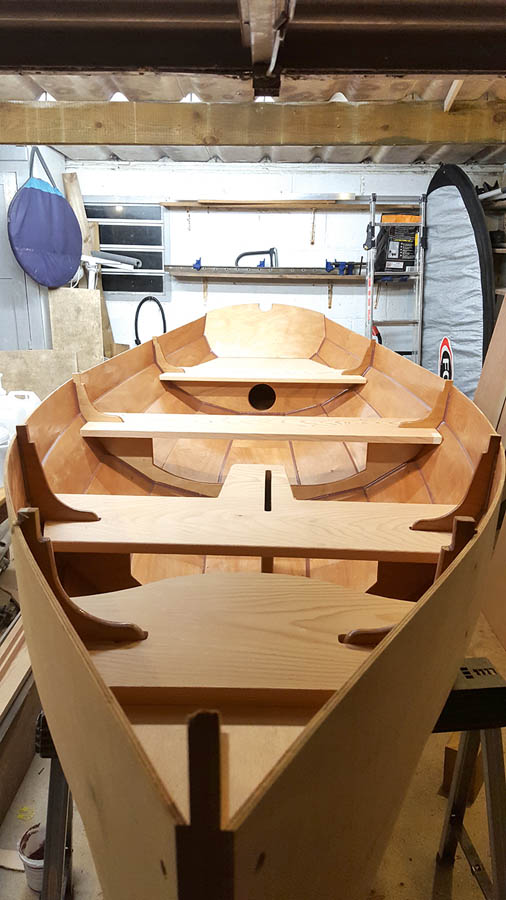
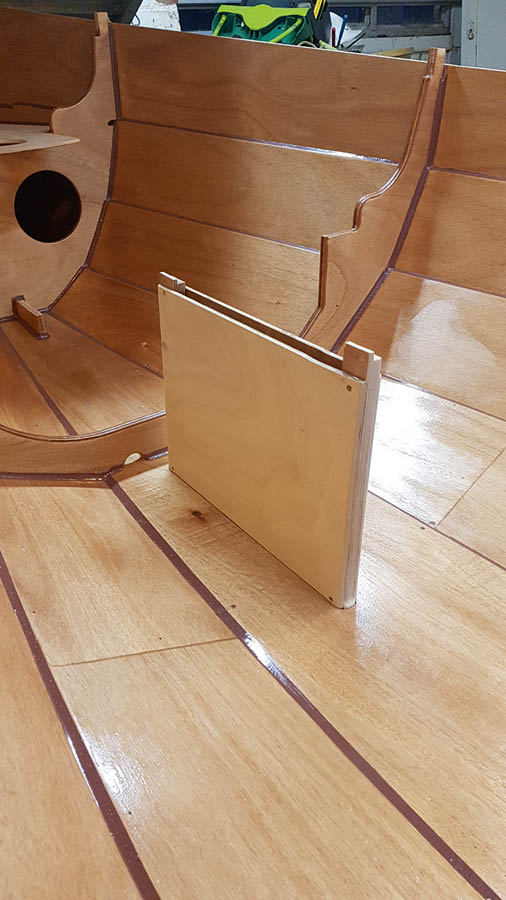
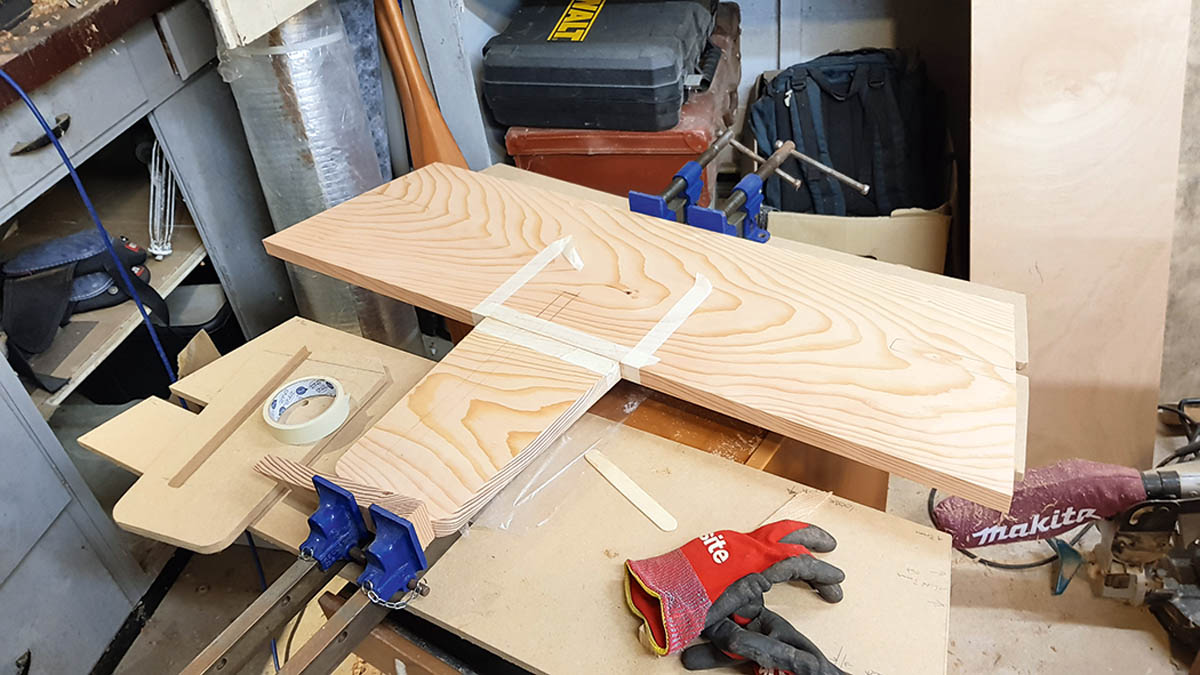
Removable thwarts slotted into place.
“Douglas fir is relatively heavy, so the combined weight of three thwarts and the mast partners is massive compared to rest of boat. I’m trying to keep the fixed weight of the boat to a minimum, so I can take it out on my own and if possible stick it on the roof of my car.
“Having removable thwarts means I can carry them separately or chuck them in the boot, and keep the hull light. Also, the main central thwart is 280mm wide, which means that, if you cut three slots on each side, it could sit in three possible locations. That allows you to adjust the balance depending on who is in the boat: you can slot it further aft for two-up rowing, to create more space between the thwarts, further forward for just one, or centred if you’ve got a couple of passengers on board.”
The end result is rather more ‘designery’ than the skiff I built 22 years ago, with rounded ends on the thwarts instead of epoxy fillets, emphasising the fact they are separate components. Jeremy plans to glue wooden ‘buttons’ made from slices of oak or cherry dowels to the inside of the boat to take the weight of the thwarts in their various positions. (See part 5: this design decision was later updated to ‘short lengths of bevelled timber’). As for the possible loss in strength caused by removing the glued-in thwarts, Jeremy was satisfied that the strength of the frames, combined with the quarter knees, breasthook and gunwales (not to mention all those annoying fillets), will be more than enough to keep the hull rigid.
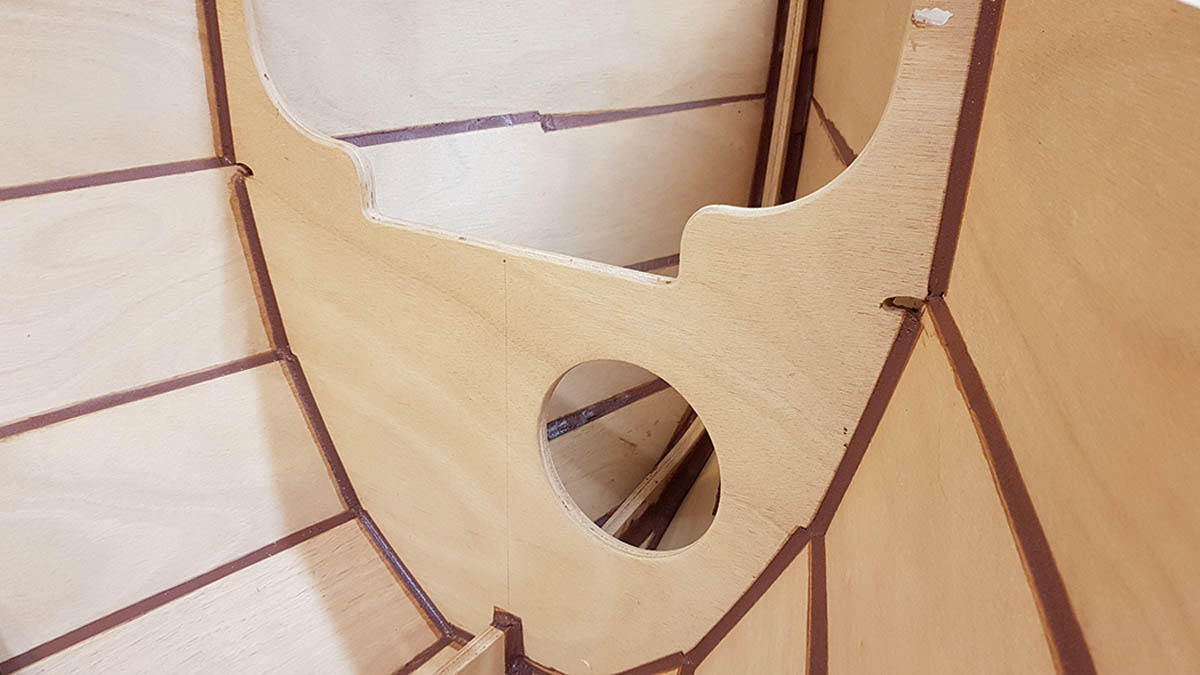
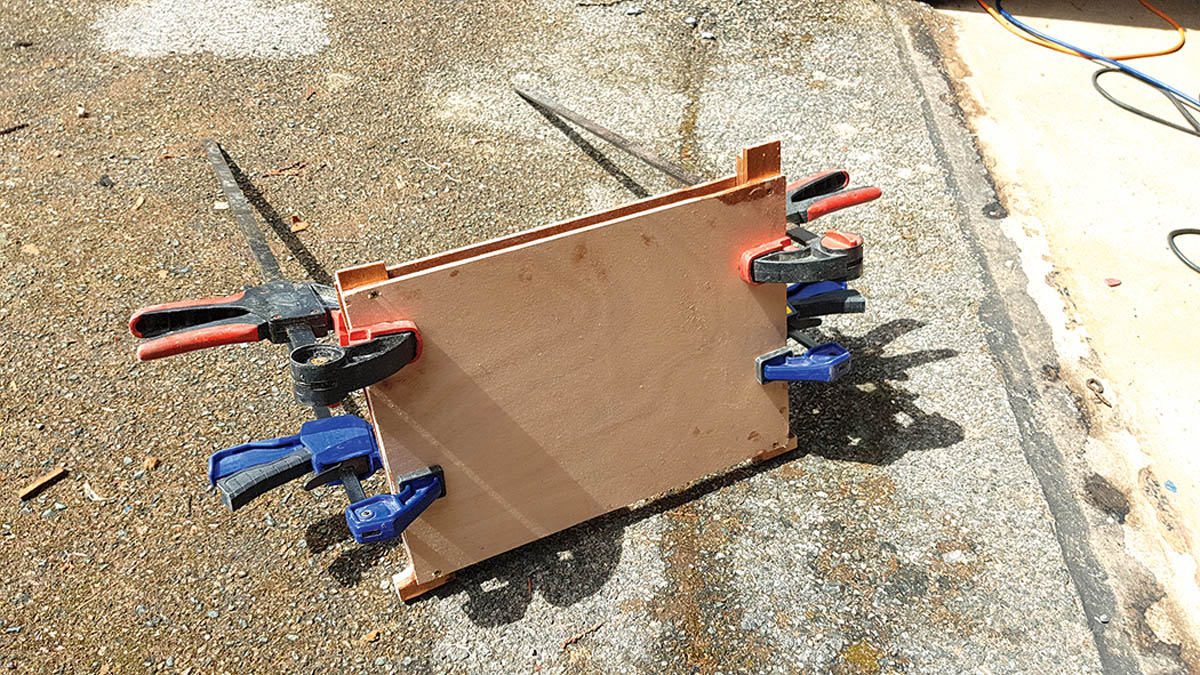
Jeremy also departed from the original design when he built the combined forward thwart and centreboard case top. Rather than cut a notch into the aft edge of the thwart for the centreboard case top to slot into, as per the original kit (and the free plans), he decided to simply join the two parts edge to edge, arguing that it made a neat job without losing any strength. By glueing the edges and clamping the two parts together lightly with a pair of sash cramps, he achieved an invisible join, so it looks like one piece of wood.
He had an uncomfortable moment, however, when it came to cutting the slot for the centreboard.
“I drew the slot on the thwart based on where the template said it should be, and made sure the centreboard box was upright with a set square. But when I went to the stern to check, it looked like the hole was nowhere near right. Because the lines on the centreboard case top aren’t square and the whole case is off centre, it’s weird to read by eye. I measured and measured and measured, and then I said, ‘Do it. Cut it.’ And it was absolutely perfect.”
After three months’ work, squeezed in between work, childcare and all the stresses of modern life, the toll of what was often rather tedious work was beginning to show. But Jeremy was still upbeat, as the end of the project started to loom into sight.
“I’ve got a couple of gripes, offset by the real satisfaction thinking it’s starting to look really nice – and luckily that’s the feeling that’s carrying me along. The gripes are that, as the project goes on, I’m more and more interested in the boat as rowing craft, so any effort I put into the sailing part feels like a waste of time. And there are some small inaccuracies in the kit, like the centreboard case being a bit narrower than the slot, which created extra work and was frustrating.
“But when I look at it, I do still think it’s a really pretty boat, with really pretty lines. I can’t wait to get out on the water on it.”
Cost so far
Previous months: £1,282.98
This month:
Disposable brushes £4.85
Timber £220
Total so far £1,507.83
Time so far
Previous months 56¼
This month 32
Total so far 88¼
In pictures: Cutting and fitting timber parts
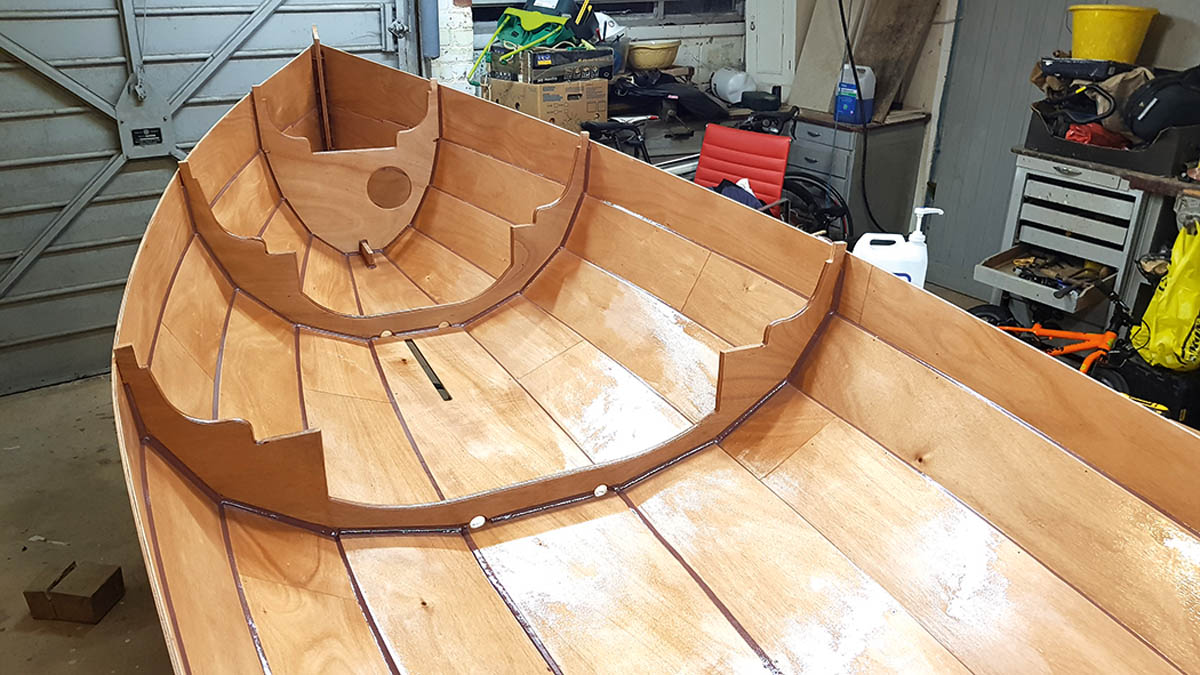
1. The forward bulkhead is now epoxy filleted to adjacent planks. Note limber holes which allow water from the foredeck to drain after the thwart is fitted.
2. Jeremy regretted not using a squeegee to apply the liquid epoxy to the inside of the boat, as using a brush “wasn’t a great success,” he says.
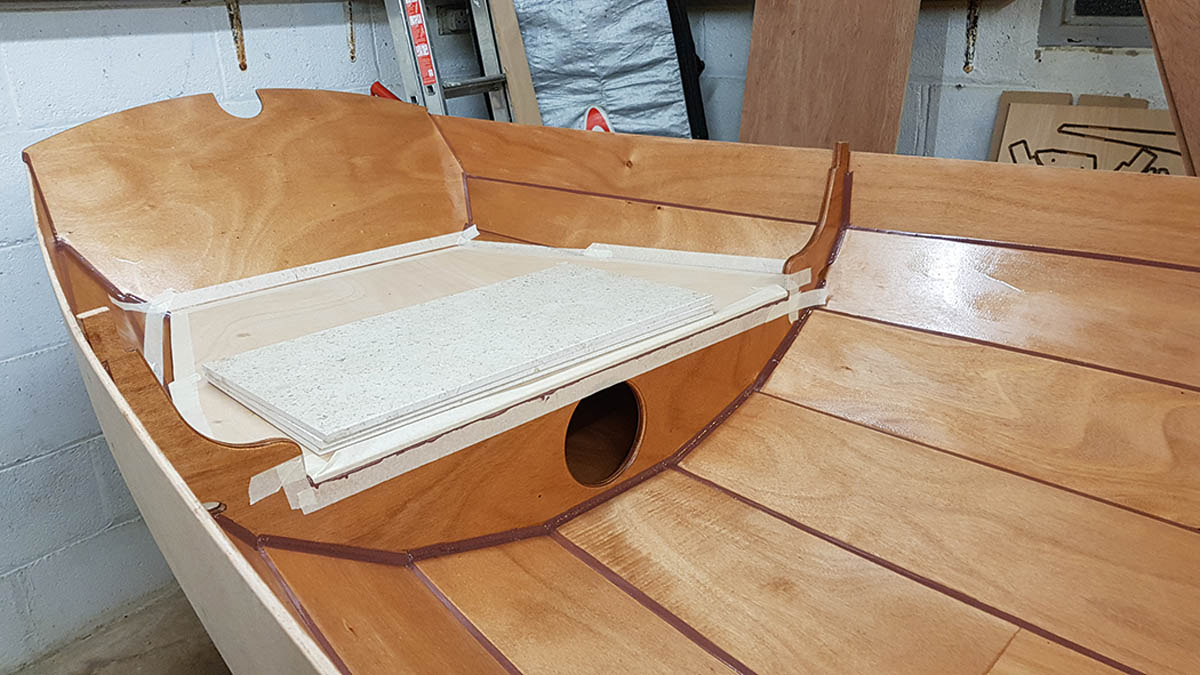
3. Three limestone tiles provide exactly the right pressure to glue down the aft buoyancy tank top, while tape ensures the surrounding timber stays pristine.
4. The centreboard case proved slightly narrower than the slot, which meant Jeremy had to widen it at the bottom with some extra timber.
5. Here’s the centreboard case in situ, before the uprights were trimmed to the right length. Note how it is offset to port to avoid having to cut the keel.
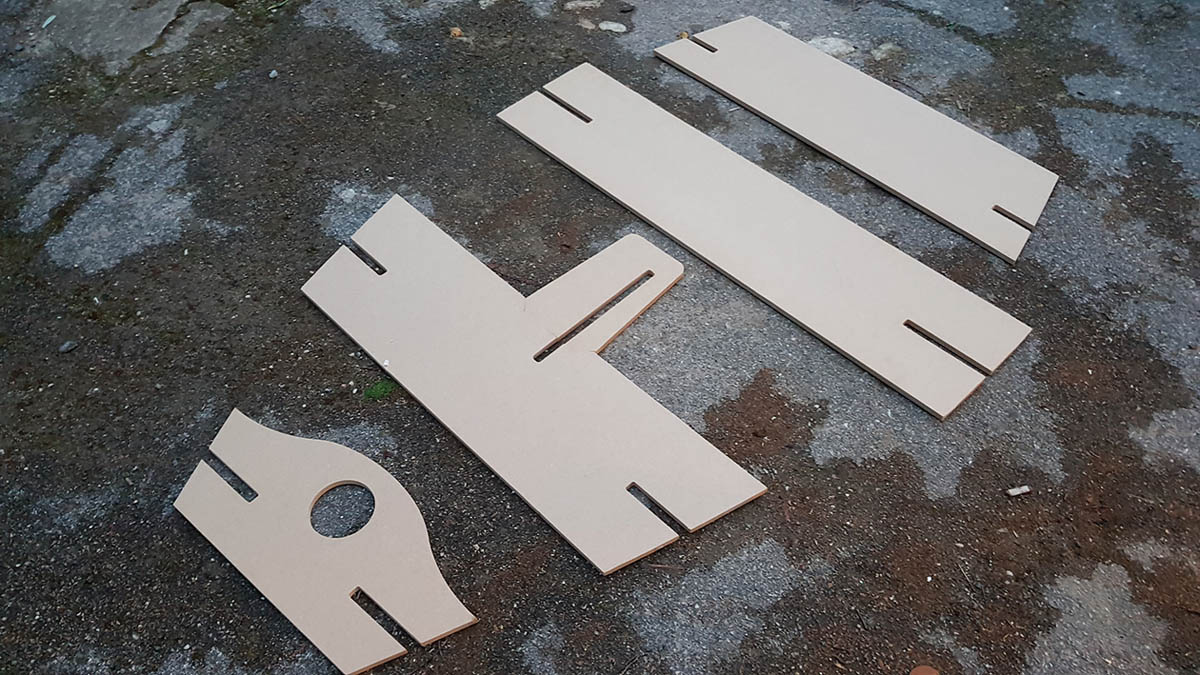
6. A set of MDF templates for the thwarts are included in the Jordan Boats kit. Templates also included in the free plans, available online at pbo.co.uk.
7. It’s a good idea to bevel the ends of the templates to try them out before cutting the timber, to ensure inaccuracies haven’t crept in during construction.
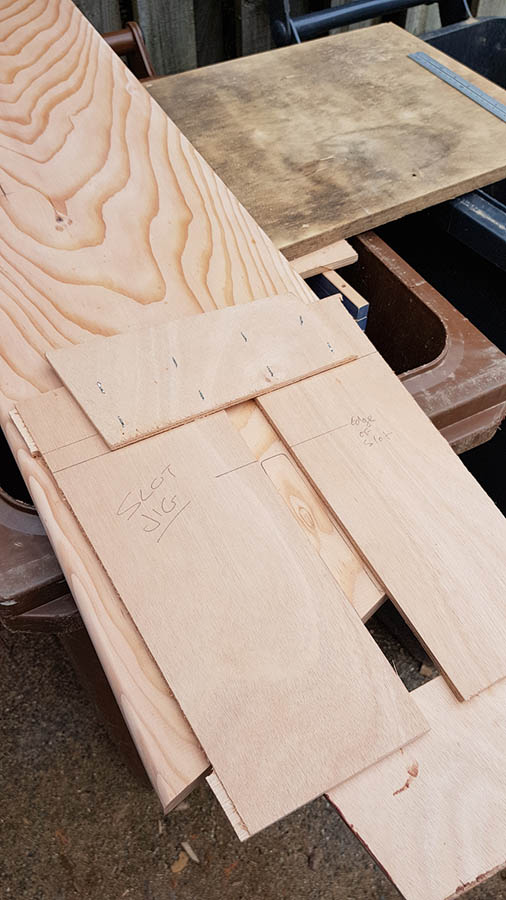
8. Rather than cut the placement slots in the end of the thwarts with a drill and saw, Jeremy made a simple jig out of plywood…
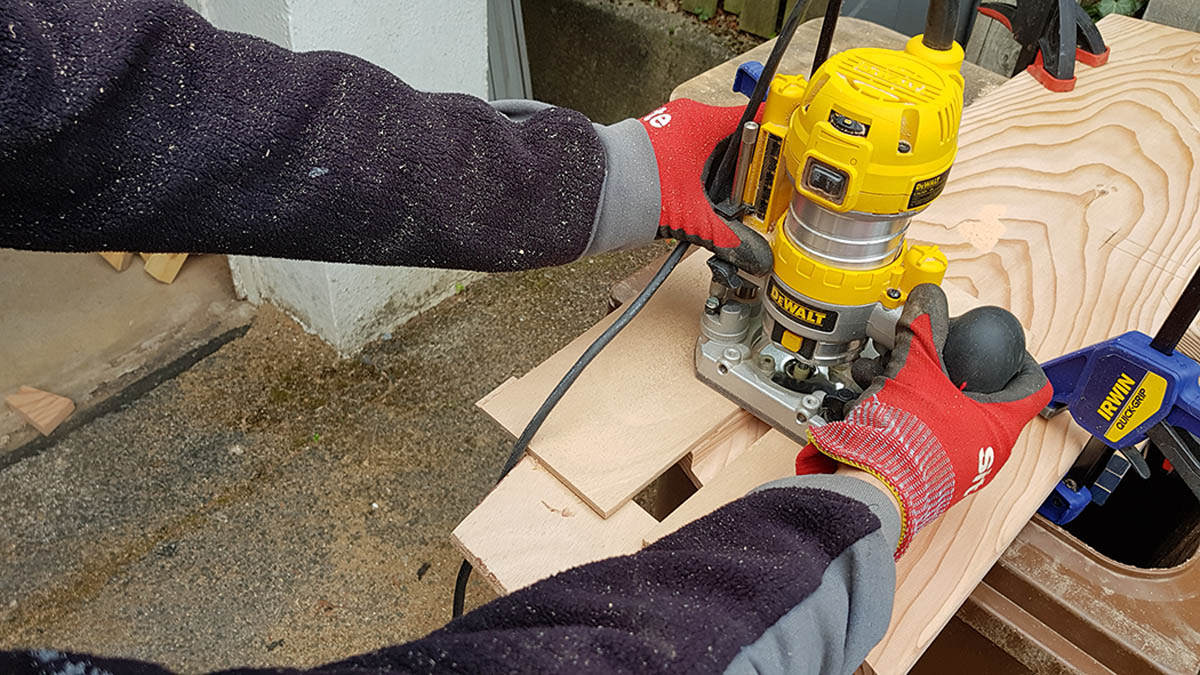
9. …which he then clamped to the end of each thwart in turn. He then used his router, fitted with a guiding bush, to cut the slots.
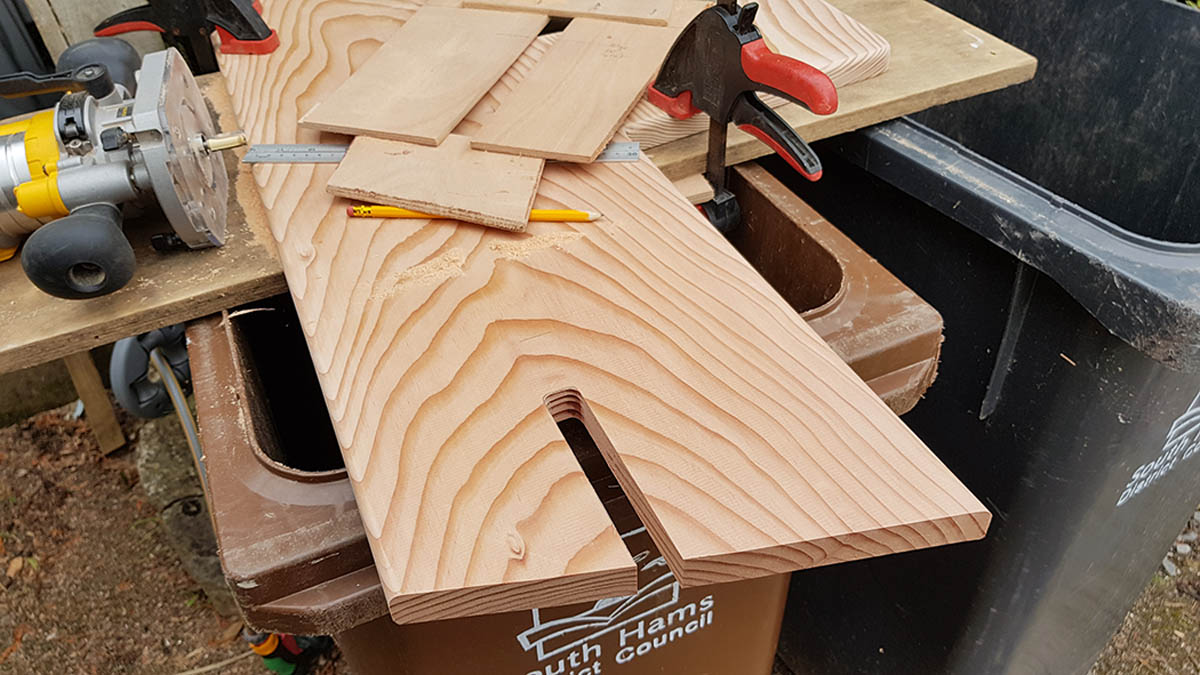
10. The result was a clean, accurate cut, which was absolutely identical each time. The slots hardly needed any cleaning up, saving still more time.
11. Fitting the aft thwart, the ends yet to be rounded. Jeremy has made the thwarts removable to reduce the boat’s fixed weight for easier transportation.
12. Rather than cut a notch in the aft edge of the thwart to receive the centreboard case top, Jeremy glued them edge to edge.
13. Getting just the right amount of pressure was crucial to ensure the epoxy wasn’t squeezed out. Note how the grain of the pieces is orientated to match.
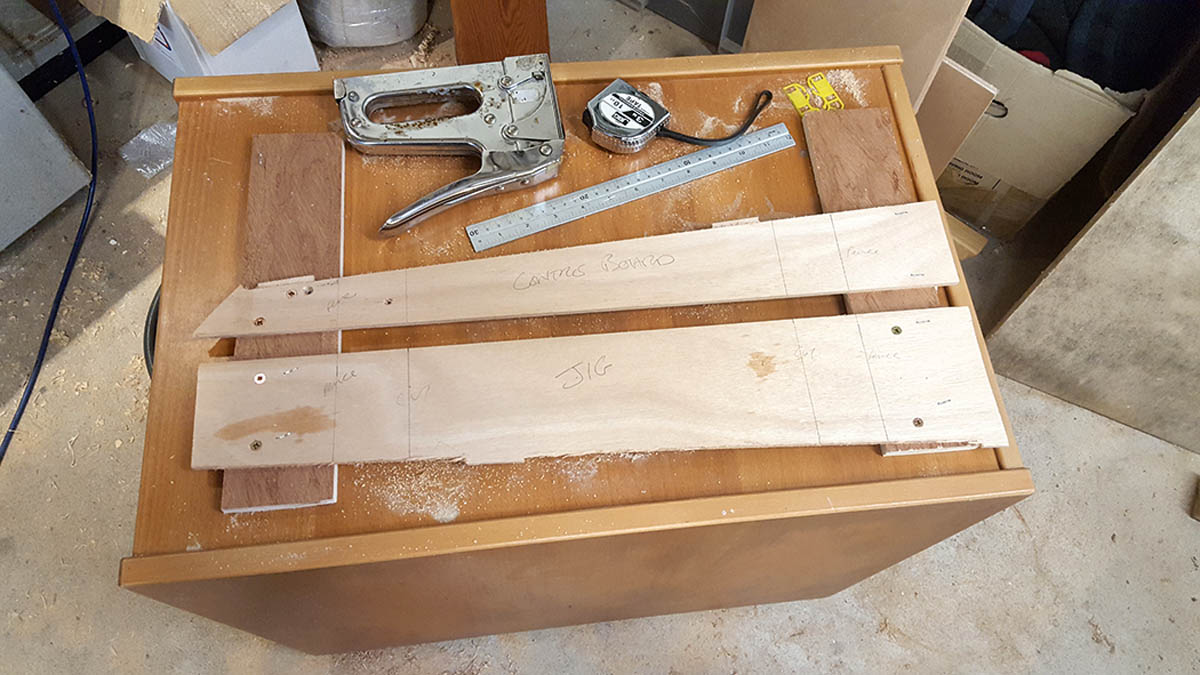
14. Another jig in the making, this time for the centreboard slot. Scraps of plywood secured with screws and staples make a fast job of it.

15. Using the router to cut the slots might look messy, but it’s fast and accurate and gives a much cleaner finish than a saw.
16. The end result is a pristine thwart which looks as if it’s been cut from one piece of wood. Slot is offset to port to match the centreboard case.
 How to get free plans

How to turn free plans into plywood parts and templates
- A set of PDF plans (excluding the sail plan and outboard conversion) for personal use only is available free of charge, but please, please don’t forget a small donation to the Ed Burnett memorial fund: justgiving.com/fundraising/bill-burnett1
- The 39 pages of plans (size ‘A zero’) should be printed (black & white is fine; printing firms are available online).
-
Once printed, join together individual sheets by matching the corresponding numbers in each corner and aligning the target marks.
-
Affix the templates directly onto plywood sheets (2440mm x 1220mm / 8ft x 4ft), aligning the edges and you are ready to cut the parts. We estimate
- 4 1/2 sheets 6mm ply
- 1 sheet 9mm ply
- 1 sheet 15mm ply
- 1/4 sheet 12mm ply
- 2 sheets 12mm MDF
- Solid timber (eg. 1in Douglas Fir) for thwarts, etc
Instructions for free Western Skiff plans – click here to download
Overview pdf of Western Skiff plans (10 pages of A4) – click here to download
Full set of pdf plans of Western Skiff (39 pages of A0) – click here to download
Rig dimensions & sail plan – click here to download
Building an outboard well during skiff restoration in 2015, by Nic Compton
Browse the complete set of articles in this series online