
Mike Reynolds transforms the galley area aboard his cruiser-racer by installing a new fridge box, drinks locker, sink and worktops

For many years refrigeration on board my 1980s IOR ¾ ton cruiser-racer Zen Again was a portable Waeco unit, that sat in an open compartment in the boat galley.
Although the unit worked, its volume was small, its power consumption large and it robbed us of work surface.
So we decided to replace it with a custom compartment plus an ‘off the shelf’ condenser/evaporator.
Separately, the galley sinks had rusted through so we decided on a galley makeover.
The old galley had the portable fridge mounted aft of the cooker. There was no work surface above it.
The forward area was taken up with dual sinks and an uninsulated wooden locker outboard. So the galley had very little work surface for food preparation, and more of it would be a big improvement.
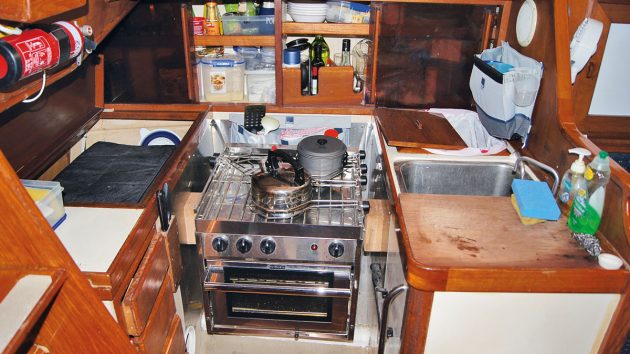
The old galley on the 1980s IOR ¾ ton cruiser-racer Zen Again. Credit: Mike Reynolds
Aft there’d be the new fridge lid but it would be flush to provide workspace.
A single sink plus a flush-fitting locker lid would be installed forward. There was a substantial period of research.
The portable fridge gave us about 30lt of refrigerated volume. The volume in which the unit sat would give us a 50lt fridge with 75mm of insulation all round.
Due to the woodwork over the area, the fridge box would have to be assembled in situ and built from the outside in.
Key design decisions were the types of condenser unit, evaporation plate and insulation foam.
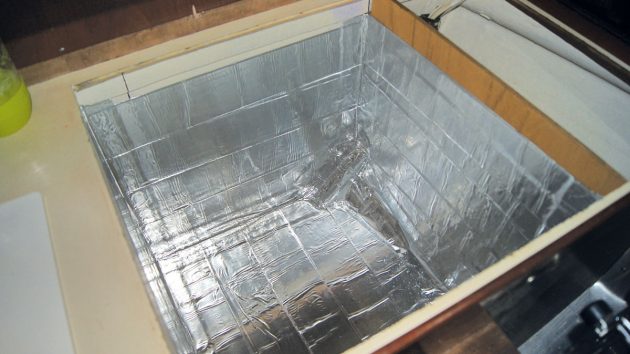
The fridge box was lined with aluminium tape to reflect heat. Credit: Mike Reynolds
We decided on a Frigoboat Capri 50F condenser with an Inox 180F evaporator.
The 50F was overkill for a 50lt fridge but has compressor rpm control, which seemed a good idea.
For insulation, we chose extruded polystyrene (XPS). XPS has a slightly lower R rating than polyurethane but was reputed to hold its rating better over time.
XPS was considerably cheaper too and appeared easier to work with.
Initial work involved lowering the floor of the compartment in which the fridge box would live.
Continues below…

How to make a boat fridge: step by step
Keith Calton converts an under-seat locker into a bespoke boat fridge for under £450

Turn a boat coolbox into a fridge
Chill out with David Rainsbury by following his step-by-step guide to converting a coolbox into a fridge

Best boat cooker: 10 alternative options for gas-free cooking
Gas cookers used to be the standard choice on almost every boat, but there are good reasons why they are…

Boat wood: a complete guide for yacht owners
Boatbuilder and finisher Lyndon March explains which types of wood work best for different repairs and modifications on board
Since the box would be permanent we needed to ensure future access to the volume below the floor. That’s because a bilge pump hose, gas line and electrical cables cross the space.
Happily, there was already an inspection hatch providing access there, so we fitted a conduit around the cables and a mouse line to pull any new cables through.
The cables emerged beyond a new wall forming the outboard side of the fridge box.
The floor and wall were epoxied individually before being screwed and epoxied into place.
We decided to avoid an irregularly shaped fridge box, preferring to have a simple cube shape. That left us with a narrow volume outboard of the fridge box.
The fridge XPS insulation panels are cut to fit and then glued into place. Credit: Mike Reynolds
It became known as the ‘hole’ and has proven very useful.
The fridge box was first lined with sticky-back aluminium tape. This reflects radiant heat.
Next, we added 75mm XPS panels. Some of the panels needed to be carefully shaped to fit. XPS proved very easy to work with.
The panels were glued in place using a construction adhesive. We applied two coats of epoxy over the panels to prepare them for 4mm marine ply covers which would form the inner floor and walls.
The 4mm interior floor, 4mm interior walls, 9mm cover and 9mm top cover were constructed and glued in place.
Laminex was used to make the worktops. Credit: Mike Reynolds
Next, the single Laminex worktop was prepared.
Cutting out the holes in the single panel was a little scary; on the aft side it was only about 30mm wide.
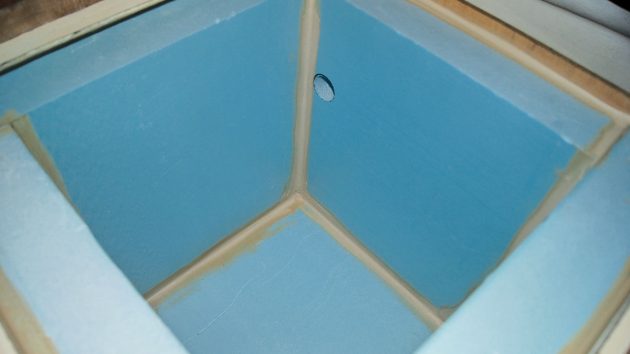
Happily, it didn’t fracture and it was glued in place. The worktops were masked then the painting of the fridge box commenced; three coats of epoxy primer/undercoat followed by three of epoxy gloss over the epoxy-coated marine ply.
With the aft part of the galley finished, we turned our attention to the forward part. This would house the new sink and an insulated (but not refrigerated) drinks locker.
The new sink would be supported by a marine ply board which would sit on the original ‘sill’ of the old double sink.
We epoxied all the marine ply panels to seal them. With the old sinks and locker removed we took the opportunity to clean and paint the volume under them.
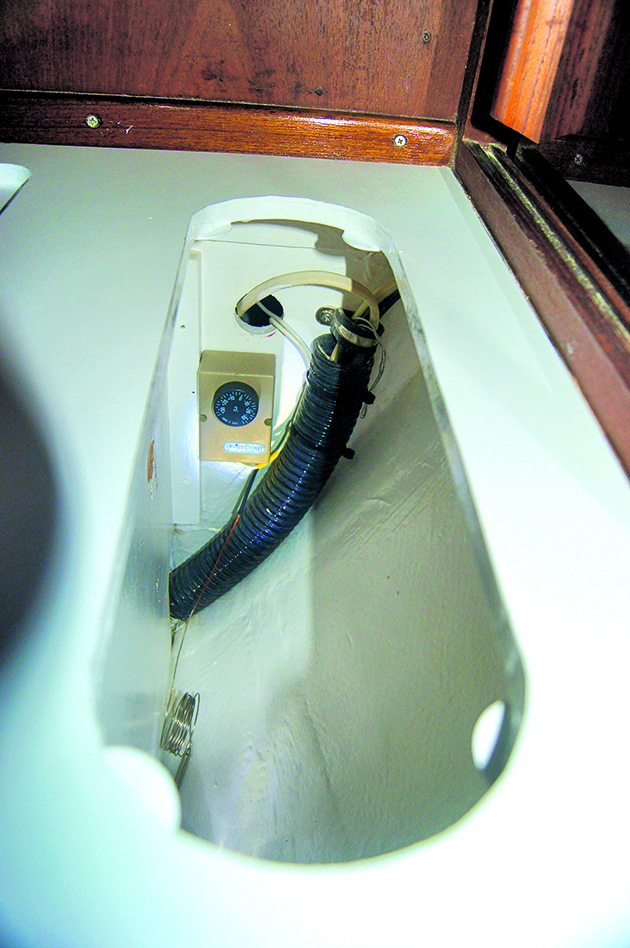
The thermostat was mounted next to the fridge in the ‘hole’ to keep the electrics away from any moisture. Credit: Mike Reynolds
We also replaced the nearly 30-year-old water filler hose which turned out to be extremely brittle. It cracked apart during removal.
The drinks locker outboard would have a flush lid.
This required a ‘stepped’ top cover which was interesting to construct.
The locker only just fitted through the compartment top so the XPS insulation panels were added in situ.
It has 75mm insulation below, 50mm outboard and 25mm elsewhere.
We fitted a shelf under the new sink to use some of the spare volume in the compartment. We also replaced and rearranged the plumbing under the sink.
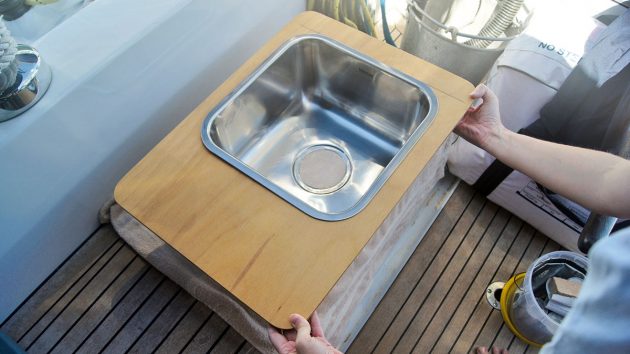
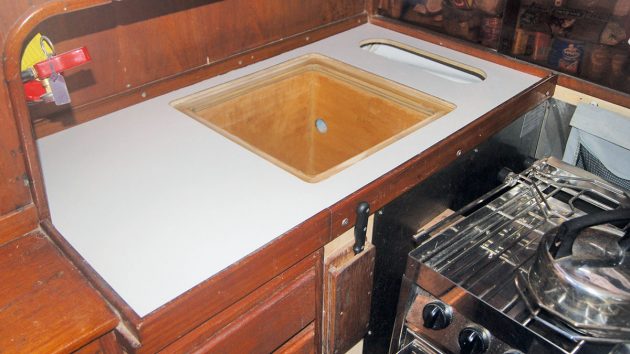
The new sink with an epoxied support board. Credit: Mike Reynolds
The Laminex worktop and sink were fitted. Then the taps and plumbing. Finally we painted the drinks locker.
With the painting of all the lockers complete, we could trim their lids to size.
Two of the lids were marine ply/Laminex sandwiches, while the fridge lid also had 50mm of XPS insulation.
The drinks locker and the fridge lids had flexible seals attached.
The condenser unit was sited in the main cockpit locker – immediately aft of the fridge box.
It was mounted on a custom-made stainless steel bracket. The thermostat won’t be adjusted frequently so we mounted it in the ‘hole’.
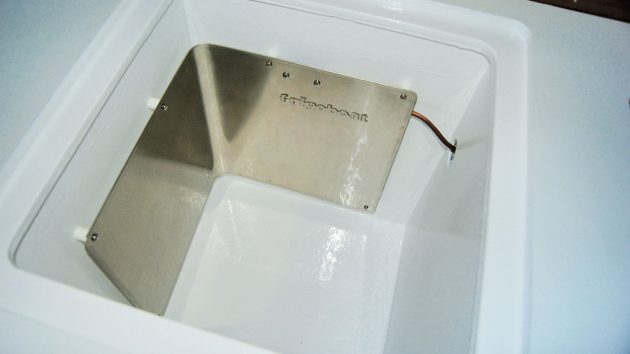
The mounted evaporator plate in the new fridge. Credit: Mike Reynolds
This kept the electrical and sensor leads out of harm’s way.
A single hole was cut through the bulkhead between the ‘hole’ and the cockpit locker.
The plan was then for the evaporator plate to be attached to the fridge box walls with spacers. Finally we could bring our new fridge to life.
We enlisted the help of a fridge mechanic. He didn’t have much to do, but what he did was very important.
Together we manoeuvred the evaporator plate (with its 2m tubing!) into place.
That was scary but we avoided damaging the paintwork or the tubes.
He then connected the evaporator plate to the condenser and checked the operation of the system. The commissioning went very smoothly.
We were initially uncertain if the cockpit locker would be large enough to avoid the condenser running hot or creating condensation, but it has proven to run just fine in both cold and hot climates.
We’re very happy with the result. The fridge works very well and the sink is great. The worktop space has transformed meal preparation.
Since completion, we’ve made a couple of upgrades.
A smart controller now provides fridge temperature display and compressor speed control. And we fitted catches on the locker lids.
Here are the overall project statistics:
- Duration: 2 months
- Effort: 120 hours
- Cost: £2,000 (sink, fridge unit, insulation, plywood, Laminex, epoxy, glue, paints, hose etc)
Enjoyed reading Boat galley improvements on a sailing yacht? 
A subscription to Practical Boat Owner magazine costs around 40% less than the cover price.
Print and digital editions are available through Magazines Direct – where you can also find the latest deals.
PBO is packed with information to help you get the most from boat ownership – whether sail or power.
-
-
-
- Take your DIY skills to the next level with trusted advice on boat maintenance and repairs
- Impartial in-depth gear reviews
- Practical cruising tips for making the most of your time afloat
-
-