
Zoran Glozinic does a bit of bilge pump troubleshooting to try and work out why the float-activated switch on his automatic pump won't work

Bilge pump troubleshooting: getting the float activation switch to work
Recently I welcomed a classic motorboat into my small fleet of good old boats.
The small wooden cruiser, built over 55 years ago, is in dire need of restoration, though the carvel planked hull is in surprisingly good shape.
However, much of the boat’s superstructure – including the wheelhouse and main cabin – was cracked and rotten, and the bilges full of rainwater.
My first job was to find a quick way to install at least one automatic bilge pump so I wouldn’t need to rush to the boat after each rainfall.
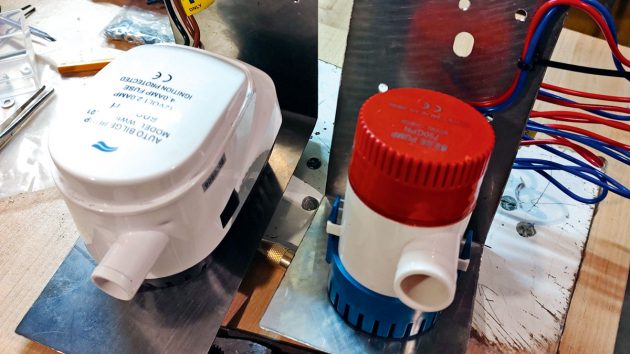
Automatic (left) and manually-switched pumps mounted on their brackets and ready for installation. The bilge pump troubleshooting would begin before the final installation. Credit: Zoran Gloznic
I did what I could to temporarily reduce water ingress. However, the boat was far from water-tight, especially after the heavy rain storms we’ve experienced in recent years.
The installation had to be foolproof but not permanent, as I’d be working on the boat and the bilge pumps would also need to be easily removable.
I decided to use two bilge pumps – one automatic and one with manual control.
Each of the pumps I used have a removable base (the basket/strainer) with predrilled holes to secure the pump in a boat bilge.
The main body of the pump, which contains the motor with impeller and electrical gear, is secured to the base with plastic clips.
This is a fine solution when you need to separate the pump from the base occasionally, for example to clean the basket, but I doubted it would withstand repeated removal and mounting over the next few months, and possibly years of renovation work.
I needed a solution that would enable me to remove the pumps without separating them from their bases/strainers.
Removal or repositioning should be simple and not prevent installation on the very bottom of the bilges.
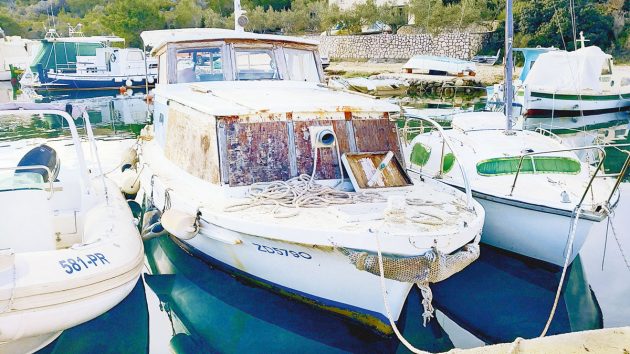
Zoran’s boat is a Pasara. Originally a work boat, the Pasara is commonly seen on the Adriatic coast and comes in all sizes from 12ft-40ft (3.7m-12m). Credit: Zoran Gloznic
After some thinking, I decided to fabricate two stainless steel brackets made from thin sheet metal.
I would mount each pump using existing mounting holes on the base and when installed this way, the pump would still sit almost on the bottom of the bilge.
I had some 1mm stainless steel sheet lying around so I used an angle grinder to cut two rectangular pieces and then bent them into 90° brackets.
I did this freehand, but the result was acceptable. I’m sure no-one will dive into bilges to check the cuts were straight!
I rounded all the sharp edges and drilled mounting holes for the pumps on the horizontal (bottom) sides of the brackets and I also made some holes on the vertical sides.
These would be needed for screws to secure the bracket and pump assembly to the boat.
Working with stainless steel
Working with stainless steel doesn’t always produce the desired results, but a basic understanding of stainless steel properties helps.
You do need the right tools when drilling holes, and that means you must use HSS (high speed steel) drill bits.
I always use titanium-coated HSS drill bits, as they last longer and are corrosion resistant.
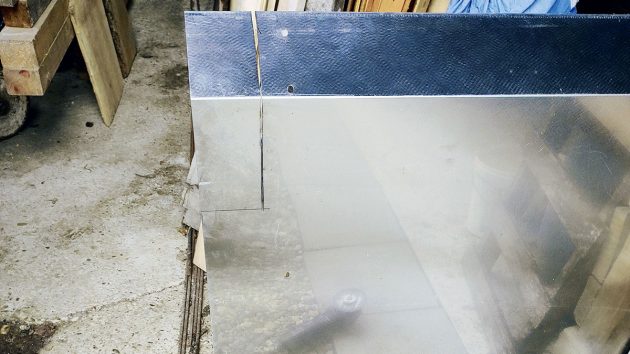
Free-hand cutting of stainless steel sheet to make brackets for the bilge pumps. Credit: Zoran Gloznic
You’ll appreciate this if you keep them in your boat tool box! Mark the holes using a centre punch.
Ideally you should use a drill press, but you can do the job using a hand drill as well.
Not everyone has a drill press, especially on board a boat. My solution is to use a drill press stand for a hand drill.
Combined with a cordless hand drill of decent quality, this is a great piece of kit to have when working on your boat.
Go slow with the drill
You need to use the slowest speed when drilling to avoid overheating the drill bit and material you’re drilling through.
You also need to keep a constant pressure when drilling – you must see a nice spiral of metal coming out from the hole.
Use the cutting oil to help cool the drill bit and material. You can use any oil or even WD40.
If drilling through thicker material, stop frequently to let the drill bit and material cool off.
Stainless steel is not as hard as many people think but it will easily harden with overheating.
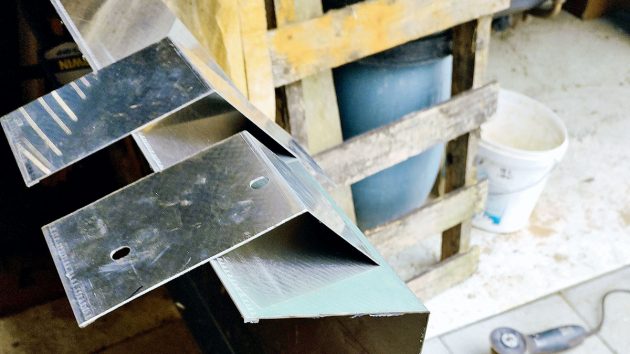
Both brackets done for the two bilge pumps. Credit: Zoran Gloznic
Too much heat, a dull drill bit and/or too high speed will result in failure. I mounted both pumps using stainless steel machine screws and lock nuts.
The electrical wires were secured to the vertical side of the brackets using a push-mount winged cable tie.
This type of easily removable cable tie is often used in the car industry; it’s designed to be secured to a car panel or chassis – you just need to drill a hole which corresponds to the tie size.
Pre-installation test
I tested both pumps in my workshop; the automatic one by moving the float until it engaged the pump switch, and the other one by connecting it directly to a 12V car battery.
As the manual one isn’t equipped with a float switch, it’s turned on and off by hand when needed – a kind of portable bilge pump.
I cleaned the bilges and, once I’d decided where to locate the pumps, I installed the evacuation hoses and power wires for both pumps.
Before securing them I decided to test them again, but this time by simulating the real situation – making sure they can evacuate water and not just that the motors are spinning.
The manual bilge pump performed as expected, but I was in for a big surprise with the other one.
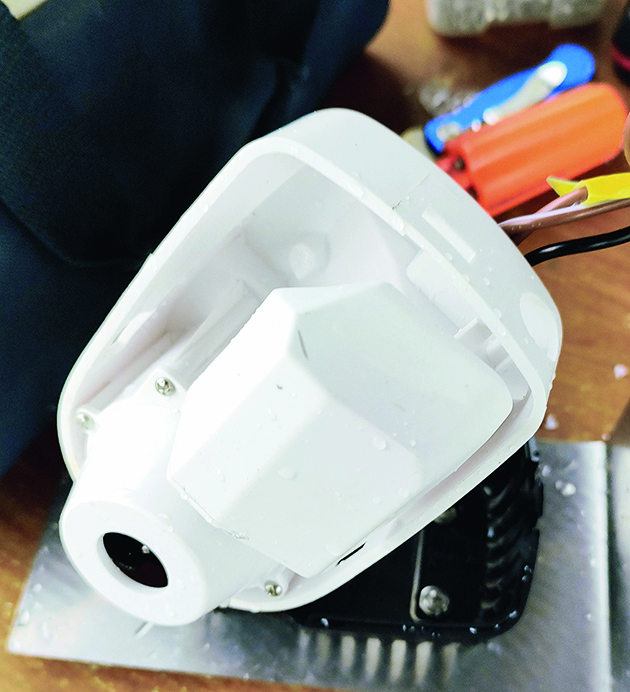
Examining the float chamber as part of the bilge pump troubleshooting process. Credit: Zoran Gloznic
I placed the automatic bilge pump in the big bucket, turned the control switch to ‘automatic’ and started slowly adding water to the bucket.
The water level went up, the pump was completely submerged but there was no click from the float-activated switch.
Hmm… I emptied the bucket, removed the pump body from the strainer and verified the movement of the float – everything was OK when I moved the float up; the pump came to life.
I repeated it a few times – the pump worked like a charm.
However, I returned the assembled pump and bracket to the bucket and went through the same exercise of adding water, but the pump refused to come on.
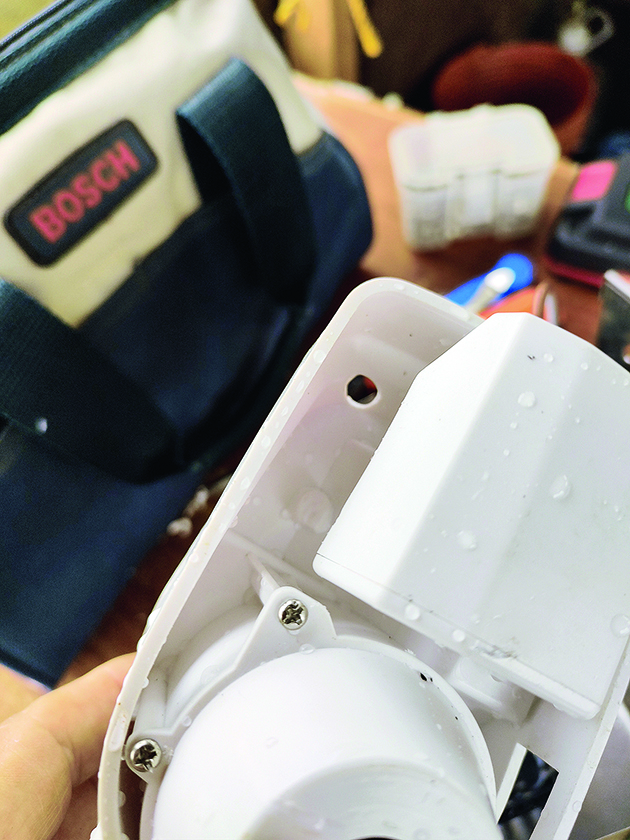
Bilge pump troubleshooting: A hole drilled on top of the float chamber in the automative pump meant it was soon working again. Credit: Zoran Gloznic
I’ve owned previous boats and installed more than one automatic bilge pump, but this was something I’d never seen before.
I detached the main pump body from the strainer basket again and spent some time looking over it but couldn’t figure out what was wrong and why the float wouldn’t engage the switch when the water level was up.
It occurred to me that the pump had been sold at a discount.
Was it faulty? I thought it unlikely as I’d bought it from my local chandlery, not online at a price too good to be true.
Continues below…

Best bilge pumps: electric pumps, emergency pumps and alarms
Rupert Holmes explains how electric bilge pumps work and why performance doesn't always meet expectations

Is it worthwhile fitting an automatic bilge pump? Ask the experts
James Brooking asks: “I have a 25ft bilge keel yacht, it is fitted with a large Whale pump in the…

Make your own bilge pump alarm
A bilge alarm is an essential piece of kit on any boat. You can buy a bilge alarm on Amazon…

Best bilge cleaners: how to clean an oily, smelly bilge
Ben Meakins gets down and dirty in the pursuance of the most effective way to clean oily, malodorous bilges
I was about to start removing the float assembly from the pump – with the intention of testing how buoyant the float itself is – when I realised what was wrong.
Or, at least, I was 99% sure: the float chamber had no opening where the air could escape as the water level was rising.
Or at least, there were some openings – three slots for the strainer clips to engage the body of the pump, and one hole for the small round button to manually operate the float.
However, these were on the very edge (bottom) of the float chamber so by the time they were covered by rising water, the float was still in the very low position.
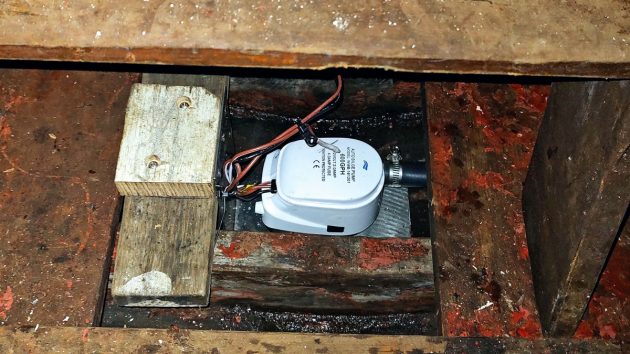
Automatic bilge pump installed in the bilge under the main cabin entrance ladder. Credit: Zoran Gloznic
At first I couldn’t believe that was the problem – after all, that would be obvious when testing the pump prototype.
I was eager to quickly prove my theory so I grabbed my cordless drill and made a big hole on the top of the float chamber, being careful not to drill into the sealed part of the pump body where the motor electrical connections are located.
I reasoned that if I was wrong with my diagnosis, I could easily close the hole with some sealant and continue troubleshooting until
I found the problem or delegated the pump to the bin.
So the pump assembly went back to the bucket, I started filling the bucket with water and soon there was a nice click from the pump resulting in a perfect stream of water out of the evacuation hose!
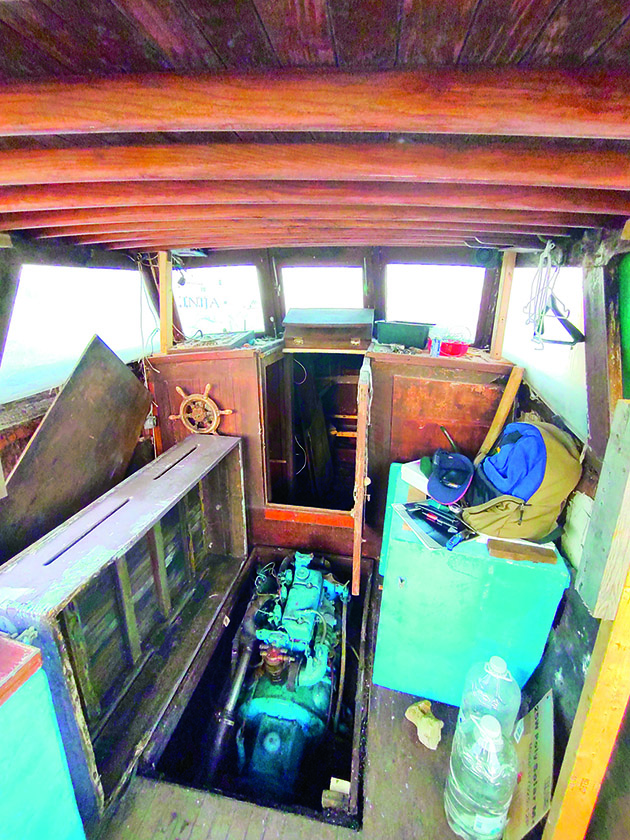
Many Pasaras have been converted to pleasure boats. Credit: Zoran Gloznic
Rather than continue working on the boat and install the pumps, I called my chandlery.
I wanted to order a few more of these bilge pumps. Maybe the price would be even more discounted by now!
Well, my dream of having a nice inventory of cheap but perfectly good bilge pumps evaporated quickly. That particular bilge pump was no longer available…
Enjoyed reading Bilge pump troubleshooting: getting the float activation switch to work? 
A subscription to Practical Boat Owner magazine costs around 40% less than the cover price.
Print and digital editions are available through Magazines Direct – where you can also find the latest deals.
PBO is packed with information to help you get the most from boat ownership – whether sail or power.
-
-
-
- Take your DIY skills to the next level with trusted advice on boat maintenance and repairs
- Impartial in-depth gear reviews
- Practical cruising tips for making the most of your time afloat
-
-