
With the stringers scarfed and bent into position, the lines of PBO’s Secret 20 kit boat start to become evident. David Pugh reports

Building a kit boat is a bit like a child’s dot-to-dot drawing.
See the full set of articles: Building the Secret 20 kit boat with PBO.
The framework is made entirely from straight bits, and seeing the finished shape requires considerable imagination.
It’s not until you start bending the stringers into position that the lines of the boat really start to become evident.
Our kit came with the stringers planed to size, but the longer stringers were in sections – perhaps unsurprising when the whole lot has to be packed up to be shipped halfway around the world.
That left us with a choice: join the lengths with butt-straps (short lengths of timber doubling the stringer at the joint), or scarf them together.
Butt-straps are the easier option, but we chose to scarf for two reasons: scarfing avoids ugly joints on the inside of the hull, and butt-straps introduce stiff points in the stringers which could have affected the fair curve we hoped to achieve.
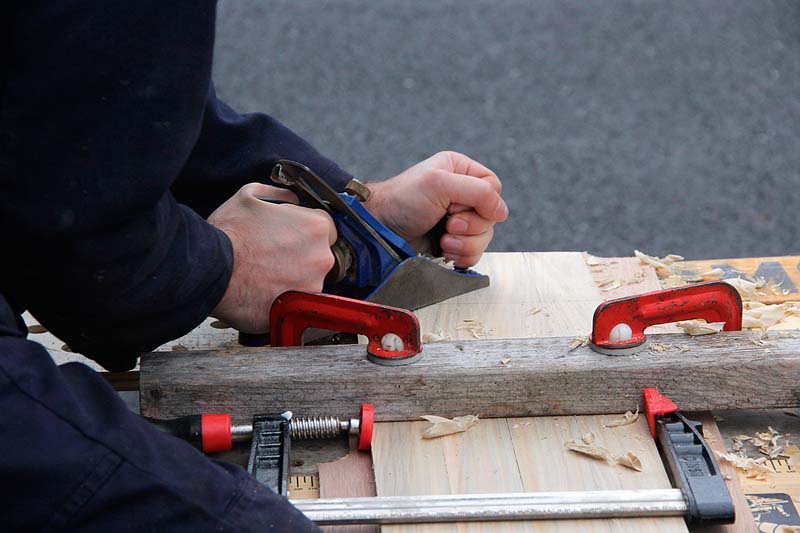
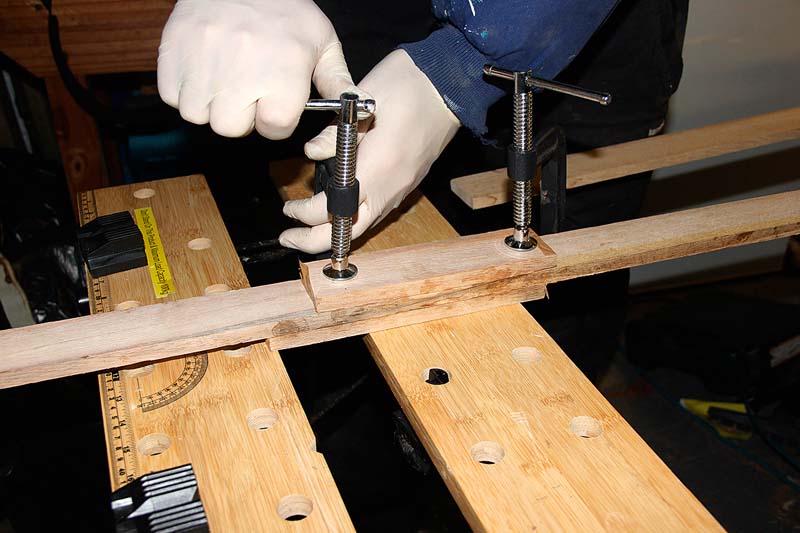
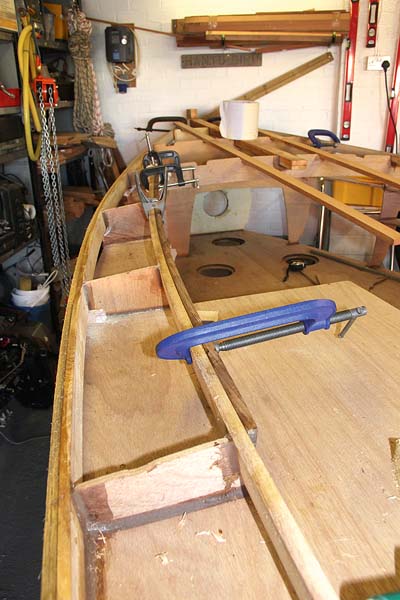
Clamp firmly to the bench, with a transverse clamp to keep the lengths from working apart

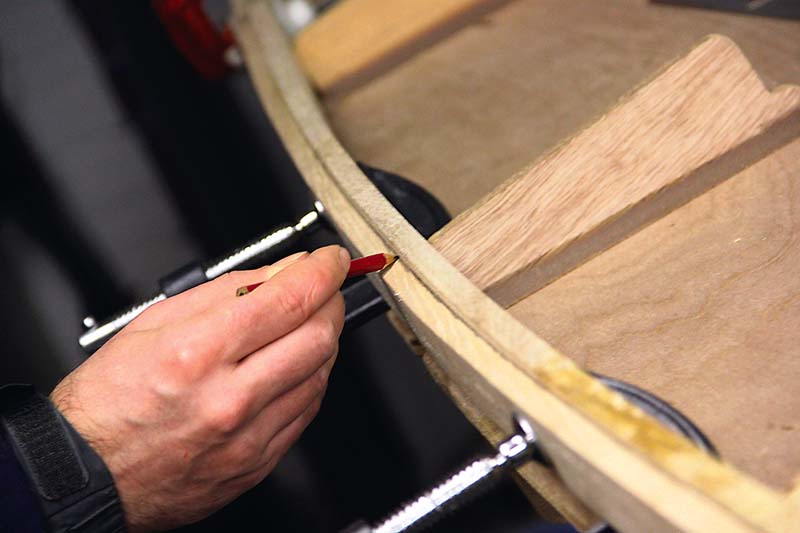
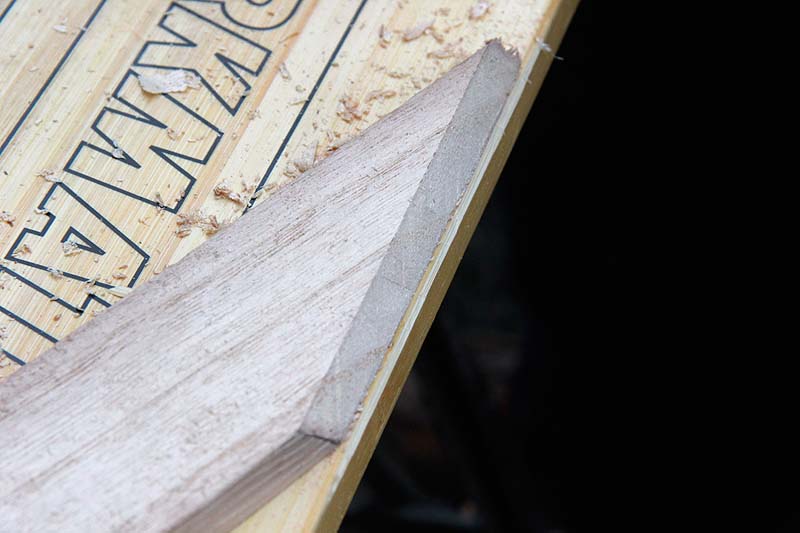
Mark the length of the scarf across the top of the timber and the scarf angle down the side
Scarf length and strength
Scarf joints work because they offer a large surface area for the adhesive to bond.
They also allow the glue to work longitudinally with the grain of the timber, which creates a much stronger bond than attempting to glue end grain.
The longer and flatter the scarf, the stronger the joint. A 4:1 scarf (length four times the thickness of the timber) offers approximately 65% of the strength of a similar length of solid wood.
Increasing the length to 8:1 increases this to 85%, 12:1 gives 90% and 20:1 gives 95%. Lloyds insist on 4:1 for planking and 12:1 for spars.
The timber for our stringers is approximately 15mm thick, so we opted for 140mm-long scarfs to give a ratio of just over 9:1.
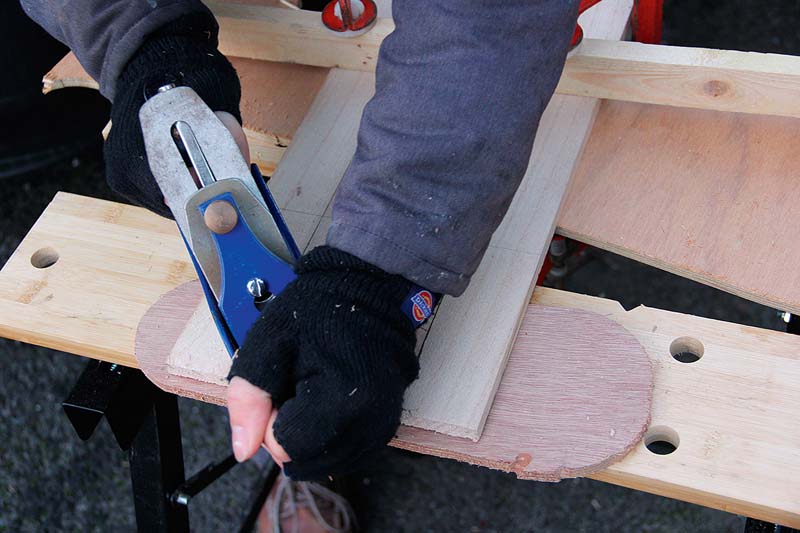
Diagonal strokes with a smoothing plane help to keep the bevel even
It can be easier to plane the bevel too steeply, then adjust the angle
Setting up for scarfing
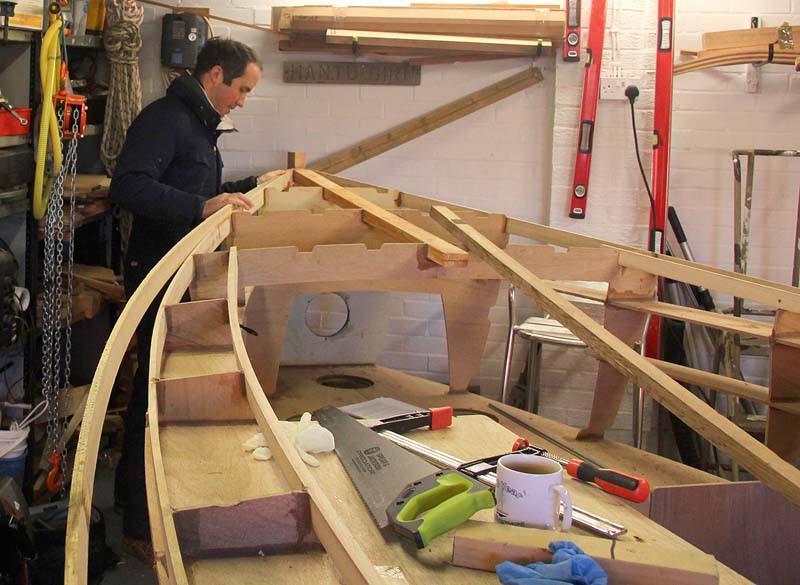
The bottom stringers will be fitted later, once we have turned the boat over for planking; for now
we needed to prepare the deck stringers, which give the boat its sheerline, the cockpit stringers, which shape the perimeter of the cockpit and support the cabin sides, and the intermediate stringers, which will be fitted halfway down the hull sides.
The deck stringers are laminated from two thicknesses to strengthen the gunwales, giving us a total of eight stringers which needed scarfing.
To add to this, one of the lengths provided for the inner deck stringers proved to have some wild grain which did not take kindly to being bent around our frames and split, so one of our stringers now needed three scarfs instead of one.
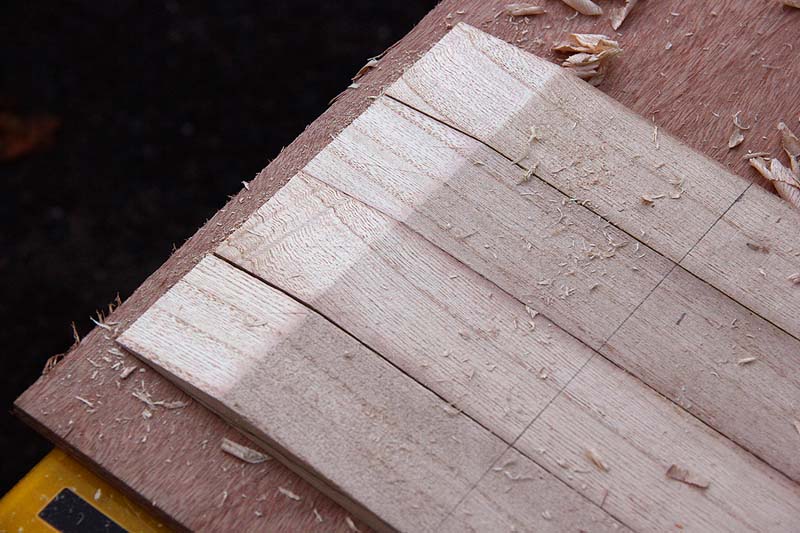
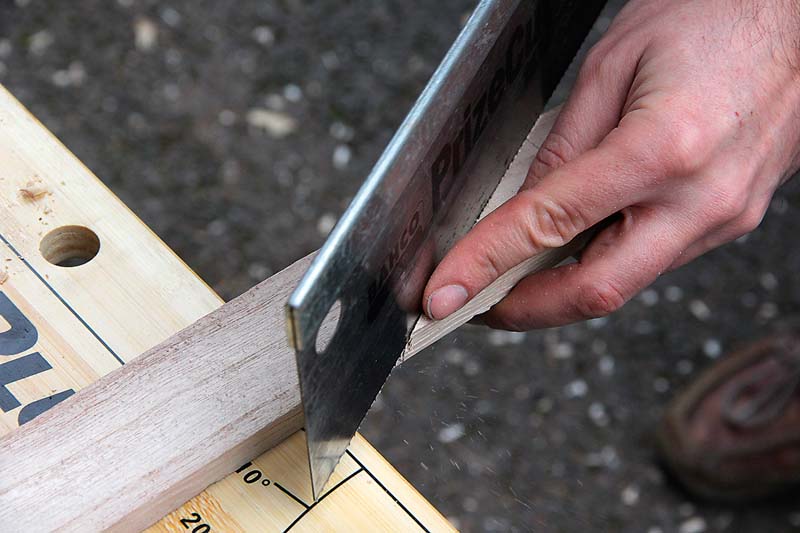
It’s easiest to cut both sides of a scarf as a pair, as by planing them at the same time you can ensure that the lengths and bevels are identical.
I opted to plane in groups of four (two pairs together) in order to speed up the process – although the cutting time is similar, you save on the set-up and clamping stages.
Square up the ends of the timber then clamp it firmly to the bench, with a transverse clamp to hold the lengths firmly side by side.
If you value your bench it’s good practice to place a piece of sacrificial timber under the ends of the lengths to be scarfed, which will support the feather edge of the scarf as it is planed.
Mark the length of the scarf across the top of the timber with a square.
This is the only mark you really need, but I find it helpful to mark the angle of the bevel on the side of the timber as a guide.
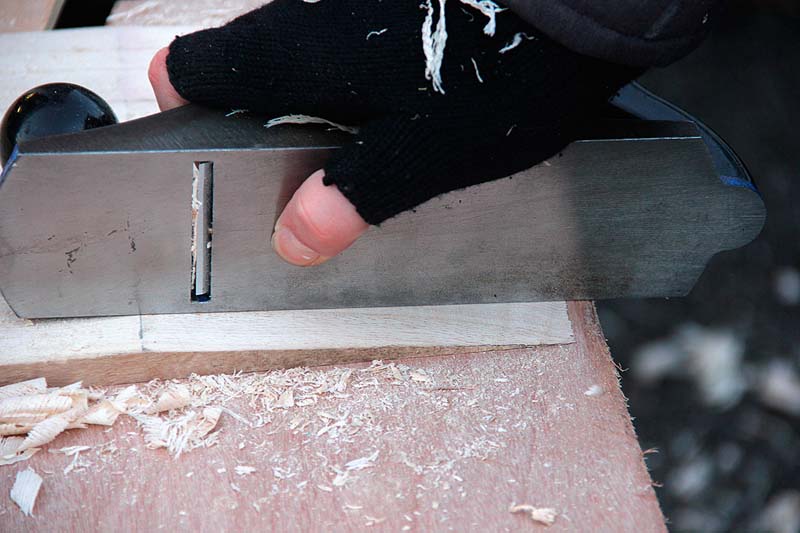
A plane bed makes a handy tool to check the bevel is flat
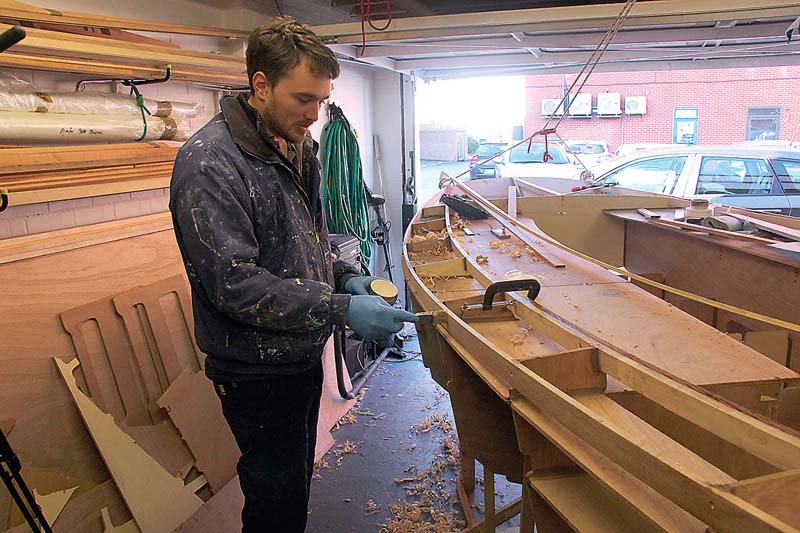
Planing the scarf
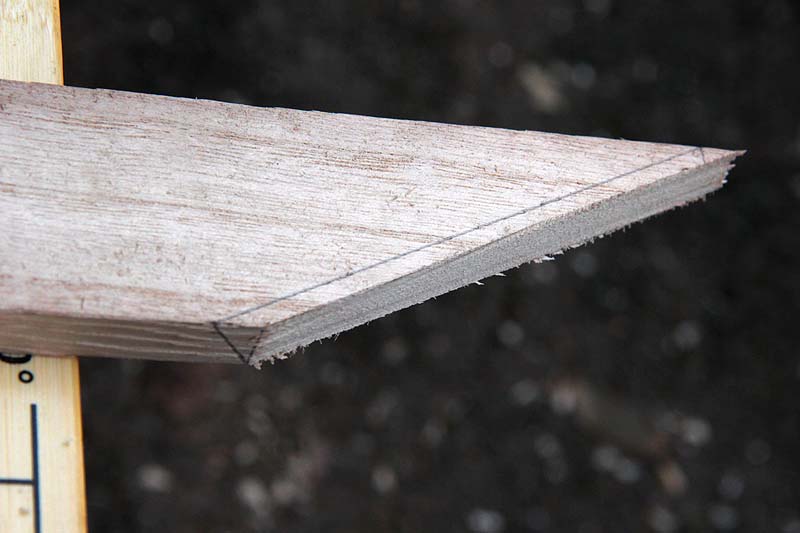
I find a smoothing plane the best choice for cutting scarfs – the length and width of the bed is long enough to ensure that you don’t plane any camber into the joint – but it’s a matter of personal preference.
Make sure it’s razor-sharp to avoid any tear-out, especially at the feather edge, then start to plane.
I find a slightly diagonal stroke works best as it helps to ensure an even bevel across the whole area.
Here’s where marking the bevel helps – you’ll inevitably start at slightly the wrong angle, but as you work through the material you can glance at the line to correct it.
As you’re working both sides of the scarf together it doesn’t matter too much if you make the bevel a little too long or short, but it is vital that you plane it perfectly flat to ensure a good glue joint.
It’s OK to use the plane at a fairly coarse setting to begin with, but set it fine to finish as a coarse blade can tear out the feather edges and pit the surfaces.
To ensure the bevel is perfectly flat, use the edge of the plane bed or a steel rule to check across and down, correcting accordingly.
With a sharp, fine-set plane you’ll generally find the flat plane bed has done the work for you.
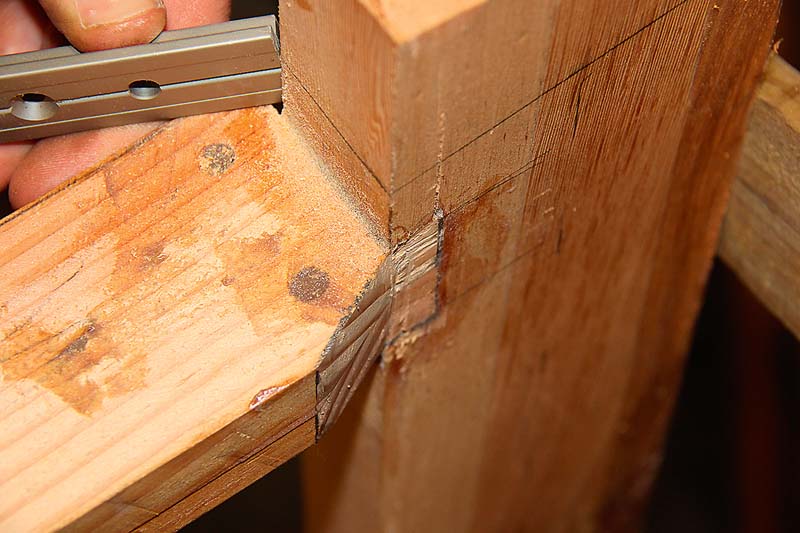
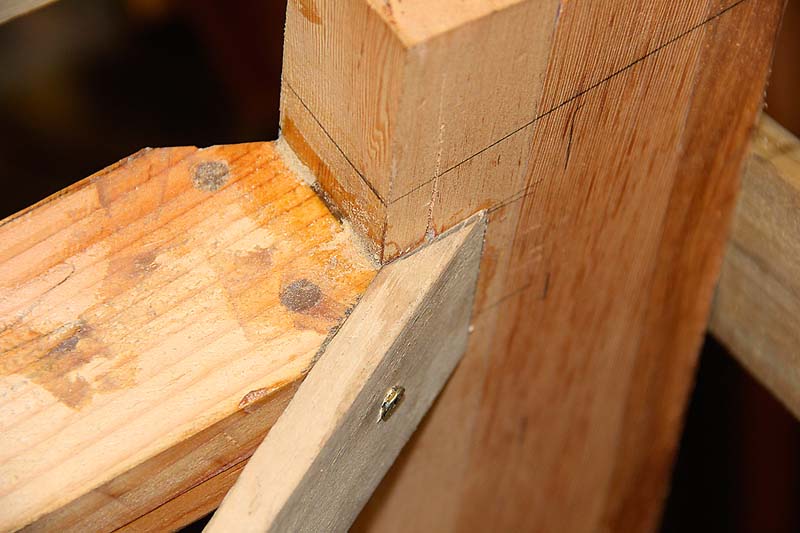
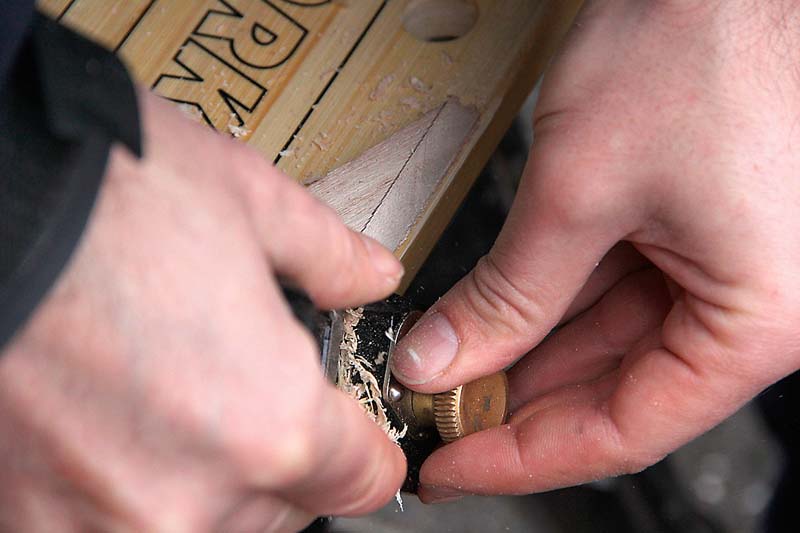
We used a straight edge laid from the first frame to the aft face of the stem to mark the angle to cut
We cut out the bulk of the waste with a pull saw before tidying up with a sharp chisel
Foredeck beam
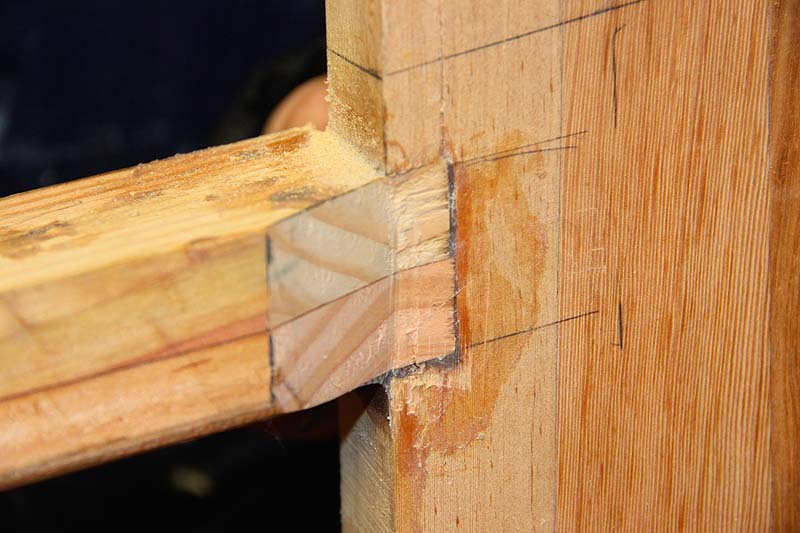
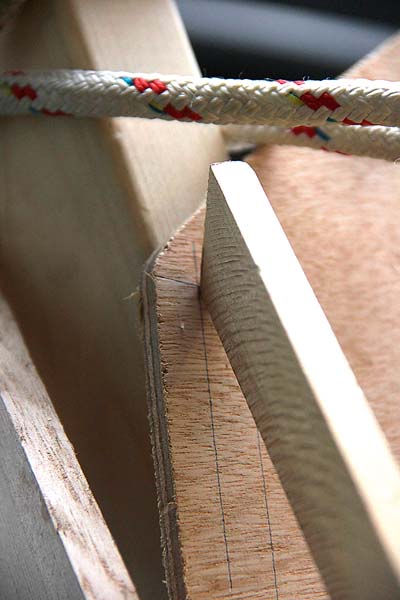
Before we could start fitting the inner deck stringers, we needed to shape the forward end of the foredeck beam to allow them to sit snugly alongside it.
The kit comes with a line marked on the stem in the position at which the hull panels should fit, and a bit of educated guesswork led us to conclude that the foredeck beam should be cut back right to the aft face of the stem.
This allows space for both the inner and outer deck stringers and the hull panels, all bevelled to fit – or they should do.
We won’t know for sure until the panels go on!
We used a straight edge laid from the first frame to the aft face of the stem to mark the angle to be cut, and transferred the angle of the stem back down the foredeck beam with a sliding bevel.
Thus marked, we cut out the bulk of the waste with a pull saw before tidying up with a sharp chisel.
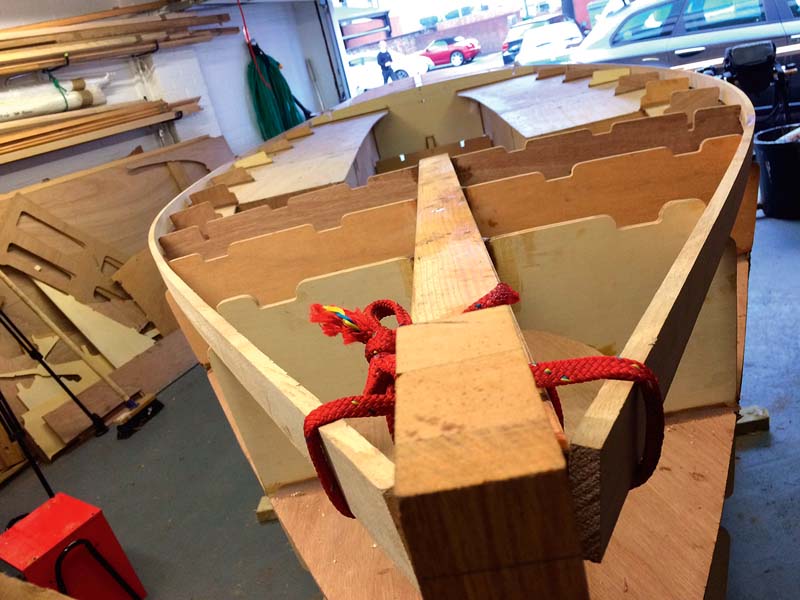
Lashing the stringers into place against the foredeck beam
Gluing up the scarf
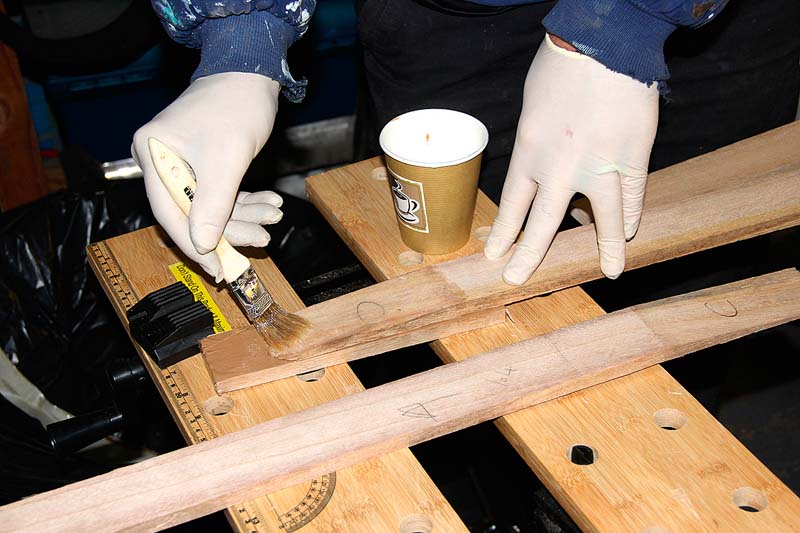
The join should now fit perfectly with no gaps, so choose an appropriate glue – resorcinol or unthickened epoxy are the common choices for boats.
We used epoxy, and stuck parcel tape to some offcuts of the stringer material to use as load spreading pads.
The parcel tape is an easy way to avoid your spreader pads becoming part of the joint.
You need to apply an even pressure along the joint, which we found needed two clamps per joint.
With feather-edge scarfs there’s a risk that the two halves will slide against each other as you apply pressure, so you may need to use an extra couple of clamps to the bench, or a locating pin or two.
Apply unthickened epoxy to both faces of the joint…
…before clamping with two clamps and spreader pads
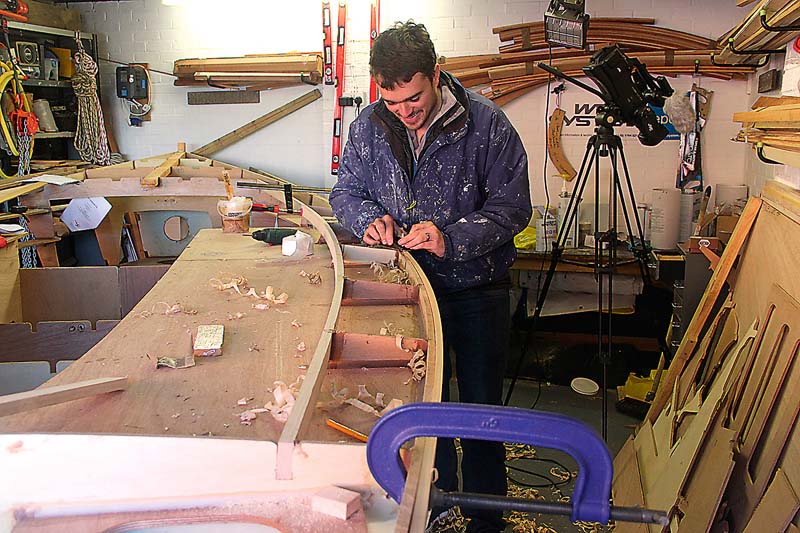
Inner deck stringers
We were finally ready to fit the inner deck stringers.
The first step was to shape the forward ends – a two-way bevel set by the angle between the sheerline, gunwale and stem.
This was fairly easy to mark by lashing the stringers into place against the foredeck beam and using a piece of scrap timber laid against the stem to transfer the angle.
A sliding bevel gave the vertical angle.
I find the easiest way to cut a compound bevel is to cut the angle across the grain square to the timber, then plane the secondary bevel.
We did this for both inner deck stringers and fixed them snugly to the foredeck beam with temporary screws while we offered them up further down the boat.
Fixed to the foredeck beam with a temporary screw
This was our opportunity to get the sheerline right, so we took our time over it.
Settling the port stringer into the pre-cut notches in the frames gave a pleasing curve, but when examined closely showed a reversal in the sheer across two of the forward frames.
It’s not the look we were hoping for, so we trimmed the notches to allow the stringer to settle into a fair curve.
We’ll need to trim the tops of the frames later to give a slightly tighter curve to the foredeck.
Further aft, we needed to trim the bottom edge of the stringer for it to bed down onto the outboard edge of the cockpit seats while still allowing the top to follow the line of the frames.
We did this by removing the stringer and fitting it upside down, marking the difference between the frame tops and the edge of the stringer and joining the dots with a flexible batten.
After racking our brains for the best way to cut out the resulting curve, the answer became obvious – leave it attached to the boat, upside down, and plane it in situ.
This allowed us to easily plane off the excess with a block plane, as the stringer was sitting high from the natural sheerline.
Offering up the stringer, right way up, showed a couple of high spots, but the idea had worked well and it fitted in with only a little fettling.
Even better, when we tried it on the starboard side of the boat it fitted perfectly, so we used it as a template to plane the other stringer to the same profile.
Throughout the fitting process, we used a long level across the stringers to check that they were at the same height and that the sheer was the same on both sides.
Working from bow to stern, we used temporary screws through the stringers into the frame edges to hold them in position once we were content with the fit.
We trimmed the notches on frames 2 and 3 to allow the stringer to settle into a fair curve
An initial offer-up showed that the stringer was sitting too high where it came into contact with the cockpit seats
The first stringer fitted both sides, so we used it as a template…
…to plane the other stringer to the same profile
Transom joints
With a good fit for the stringers at the bow and on all the frames, all that remained was to cut the angle to join the transom.
This wasn’t easy, partly because the transom is curved and the stringer needed to be set in from the edge to allow for the outer laminate, but also because the transom needed bringing in at the upper corners to complete the curves set by the framework lower down.
We initially set the shape by clamping two lengths of timber to the sides to ensure the transom edges were straight, then rigged a line from the garage roof to the tops of these timbers to pull them forward and ensure the athwartships curve was correct.
We found the best way to mark the joint was to measure the positions of the inner and outer stringers using a piece of scrap stringer, then use a batten clamped to the top of the inner stringer to bend into place to find the length to the upper outer edge of its final position.
A sliding bevel from the batten then gave the angles in both directions.
As before, I cut the compound bevel by cutting the across-grain angle first, then carefully planing the secondary bevel with a low-angle block plane.
Thankfully, both sides fitted well using this method.
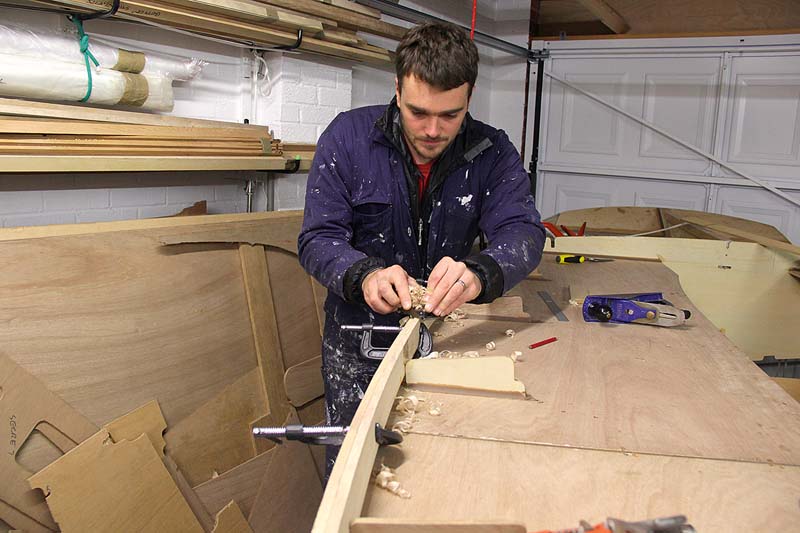
To finish the job we mixed up some epoxy and filleted the stringers to the stem, transom and all frames, leaving them several days to fully cure before we removed the screws.
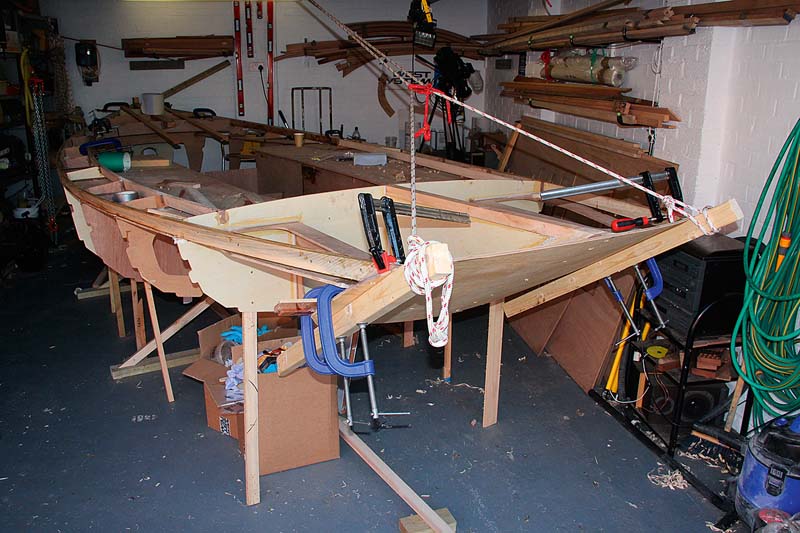
Two lengths of timber clamped to the transom edges, pulled in with rope, set the curve at the top of the transom

Scrap timber to mark the widths
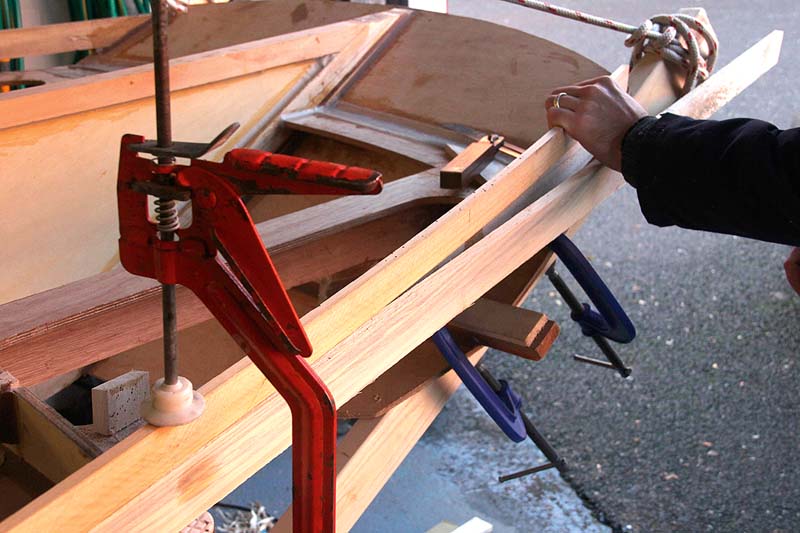
Batten clamped to the stringer…
…to find the correct length to the outboard top corner
Cutting compound bevels
Cut the first angle square to the grain with a fine toothed saw
Mark the secondary bevel clearly on all sides
Use a sharp (preferably low-angle) block plane to remove the waste
The result is an accurate cut –easier than sawing in one go
Outer deck stringers
These are made from a tough, straight-grained softwood similar to Douglas fir, giving a stiff, strong inwale to which the hull and deck can bond. Fitting was similar to the inner stringers, but having already set the sheer made the whole process much easier.
Planing the hollow in the lower edge was easily achieved by clamping it upside down alongside the inner stringer and planing to the same profile.
The forward bevel was measured and cut in the same way as with the inner stringer, but we were able to save time on the aft bevels by transferring the across-grain angle from the offcut left over from trimming the inner stringer.
To fix the outer stringers we laminated them to the inner stringers using unthickened epoxy and held them in place with a mixture of clamps and screws while the epoxy set.
Fillets at the frames, stem and transom completed the job, backed up with glass tape at the transom.
To fix the outer stringers we laminated them to the inner stringers using unthickened epoxy, and held them in place with clamps and screws
Offering up the outer stringers
Planing the hollow in the lower edge was easily achieved by clamping it upside down alongside the inner stringer
Cockpit and cabin stringers
The cockpit stringers start at the back of the cockpit at frame 10 and run forward as far as frame 3, which is where the cabin ends and the foredeck begins.
The foredeck will be supported by the central foredeck beam and some additional fore-and-aft supports, yet to be fitted.
As there were no bevels to cut, fitting was straightforward.
The stringers notch into frames 3 and 10 and easily bent to meet the other frames.
Apart from easing the notches in a few places very little woodwork was required, so we were quickly in a position to fillet them in place, held with temporary screws.
Where they passed through frames 3 and 10 we only filleted them on one side, allowing us to cut them flush to the frames once the epoxy had set.
The cabin stringers are an inner laminate to the cockpit stringers, extending from frame 3 aft to frame 6, the length of the cabin.
These will later provide solid support for the cabin sides.
We trimmed them to length, bevelled the forward ends to butt neatly against frame 3 and laminated them to the cockpit stringers with epoxy, held in place with clamps and temporary screws.

Laminating the cabin stringers to the cockpit stringers
Cabin stringers run from frames 3 to 6 to support the cabin sides…
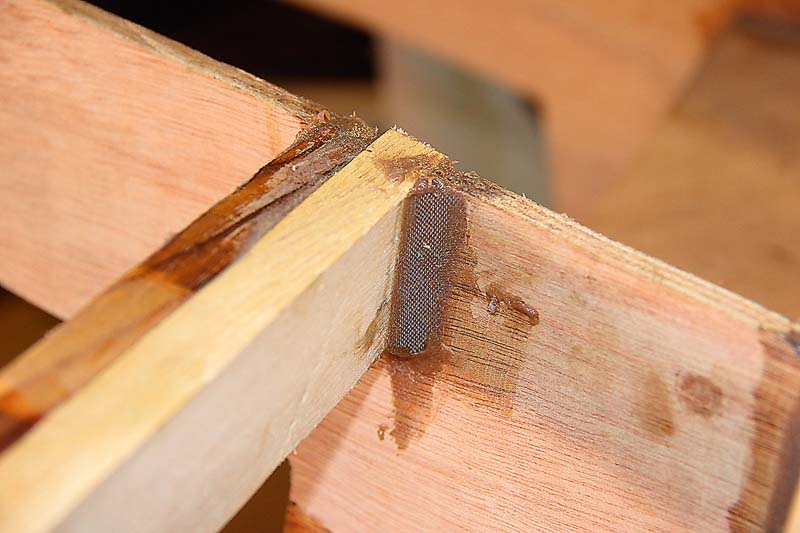
…and butt neatly to frame 3. We filleted the outer and bottom edges for strength
Next month
Intermediate stringers and foredeck supports.
As published in the March 2017 issue of Practical Boat Owner magazine.