
A power router can make light work of jobs that would otherwise take ages by hand. Julian Peckham has some tips for its use

For certain boat maintenance jobs and DIY, a power router is invaluable: use it for chamfering edges, making rebates and cutting slots for joinery, and creating decorative mouldings for cabinetwork.
A basic router can be yours for under £50, and it might be all you’ll ever need. If you’re considering a lot of joinery, however, you might want to spend maybe three or four times that much on a more powerful, better quality machine that’ll give many years of reliable service. Different makes have different methods for things like adjusting depth and securing the bit in the collet, but they aim to achieve the same end result.
Here I’m going to cut a mortice for a hinge – a common job if you’re fitting new locker doors – and it shows most of the techniques you’ll need to follow for any number of jobs.
But your first priority should be to stay safe. Never use a router without wearing safety glasses –
the router can spin at over 30,000rpm, and at this speed wood chips will be flying about
all over the place. Routers are invariably noisy things, so ear defenders are vital too. And you might want to wear a dust mask.
Cutting a hinge mortice

With the machine unplugged, select the bit you want – this is a straight bit for our hinge mortice – push it fully home into the collet, then pull it back out two or three millimetres before securing it in the collet with a spanner.

Don’t over-tighten – nipped up snug is what you’re aiming for, but if you’re unsure it’s better to err on the side of caution and have it tighter rather than too loose.

Here I’ve marked up where the hinge has to go, and have fitted the router’s fence which will act as a guide stop for the width of the hinge.

Next is to adjust the router depth to that you require. It’s easy on this job: just place the hinge on the router base and adjust to the same depth.

Routers spin in a clockwise direction when looking down at them from above, which leads us on to an important tip…
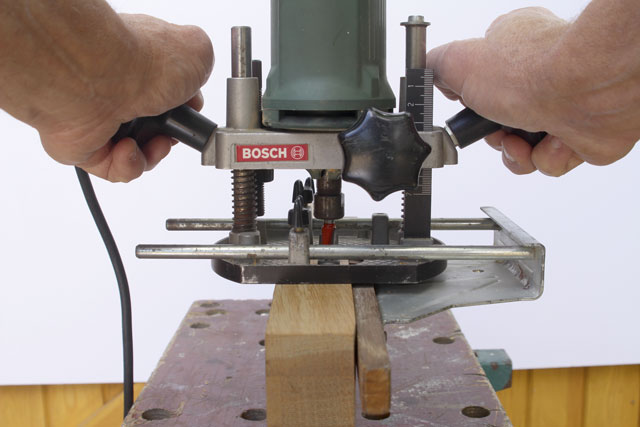
… When using a router, always push in an anticlockwise direction (ie always keep the wood you’re cutting on the left) because anticlockwise the router is much easier to control. Going clockwise it’ll want to wander about all over the place, and you’ll struggle to keep it under control.
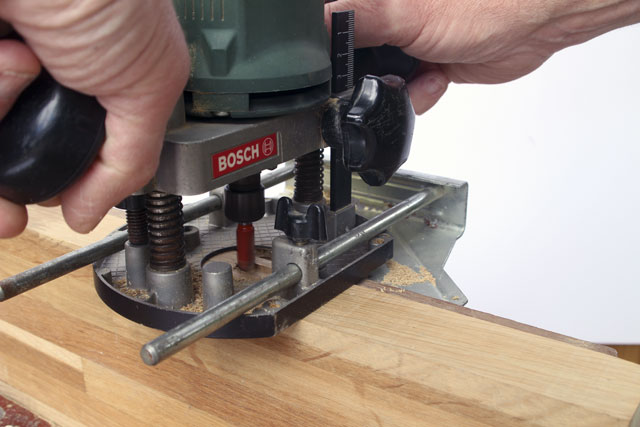
Start her up and, keeping the router base flat, push slowly and smoothly so the motor can keep its revs up – this is not much of a problem in a shallow cut like this, but is important if you’re cutting deeper. Judge your speed by the depth of the cut and the hardness of the wood – too fast and the cut will be rough, too slow and you might get burn marks on the wood.

Go carefully towards the end of the cut so you don’t wander beyond your pencil line. Then, with a couple of extra passes,
you can cut out the remainder of the waste wood.

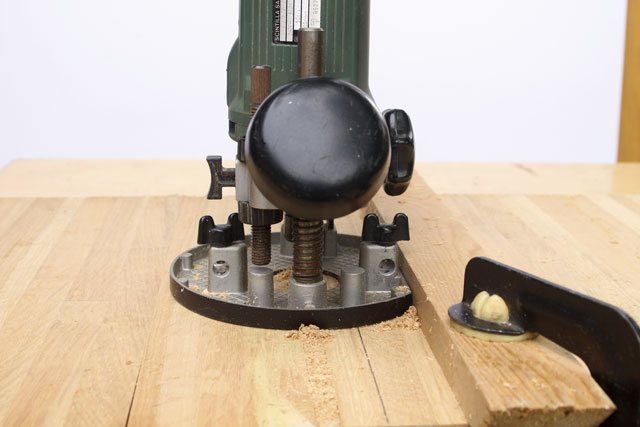
A spinning bit obviously won’t cut a sharp right angle, so cut out the very corners of the mortice with a sharp chisel and the job is done.
The router creates a perfect fit for the hinge.
If you need to cut a slot in a wide piece of timber – too wide to use the router’s own fence – clamp a straight batten to the RIGHT. The router will naturally try to drag itself towards the fence, but if you’re worried about not keeping it straight, use two fences (see main photo). Two fences are also useful if you want to cut a slot wider than a single bit width.
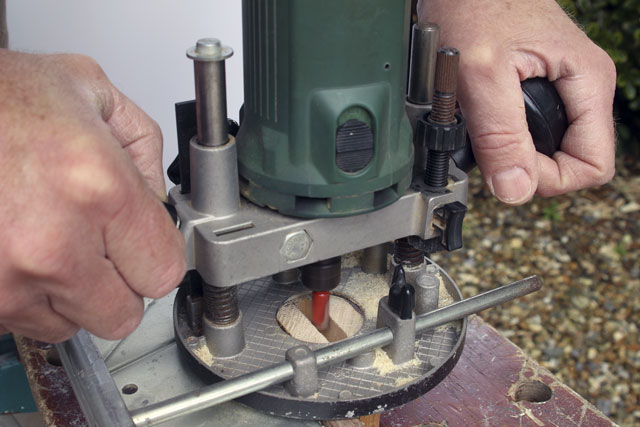
Use the plunging action to cut a mortice for a tenon joint, but don’t attempt to cut the full depth of the slot in one go. Make several passes, getting deeper every time. Don’t cut any deeper than around one-and-a-half times the diameter of the bit in one go – this rule applies to any routing: take things steady, and make several passes.

You can cut accurate mortices for joints very easily with a router – and once the machine is set up you can replicate the cut for more joints very quickly.

Some router bits have a small bearing at the tip. The bearing guides the bit around the edge of a workpiece and maintain an even cut – great for chamfering the edge of a curve as you don’t need a fence.

A selection of bits is available: n Straight bit
n Round-over bit
with bearing
n Cove bit
n Chamfer or
V-groove bit