
Joe and Jo Styles have crossed the Atlantic with their two children on board Chula, a Vagabond 47. They re-caulked Chula’s teak decks 10 years ago, and here’s how they did it…

First, they removed the old caulking between the planks using a Bosch Palm Router and pinned a guide into the adjacent old caulking line.

They tidied the seam using a Fein multitool and applied primer to help the Sikaflex caulking bond to the teak, which is a naturally oily wood.

Tape was laid into the bottom of the groove to stop the Sikaflex bonding to the subdeck. The Sikaflex needs to stick to the planks but move with them as they expand and contract with temperature and moisture changes.
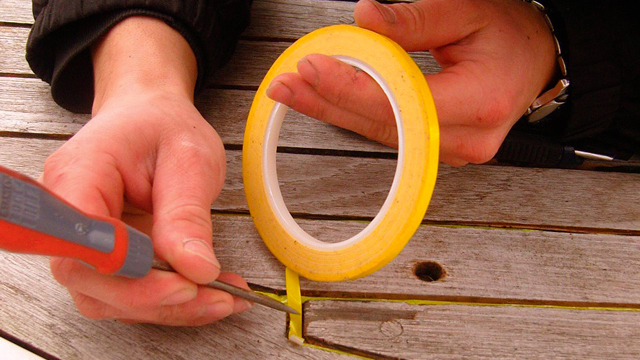
They then put masking tape over the planks in order to keep the work tidy and limit the amount of sanding that would be required later.
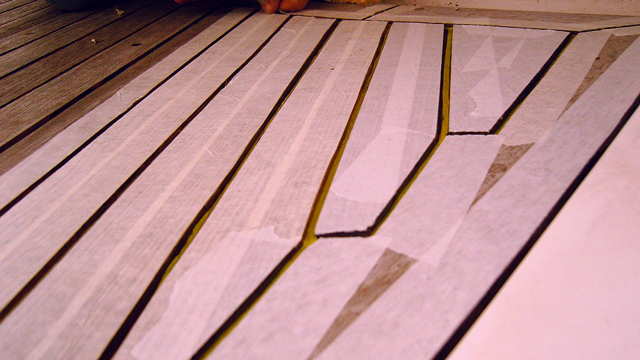
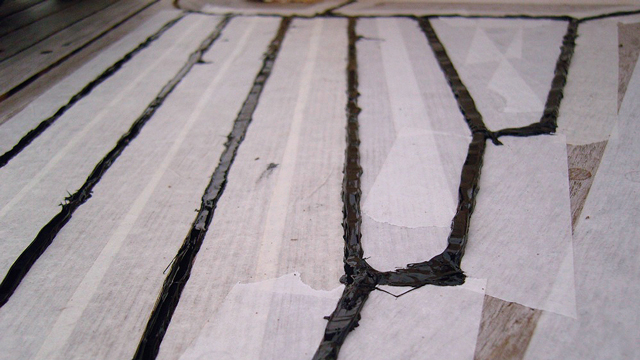
Finally they applied the caulking. This needed to be done within 24 hours of applying the primer. A week later, Jo and Joe cut away the excess caulking with the Fein multitool and could then remove the masking.
Article continues below…

How to restore teak decking: Varnish or oil? Ask the experts
“Can your paint expert help me identify the coating on my boat’s flybridge deck and stairs? “Is it likely to…

Teak alternatives: How to make your decks look as good as the real thing
However, according to a recent report by the Environment Investigation Agency, there are grave questions over the sustainability and sourcing…
Replacing the screws
Jo and Joe bought 2,000 shorter, fatter, stainless steel screws. After much debate they decided to cover the tops with Sikaflex instead of a teak plug because there wasn’t much depth to play with (planks were worn to only 8mm in places).

Careful to avoid damaging the teak, they removed the old screws and re-drilled the countersink holes slightly deeper before putting Sikaflex down.

The new screws were fastened in, covered it with a masking ‘dot’ (to stop the Sikaflex going into the cross-head) and finally filled in the hole.
A fibreglass deck replacement… for now
Jo and Joe were pleased with their re-caulked teak decks but a decade later the water ingress from beneath the teak through the screws became too much, resulting in a soggy plywood core and leaks down below.
In 2021 it was time to make the difficult decision of removing the teak decks altogether.

Messy job: old teak deck removal
This required a lot of cutting because in some places it was very well stuck down. Once off, there were areas of smelly, rotten foam-cored fibreglass to be removed and taken back to the underside of the sandwich core – what you can see when you take down the headlining in the boat.
Leaving a 3in tab around each sound edge so they had a good surface to epoxy back to, they built the decks back up using epoxy and closed cell foam.
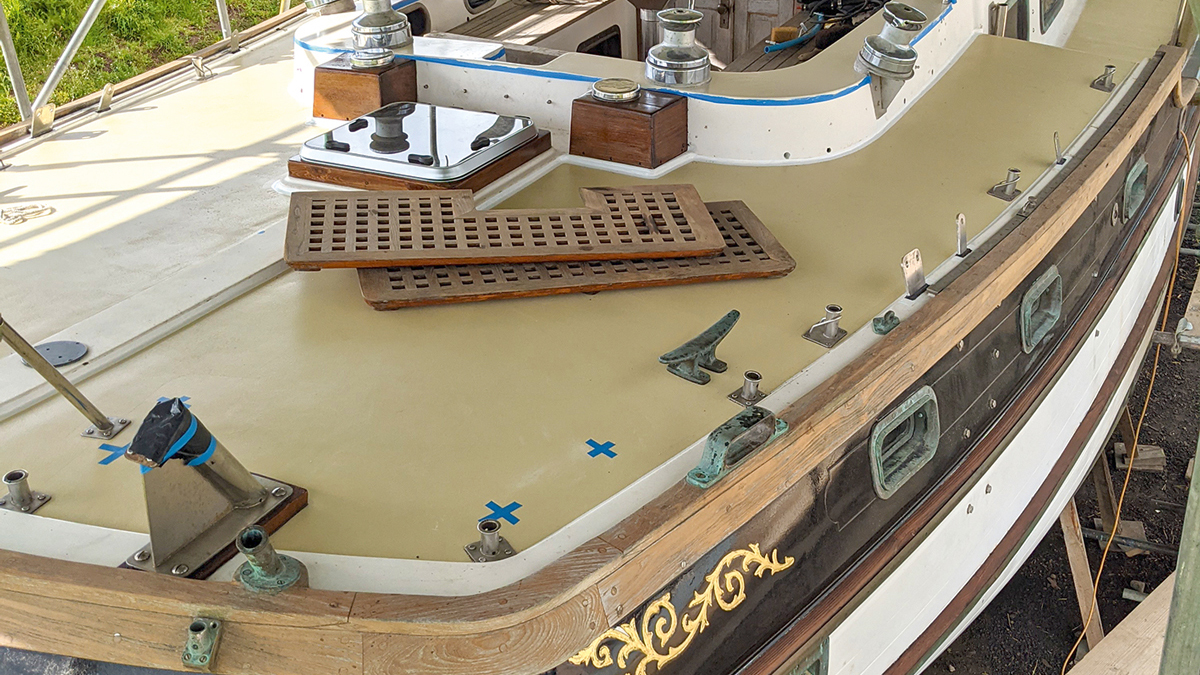
The new-look fibreglass deck
With foam glued down they smoothed it off with epoxy filler, then added four layers of the thickest biaxial epoxy glass on top to create the sandwich again.
“We could have put fake teak on – and we might do at a later date, but this is what we can afford at the moment,” says Jo. “It’s not the smoothest finish because we did it ourselves but we’re pretty happy with it.”
You can follow Jo and Joe’s adventures at vagabondchula.wordpress.com
Why not subscribe today?
This feature appeared in the March 2022 edition of Practical Boat Owner. For more articles like this, including DIY, money-saving advice, great boat projects, expert tips and ways to improve your boat’s performance, take out a magazine subscription to Britain’s best-selling boating magazine.
Subscribe, or make a gift for someone else, and you’ll always save at least 30% compared to newsstand prices.
See the latest PBO subscription deals on magazinesdirect.com