
Mark Ryan explains how to securely fit a Volvo Saildrive propeller after a failed anode led to a mid-cruise malfunction.
Prevailing winds in the UK blow from the west, so why is it then, that whenever you want to travel east, the winds will relentlessly blow from that direction for weeks on end?
And so it was, as the May half-term holiday approached. Our planned cruise to take Mirage, our 40ft Bavaria, and our four children across the Thames from our base in Chatham Marina on the Medway to Woolverstone in leafy Suffolk, looked increasingly unlikely as, day by day, the forecast for fresh easterlies gradually worsened.
As the planned departure weekend approached, we noticed a small weather window of very little wind from the east between 0300 and around 1000 on Sunday morning, with a breeze picking up until around midday, followed by a fresh easterly breeze from lunchtime.
We figured that fate favoured the bold and loaded the kids and all our belongings onto Mirage and anchored for the night in Sharfleet Creek at the end of the Medway.
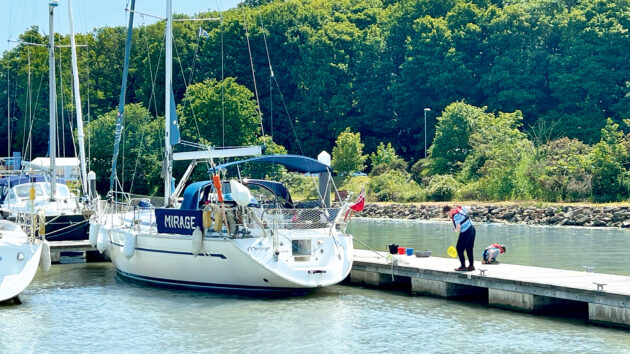
Holiday on hold at Woolverstone. Photo: Mark Ryan.
Early departure
We upped anchor at 0300 at the top of the tide, in the inky black of night that contrasted with the bright lights of Thamesport’s towering cranes and ships using the flood to come into the Medway.
The water was glassy as we chugged out into the Thames with the ebb tide starting to give us some gains, and a gentle swell running.
It’s always my favourite part of the day, as the sun peeks up to dismiss the false dawn, especially on calm mornings like this one.
As we approached the other side of the Thames, the wind began to build, well ahead of when forecast, and with the wind opposing the tide, the infamous short, steep chop of the Thames began to make itself apparent.
The kids by this time had awoken, and the one we had foolishly left in the (now bucking furiously) forecabin sleeping came up and was immediately seasick.
At this point we had some wind, and I could have put the sails up and beat into it, giving a better motion and a cracking sail, however it would have left us still at sea when the even brisker winds later on started to blow.
At anchor in Sharfleet, ready for the next day’s early departure. Photo: Mark Ryan.
Instead, I chose to make the kids as comfortable as possible and continued chugging into the short, steep, wind over tide of the Wallet.
The winds built as midday approached, and making the final chug into the Orwell was most unpleasant, but as the docks of Harwich loomed overhead, and the sea state calmed, we had a feeling of achievement; we’d outlasted our discomfort; our holiday could begin.
Coming into Woolverstone Marina, the sun shone overhead in a blue sky and we were all looking forward now to our week. We radioed the marina and were allocated a berth that the wind would be holding us off from.
Our last boat, a wonderful 30ft Albin Ballad, would keep directional even at low speeds with a cross wind. Mirage, with her fin keel, high topsides and spade rudder, quickly blows off when crawling at very low speeds, especially with a bit of a side wind.
However, I was confident about manoeuvring Mirage in these conditions now. The idea is to keep a little speed on as you approach and then take it off with hard astern as you get into position, finally getting the midships line attached to the dock – simple and effective.
We used to sport a bow fender when I purchased her as she seemed so vast compared to our old boat, but that fender now languishes in my garage, unused, as we’ve successfully docked this way hundreds of times.
Berthing horror
Heading out the lock at Chatham – bound for Sharfleet Creek. Photo: Mark Ryan.
Due to the sunny weather, many sailors were sitting watching us come in, either relaxing, drinking gin and tonics or scrubbing feverishly at their boats that I greeted in a relaxed and confident way as we chugged past.
With my eldest, Thomas, on the bow line, and my wife, Liz, on the midships line, we chugged purposely towards our berth.
I lined it up perfectly and I reminded everyone, as I do with every manoeuvre like this, to be careful and never put any part of themselves between the berth and the boat, and not to be a hero and try and jump if there is a gap.
A few boat lengths away, I put the engine out of gear for the boat to carry her way into the berth and protect the gearbox, and then as we got perfectly into position, I confidently engaged astern to come to a perfect stop (which I expected would impress the many onlookers).
The revs increased, but to my horror, the boat did not slow down – her 11 tonnes of mass carried on serenely gliding towards the pontoon.
I had two options at this point; try and get a rope on to stop the boat, or hope it was the gear cable, and try astern again. I chose the latter and put the boat out of gear and then back into astern; once again the revs rose, but we still didn’t slow down.
I shouted for everyone to hold on and stand back, and with an almighty thump we connected with the pontoon. Liz, with catlike reflexes, got her rope on the midships cleat, and we were secure with some of the onlookers tutting and some chortling – we had certainly provided some dockside entertainment that afternoon!
Damage inspection

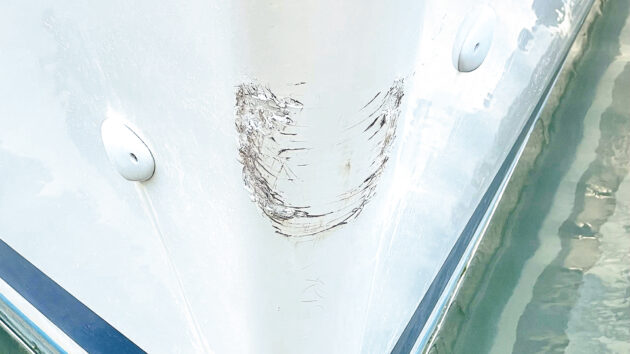
The damaged stem. Photo: Mark Ryan.
On inspection, considering the point loading on a four inch square of the bow, the damage was very limited.
The glassfibre reinforced plastic (GRP) in that area had been compressed and the gel coat was split apart, so we had got off quite lightly and were impressed at the strength of our little Bavaria.
It had still not registered with me what had happened. I supposed the gear cable must have snapped, so I went below and had a look, but the gear cable was fine.
I thought perhaps a gear in the Saildrive propeller system had broken, but that seemed unlikely. That left the only possibility being that we’d lost the propeller!
I lashed my GoPro to the end of a boat hook and plonked that into the murky depths of the Orwell, and after some trial and error we observed that we’d not only lost the Saildrive propeller, but we had lost the rope cutter too!
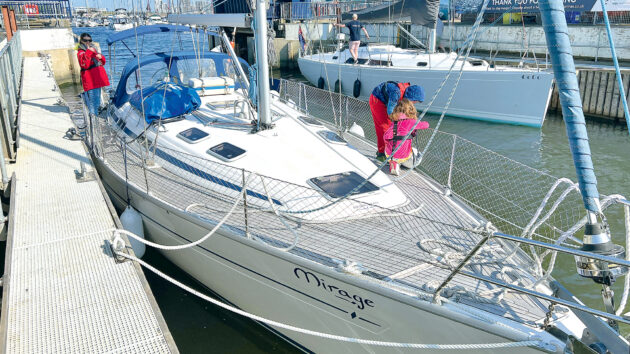
The hardy Bavaria after pontoon impact. Photo: Mark Ryan.
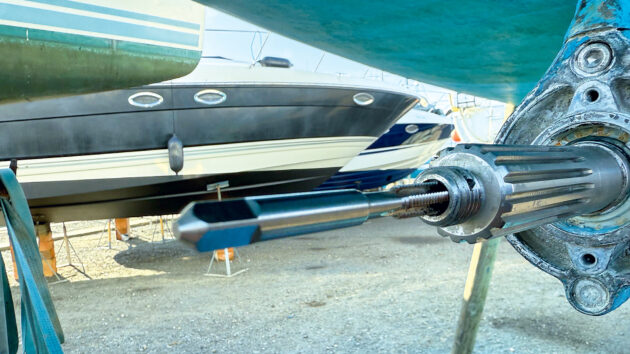
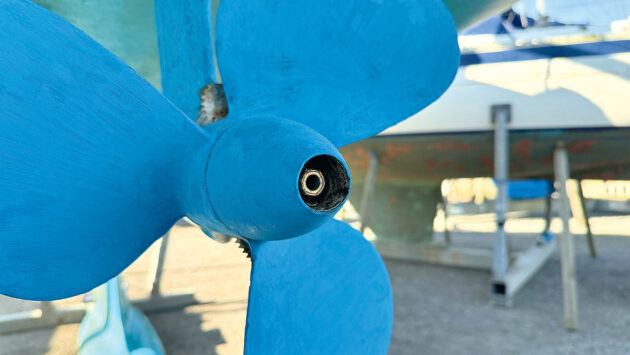
Our Saildrive propeller system
Mirage has the ubiquitous Volvo Penta 120s Saildrive. The propeller is mounted onto a greased spline on the prop shaft, with a cone that screws over a threaded section at the very end of the shaft that secures the propeller on.
A locking screw is then placed at the centre of this cone, with threadlocker, that, in theory, stops the cone from spinning itself off when astern is engaged.
All of the threads, including the locking screw thread, are ‘normal’ right-handed threads, so when reverse is engaged, these will always be fighting to spin themselves off. There is nothing mechanical that locks the cone onto the shaft – the only thing stopping the cone from spinning itself off in reverse is the threadlocker.
This presents two challenges, one is that threadlocker can be sensitive to contamination (note: the spline that mounts the propeller has to be greased and should any of that make it into the locking screw hole, it will be ineffective and you’ll lose your prop), and the second is threadlocker is sensitive to heat.
After chugging at higher than usual revs across the choppy Thames, this whole area would have warmed up, leading to a failure of the threadlocker and the loss of our Saildrive propeller.
A search online about losing a Saildrive propeller in this way revealed that I was not alone, and there were several posts from other despairing sailors about this particular mode of failure.
However, there was light at the end of the tunnel: the engineers at Volvo, recognising the requirement for something mechanical to stop failure in this way, had reinvented how the cone locks on to the Saildrive propeller with the addition of a lock washer over a locking bolt (rather than a locking screw).
The fix
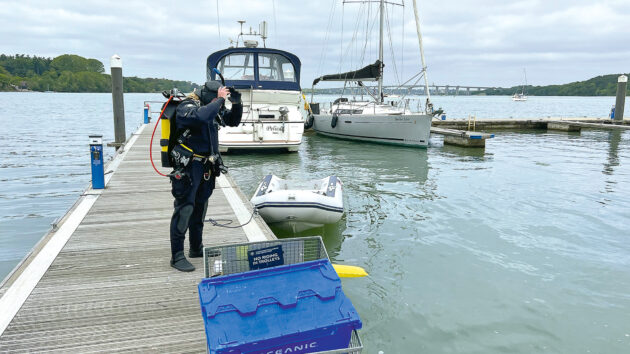
Diver prepares for an attempt to retrieve the lost prop and rope cutter. Photo: Mark Ryan.
I called our insurers at Haven Knox-Johnston, who were incredible from start to finish.
We arranged for staff at Fox’s boatyard at Ipswich to come and tow the boat and have a new propeller and rope cutter attached (we did send a diver down to try and recover the propeller and rope cutter – but had no luck in the silty murk of the Orwell), and then continued our summer cruise.
When we got back at the end of the season, we engaged the gel coat and GRP artist Rob Crowhurst of Crowhurst Marine to make her bows like new again (and stronger than ever, reinforced with extra lay-up and epoxy).
That was two years ago. On lifting out this year, I noted (with a groan) that the anode needed replacing on the Saildrive propeller.
To replace the anode, you need to remove the propeller, and I’m still suffering from PPTSD (Propeller Post Traumatic Stress Disorder) to this day.
Cleaning the threads
Using a tap to clean the threads for the cone locking bolt. Photo: Mark Ryan.
Once the propeller is removed, all contaminants, grease, oil and old crusty threadlocker must be removed from the threads. To clean the threads, I used C-Tec MultiSolve, leaving it on for a few minutes to break up any grease and the threadlocker.
Next, I used cotton buds to wipe out what I could, before taking a tap and carefully working it up and down the treads of the locking screw hole to dislodge the last of the old threadlocker.
One final douse and soak of MultiSolve and then another final wipe with cotton buds to confirm all was clean and clear of contaminants.
It’s important that either the threads are warmed slightly using a hot air gun at its lowest setting, or that the threads are left to completely dry, so that all remains of the MultiSolve have evaporated.
Fitting the Saildrive propeller
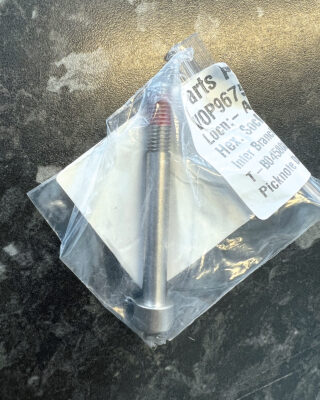
New locking bolt with pre-applied thread lock. Photo: Mark Ryan.
Next, carefully slide the new anode on to the spline and screw this on. Now comes the part you must take the most care with; the splines of the shaft, and above the splines (where the rope cutter fits around the shaft) need to be greased.
However, none of that grease must contaminate either the threads where the propeller cone tightens onto, or where the new locking bolt goes, which you will have just spent time getting clean. So carefully and slowly apply the water-resistant grease to these splines.
Slide the rope cutter carefully onto the shaft, followed by the propeller (looking through the hole to ensure you are lined up helps), and carefully inspect the thread at the end of the shaft and your locking bolt hole again to ensure there has been no contamination. If there is, carefully repeat the cleaning steps.
Rushing at this point is not an option, so go slowly and be methodical.
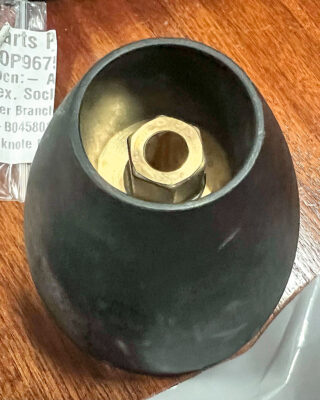
New design prop cone. Photo: Mark Ryan.
Screw the cone onto the threaded end of the shaft, retrieve your borrowed yard lumber (see panel prop removal, previous page) and brace the propeller so you can tighten the cone.
The cone tightens to 70Nm of torque and do make sure you measure this with a torque wrench. Once this has been tightened, slide your new locking bolt, that comes preloaded with the right amount of thread locker, through your locking washer. Note the two pre-bent ears lock over the bolt of the propeller cone, so they must face inwards, towards the propeller.
The locking nut itself only tightens to 20Nm of torque with a 13mm socket. Once you have achieved that torque, tighten slightly more until the flats of the locking bolt line up with the flaps of the locking washer.
Finally, fold over the flaps of your locking washer and leave for at least 24 hours for the threadlocker to harden.
Peace of mind
Refitting the newly antifouled cone on the saildrive propeller. Photo: Mark Ryan.
Now that I have a mechanical lock in place stopping my cone unscrewing, I am much more confident that I will not have another written off half term, or unwelcome coming together with a pontoon.
I’d urge anyone without the cone with the lock washer to invest in one as they are ‘backwards compatible’ and will work on Saildrive propellers with the older system that relies on threadlocker fluid.
Saildrive propeller removal to change an anode
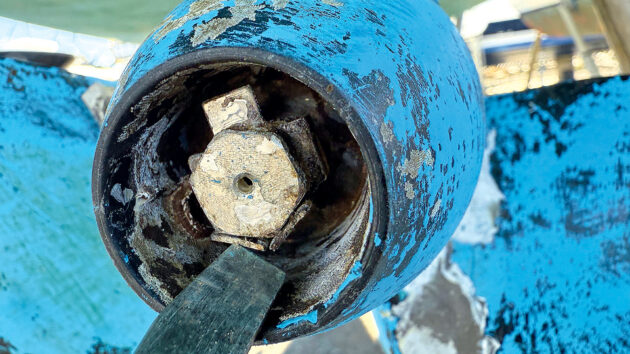
Photo: Mark Ryan.
1. Carefully, with a screwdriver, prise the wings of the lock washer (if fitted) flat. I tapped a hammer on a screwdriver to get the washer ends moving.
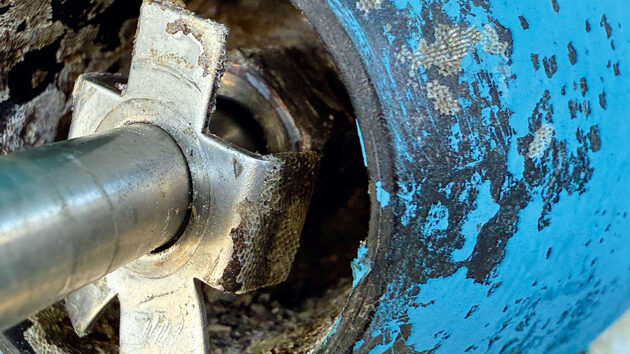
Photo: Mark Ryan.
2. Next, brace the propeller with a suitable piece of lumber from around the yard to stop the propeller from spinning as you
try to undo the locking bolt, and then unscrew the locking bolt.
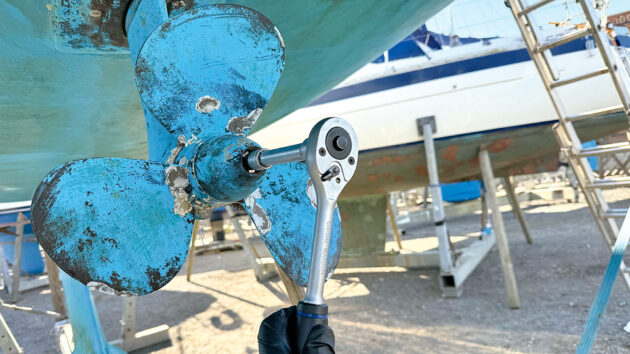
Photo: Mark Ryan.
3. The lock washer and locking bolt must not be reused – do not be tempted. Losing a propeller is not worth the risk!
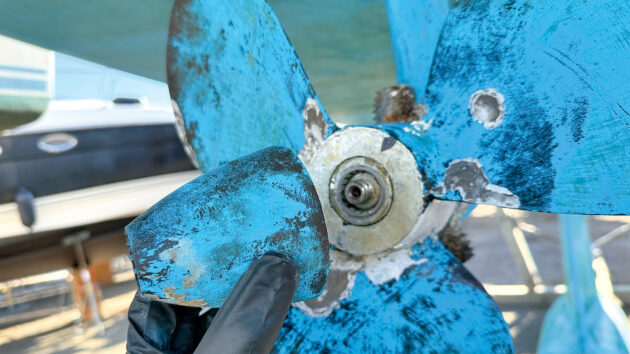
Photo: Mark Ryan.
4. Now use a 16mm socket to spin off the propeller cone; your propeller will now be able to slide off the spline.
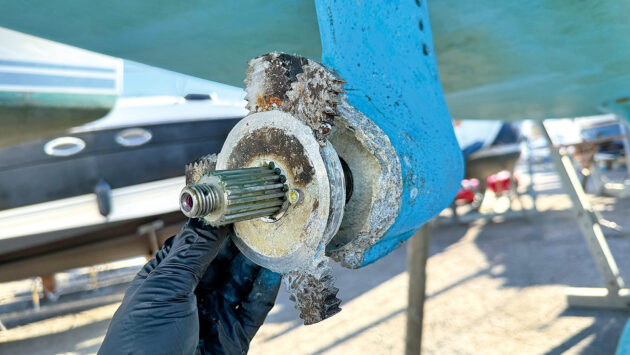
Photo: Mark Ryan.
5. If, like me, you have the wonderful Ambassador rope cutter, this will then slide off the spline as well.
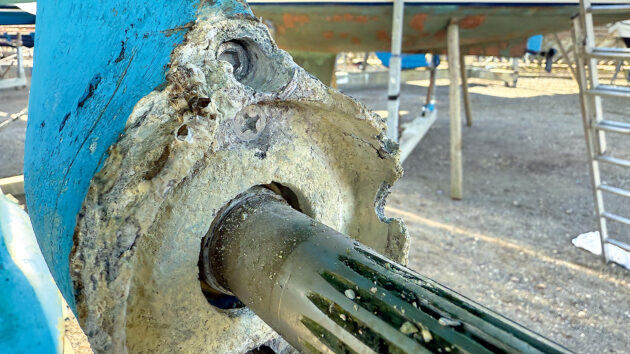
Photo: Mark Ryan.
6. The anode is held on with two machine screws that may need their heads cleaned out before they can be removed.
Saildrive propeller cleaning and refitting
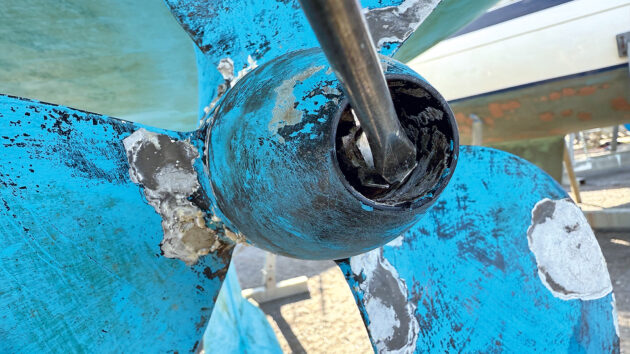
Photo: Mark Ryan.
1. Prise the ‘ears’ of the locking washer back and undo the locking bolt with a 13mm socket, bracing the propeller with some yard lumber. Dispose of the locking washer and locking bolt; these must not be reused.
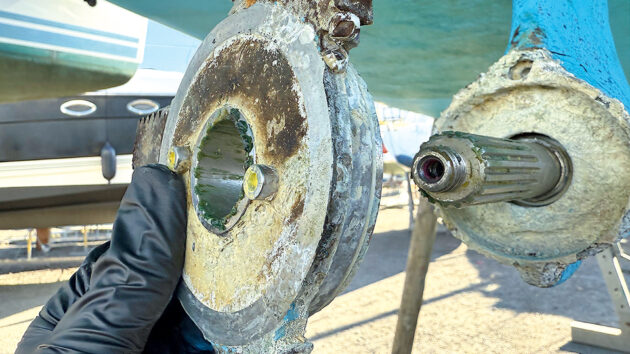
Photo: Mark Ryan.
2. Use a 16mm socket to undo the propeller cone. Slide off your propeller and rope cutter to reveal the remains of the treadlocker. This image shows the Ambassador rope cutter being removed.
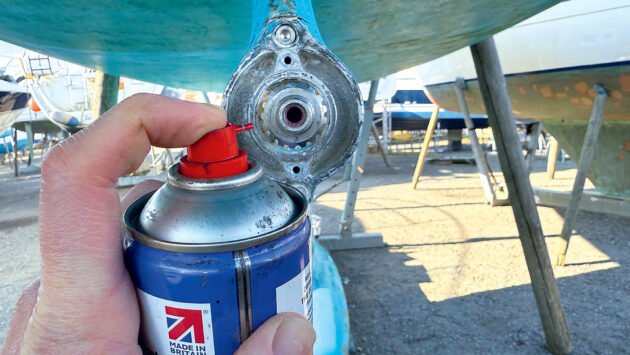
Photo: Mark Ryan.
3. Use C-Tec MultiSolve to clean all grease and contaminants off. Make sure this thread is dry of MultiSolve and clean before continuing.
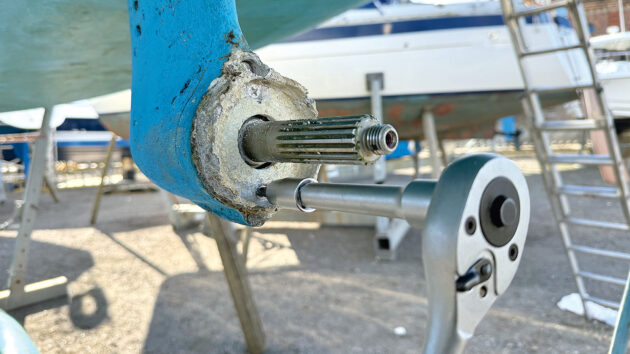
Photo: Mark Ryan.
4. Clean the heads of the two machine screws holding your anode on and undo these carefully, making sure you use the correct size screw driver bit. It might need a few thumps to come away once the machine screws are off.
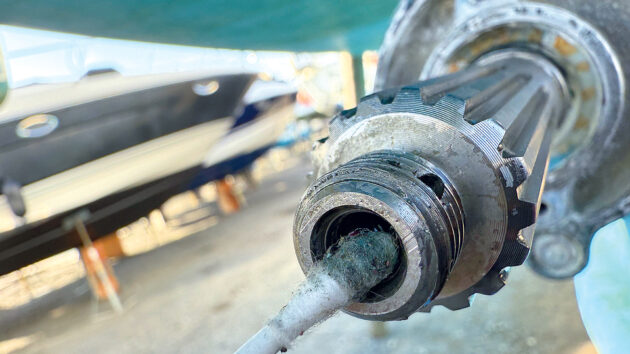
Photo: Mark Ryan.
5. Use a cotton swab to clean out the female cone locking bolt threads. Refit the anode with the two new machine screws provided.
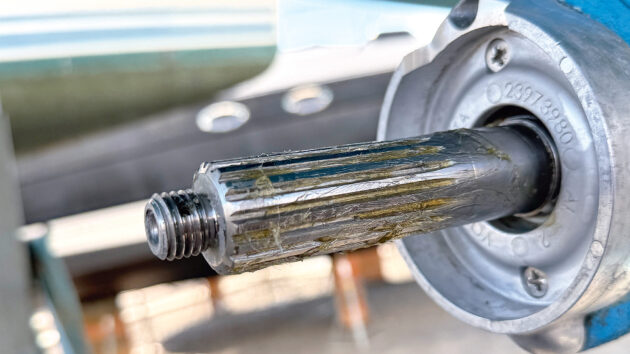
Photo: Mark Ryan.
6. Grease the splines with water-resistant grease carefully, making sure you do not get any grease whatsoever on either the male thread of the cone, or the female thread that the locking nut screws in to.
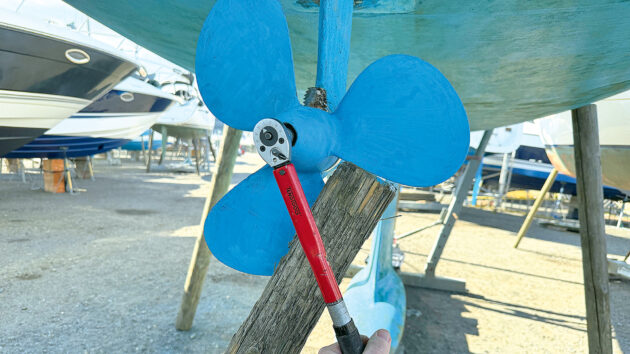
Photo: Mark Ryan.
7. After inspecting there has been no contamination, screw the cone on and brace the propeller with some wood and, using a torque wrench, tighten the cone up to 70Nm.

Photo: Mark Ryan.
8. Slide the locking washer onto the locking bolt so that the ears already turned down are facing inwards towards the propeller. Tighten the locking bolt to 20Nm.
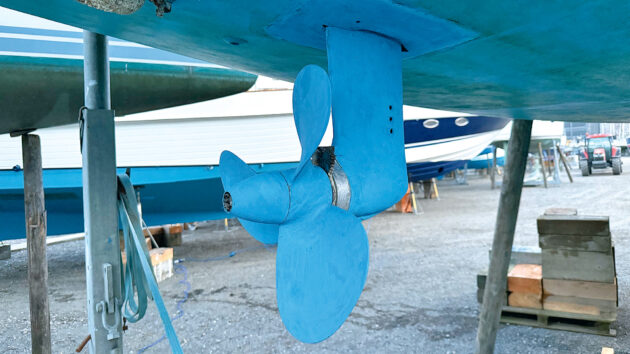
Photo: Mark Ryan.
9. Tighten slightly more so that the bolt aligns with the ears of the locking washer, then use a screwdriver to fold the remaining ears over. Leave for 24 hours before launching.
Lessons learned from fitting my own Saildrive propeller
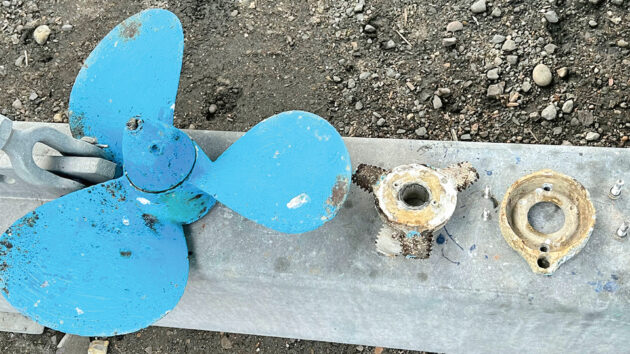
Old prop cone and rope cutter arrangement. Photo: Mark Ryan.
- Go with your instincts – If the weather is not right, for the sake of a holiday, don’t push your luck.
- The forecast is only a prediction – make contingency plans and assume that bad weather just over the horizon will arrive early.
- When setting off with children asleep, never have them go to sleep in the forecabin! Had our son slept in the main saloon, he may not have been seasick.
- The UK marine industry is something to be proud of – from the insurers, to the ever wonderful and understanding Woolverstone Marina, to Dave the driver, to Fox’s boatyard and, of course, to the expert workmanship of Crowhurst Marine, every interaction we had along the way to resolve this adventure we were met with helpful, positive and knowledgeable advice and kindred spirits who showed empathy and understanding.
- Don’t assume that the way it is now, is the way it should remain –had I known there was an upgraded cone for the Saildrive, I would have upgraded sooner and saved our little holiday.
Volvo Penta response
In a statement, Volvo Penta said:
Volvo Penta takes the performance and safety of our Saildrive systems very seriously. All of our propulsion solutions are designed and manufactured to meet strict quality standards, and when maintained and serviced correctly, they deliver many years of reliable operation.
In the event of any concern, including the type of incident described, we strongly recommend that boat owners contact a certified Volvo Penta dealer for a full inspection and support. Authorised dealers are equipped with the technical expertise, genuine parts, and factory backing to ensure the integrity and safe operation of our products.
Boater safety remains our top priority, and our dealer network is ready to provide the assistance and service needed to keep owners confident and secure on the water.
Mark Ryan is the IT director for Keystone Property Finance and has been sailing all his life. Mark, his wife, Elizabeth, and his four children sail their current boat, the Bavaria 40 Mirage, up and down the east coast of England and have their sights set on heading further afield.
Want to read more articles like about fitting a Saildrive propeller?

A subscription to Practical Boat Owner magazine costs around 40% less than the cover price.
Print and digital editions are available through Magazines Direct – where you can also find the latest deals.
PBO is packed with information to help you get the most from boat ownership – whether sail or power.
-
-
-
- Take your DIY skills to the next level with trusted advice on boat maintenance and repairs
- Impartial, in-depth gear reviews
- Practical cruising tips for making the most of your time afloat
-
-
Follow us on Facebook, Instagram, TikTok and Twitter