
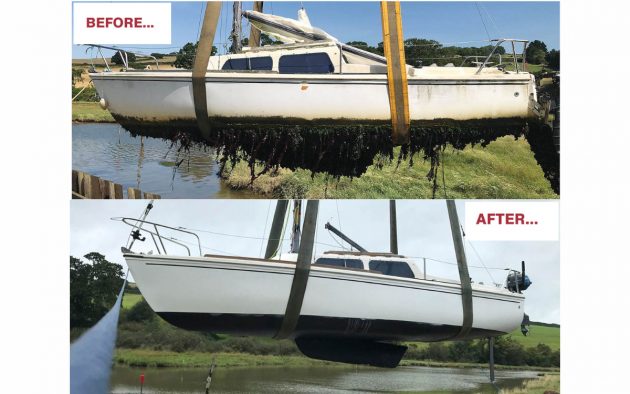
This Jaguar 22 was in a sorry state when the owner asked Will Higgs to renovate it. Here’s how he tackled the task
I’ve been hooked on boats since before I could walk, and have spent over 30 years repairing and sailing them.
My experience has taught me how to manage a yacht on a tight budget and how to prioritise projects in order to get the best out of the boat and maximum enjoyment.
More recently I found a way to make my passion my profession when I started a brokerage and boat repair company.
Our first project was a Leisure 20, which we refitted for a lady at the local sailing club. Soon after, I met a chap who’d bought his first boat – a Jaguar 22 that had been laying neglected on our moorings at Saltash on the river Tamar for some years, providing a home for several families of seagulls.
He approached me with the intention of securing a mooring and mentioned in passing that he was looking for a yard to refit the boat as he was very busy at work and didn’t have the time to do it himself.
We discussed the options and agreed to carry out a modest renovation keeping to the necessary fundamentals needed to create a safe, simple sailing boat which could be embellished as time goes on.
To cover the key factors of safety and seaworthiness we devised a checklist of all the necessary checks and repairs and this is how we tackled it.
Step 1: Clear and catalogue

Pressure washing five years’ worth of marine growth
We started by dropping the mast and emptying the boat. Next we catalogued the inventory, cleaned down all of the equipment and removed all of the rubbish.
There’s nothing worse than tripping over gear all the way through a refit and it only ends up ruined so, once it has been thoroughly cleaned and dried out, we box everything up and pack it away until it is needed at the ‘putting it all back together’ stage.
I find it really useful to keep a record of equipment including where it was located on the boat and where it is stored. This process takes a little time but saves hours later when trying to find it or remember where it goes. There are so many components to most boat refits, if I tried to fly by the seat of my pants I’d have no chance.
Step 2: Valet and strip-back
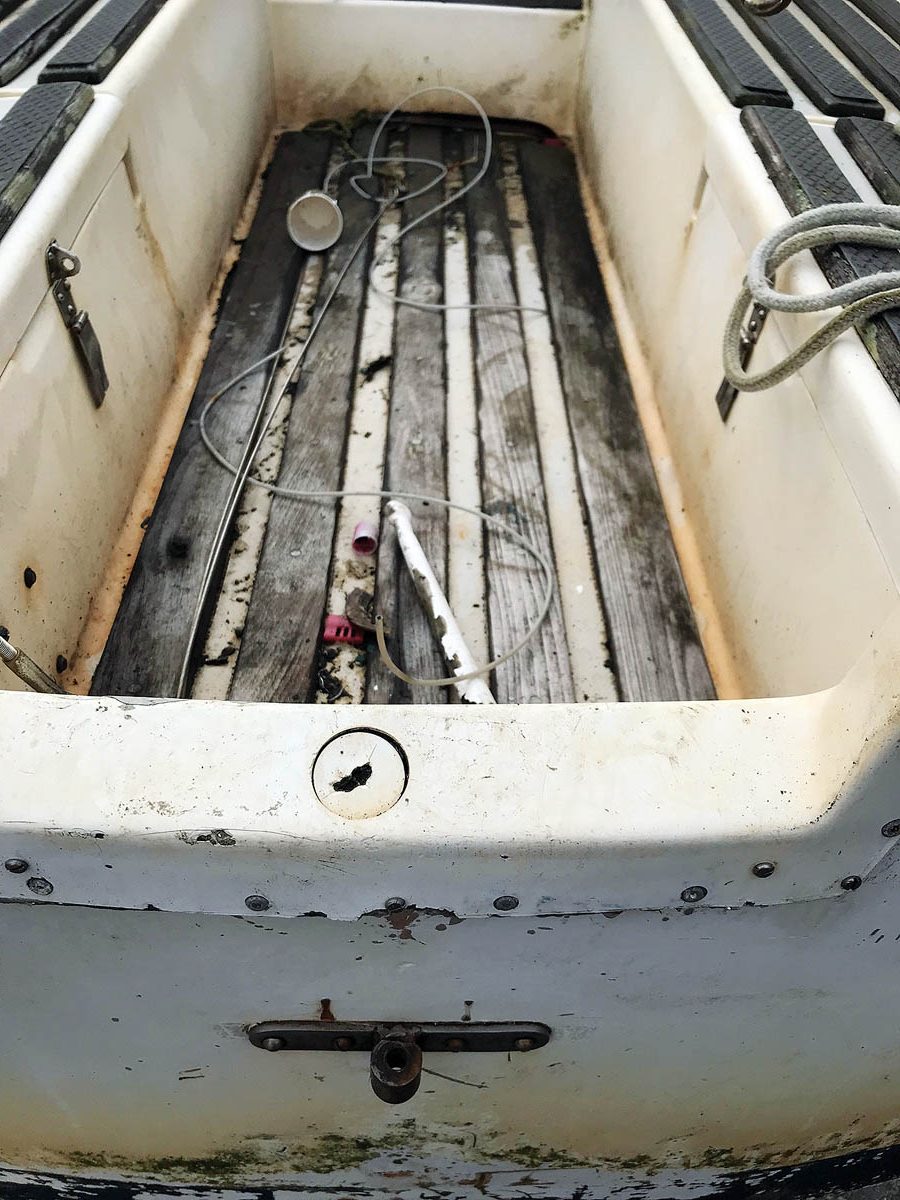
Oxalic acid treatment would be required to make this stained cockpit presentable again.
We always like to remove all grime and old paint straight away as this reveals any hidden nasties and also gets all of the dirty jobs out of the way so that they can’t contaminate new work later on.
The first stage with this particular project was scraping off years of mussel growth with a shovel which, surprisingly, revealed a boat underneath and had the enviable side-effect of providing lunch!
A full end-to-end inside-and-out pressure wash and deep clean of the empty boat followed, including the rig and all lockers and bilges.
We then used our own recipe of oxalic acid crystals mixed with wallpaper paste and water to create an effective second stage cleaning gel, highly effective at removing the notorious Tamar tan. This we applied liberally to the deck, which was badly stained and discoloured. When applied with a paintbrush, the gel sticks to the GRP and metal surfaces and, after leaving on for ten minutes, strips all the staining away leaving a brightened surface ready for polishing. A second application may be necessary on badly stained areas but altogether this process is highly effective at rescuing gelcoat without the need to wet and dry or excessively cut it which could impair the finish and its opacity.
The mixture also works well on timber to bleach out dark spots and discolouration once varnish has been removed.
The hull had been previously painted and had suffered badly from the years it had spent abandoned on its mooring. Although I always prefer to repair and restore gelcoat rather than paint if possible, we had no choice but to abrade it back to a clean substrate and start again. For the topsides this simply meant sanding extensively.
However, we uncovered more sinister issues below the waterline.
In order to clean the underside back to a reworkable point we used a media blasting attachment that connects to our pressure washer. We sheeted up and collected the waste product – disposing of it responsibly – and found that it cut through the build up of antifoul and growth very effectively requiring only a light sand afterwards to smooth it out.
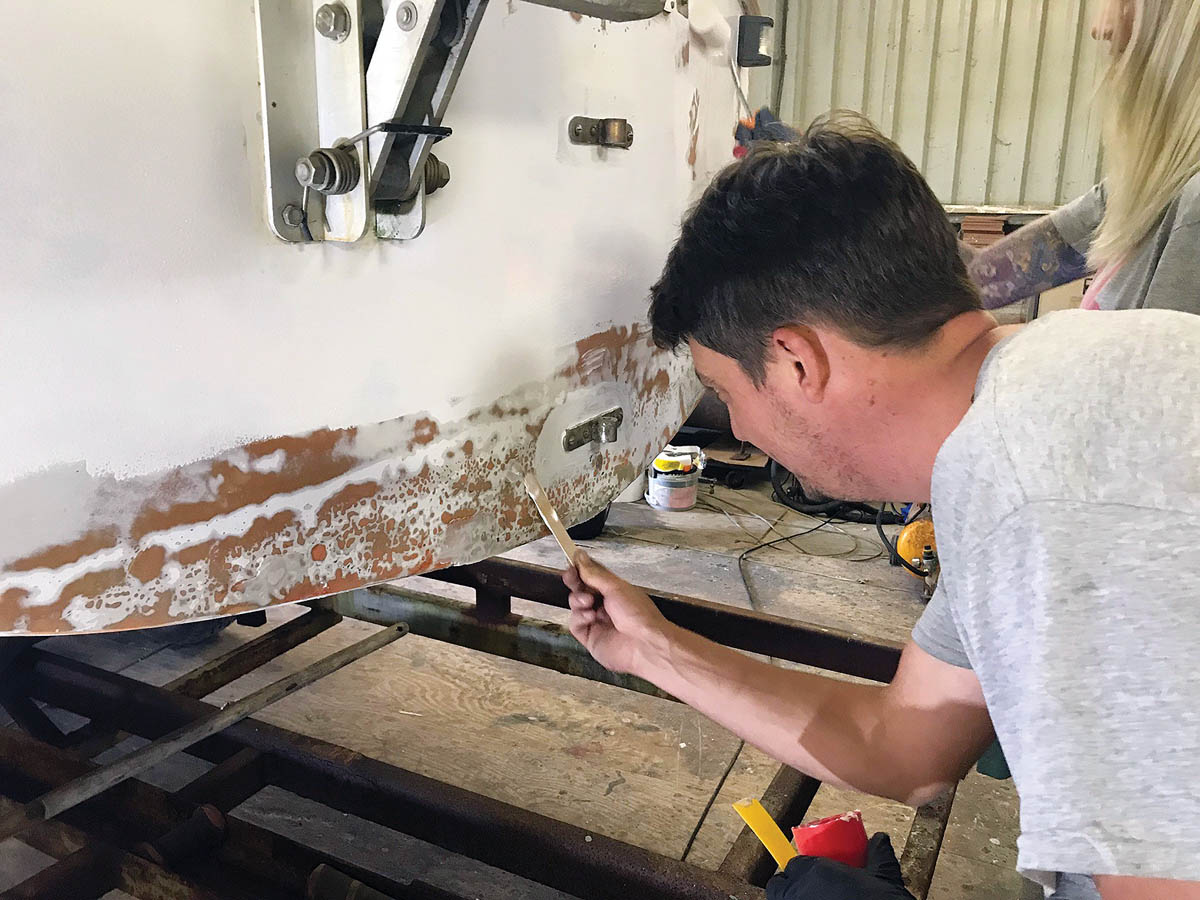
Repairing osmosis blisters with epoxy
It was at this point that we discovered osmosis. The blasting and sanding revealed that the majority of the hull was reasonably sound apart from a few isolated blisters not unexpected in a boat of this age and construction. However, there was a 15cm (6in) wide band around the waterline and splash zone that was riddled with blisters. Now I don’t profess to be the divine authority on osmosis treatment, but I have seen enough to know that it would not be cost-effective to give a boat of this age and value the full works so we had to come up with a solution which would alleviate the problem and preserve the boat without breaking the bank.
Our strategy was to Dremel out all visible blisters and then put the boat in our shed for a period of drying out.
We always try to cover a project once the cleaning out phase is completed anyway. If we can’t fit the boat in the shed we tent it. This helps us to make progress in all weathers but having the boat properly dry also improves the workmanship and the finish.
Once the blisters had stopped weeping and appeared totally dry, we allowed a further three weeks to be absolutely sure and then repaired the blisters with West System Epoxy.
Finally we faired the hull and applied two coats of Gelshield and two coats of Underwater Primer.
Step 3: Finish and paint

After a first coat of paint and looking much better already
At each stage of the project we start at the top and work down.
Initially we carried out all of the preparation work, then we repaired the GRP and timberwork as necessary, after which we faired the hull and other gelcoat repairs to create a desirable finish.
The whole boat was then detail cleaned, polishing the gelcoat inside the cabin and on deck.
Timber trims, including those which had been removed from the boat for the refit, were varnished.
Article continues below…

Restoring a 1950s Bembridge Scow
Few things can be more satisfying than saving an old wooden boat from the chainsaw and bringing her back to…
Best boat varnish: 7 top options for gleaming woodwork
Few things are as quintessential to the archetypal sailboat as gleaming, iridescent woodwork that is indicative of a recent coat…
Finally the hull was primed and repainted. For the topsides we used a self priming topcoat called Multicoat, from Hempel. This paint is excellent for general use as it dries to a satin finish – which doesn’t look too shiny and hides imperfections well, but is also easy to touch up if it is scratched without having to repaint the whole hull. Being self priming, even if a recoat is required, it is just that – a light rub-down to key and smooth the surface, and an overcoat.
Once the paint had dried we applied new vinyl decal stripes to the hull to finish off and draw the eye but also to complete the look.
Step 4: Check the rudder

Looking good in the shed: Note rudder components in foreground
We needed to be 100% sure the rudder was sound. The Jaguar 22 has a wooden stock and a lifting blade and it was looking a little worse for its years spent languishing in the river so we burned off all the paint and dismantled it into its component parts.
This included splitting the three laminated layers of the stock making up the two cheek pieces and the central core. The sections were then repaired with epoxy as necessary, faired and reassembled – again with epoxy as well as new fixings. The whole assembly was repainted and installed in its rightful place, fit and ready to keep a straight course for the foreseeable future.
Step 5: Inspect the rig
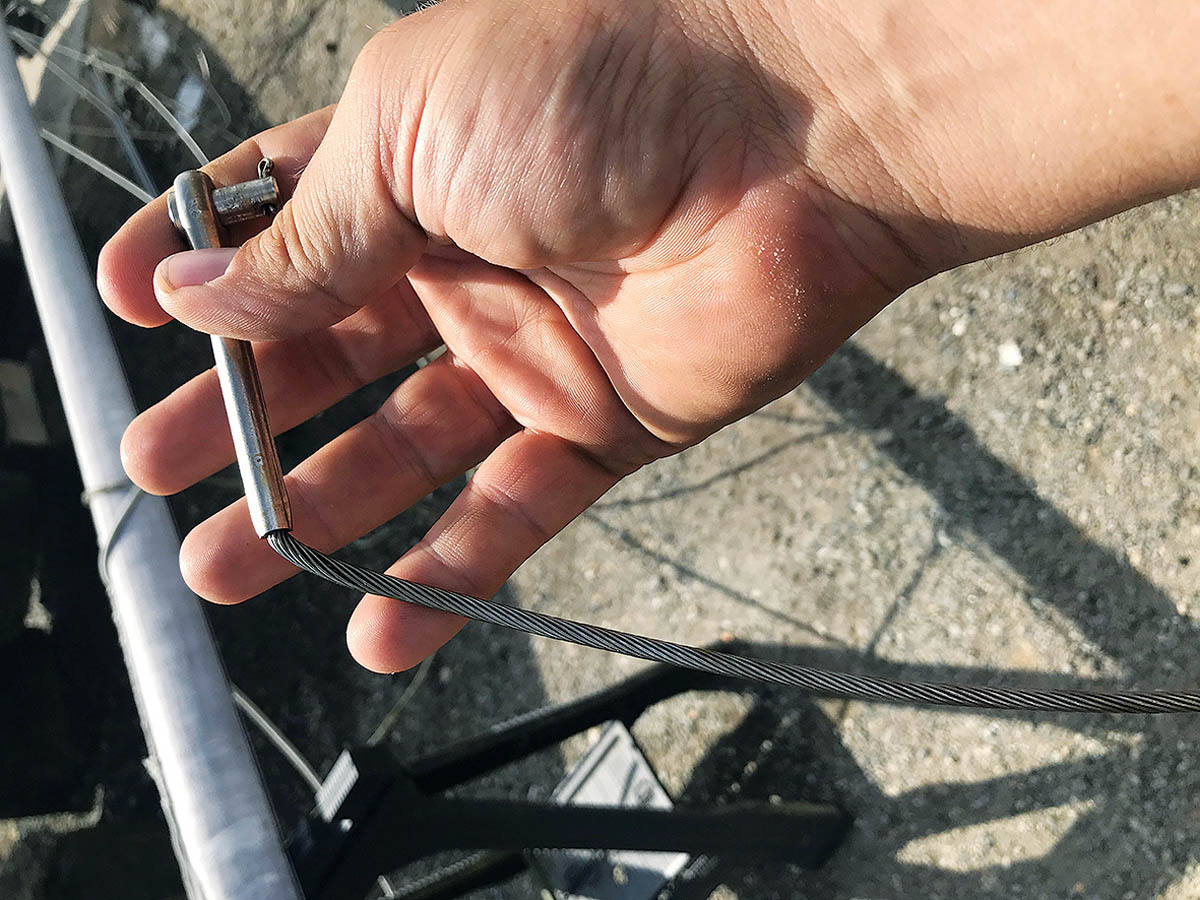
Shroud was kinked where it exited the swage and needed to be replaced
We then turned our attention to the rig. This involved polishing the mast, installing a second-hand roller reefing gear and checking over all of the standing rigging.
I usually prefer to replace standing rigging when I don’t know its age, but in this instance that wasn’t in our remit, although we did install a new forestay with a Sta-Lok fitting at the lower end as part of the roller reefing system.
We then added a new rope pack, replacing those that were badly worn and fouled up, and a new masthead light, steaming light and VHF aerial.
We taped the ends of the spreaders to prevent them from snagging the leach of the genoa, and I sent the sails off for a service and to have the necessary alterations made for the roller reefing.
Step 6: Engine service
The outboard’s gearlever was jammed but it all freed up and worked after a service
The engine had been sat on the transom for some time and had taken a few knocks to the casing.
The gear lever was jammed and it was clearly suffering from a build up of corrosion. When it was stripped down we found that we had to remove the power head in order to work the linkage free. We also cleaned out the corrosion and carried out the regular service items including the gearbox and test-ran it in our tank.
Step 7: Bulkheads and chainplates
We checked the bulkheads, chainplates and hull and deck joint and found them to be sound.
We also resealed all of the deck fittings with Captain Tolly’s Creeping Crack Cure and using CT1 Sealant around windows and those fittings that were exhibiting signs of more serious leaks.
Finally, we gave the interior a thorough clean, paint and varnish.
Step 8: Inventory
It was now time to reinstall all the cleaned-up inventory, replacing missing and broken items along the way.
The most significant broken item was the mast foot, which was difficult to replace as the fitting was obsolete and, being made up of a solid aluminium casting, very difficult to repair effectively. We did eventually manage to source a replacement part and reassemble the mast with its new rope pack.
After raising the mast we went around replacing pins and shackles until everything was as it should be and fitted new sliders to the mainsail as we’d converted it from a bolt rope in order to make it easier to handle when raising and lowering.
We repaired the keel winch and replaced the centreplate cable, and serviced all the other winches too.
Step 9: Antifoul and wax
After repairing all of the visible blistering, we protected and primed the hull. We used Hempel Classic antifouling, which despite being cheaper than many other products on the market, seems to have held up well, apart from picking up a slime layer over the winter as she stayed on her mooring.
Lastly, before launch, we treated the hull above the waterline with waterproof wax. This left us with a nice, glossy finish but also offered the hull a degree of protection against scratching and staining.
Step 10: Rig and launch

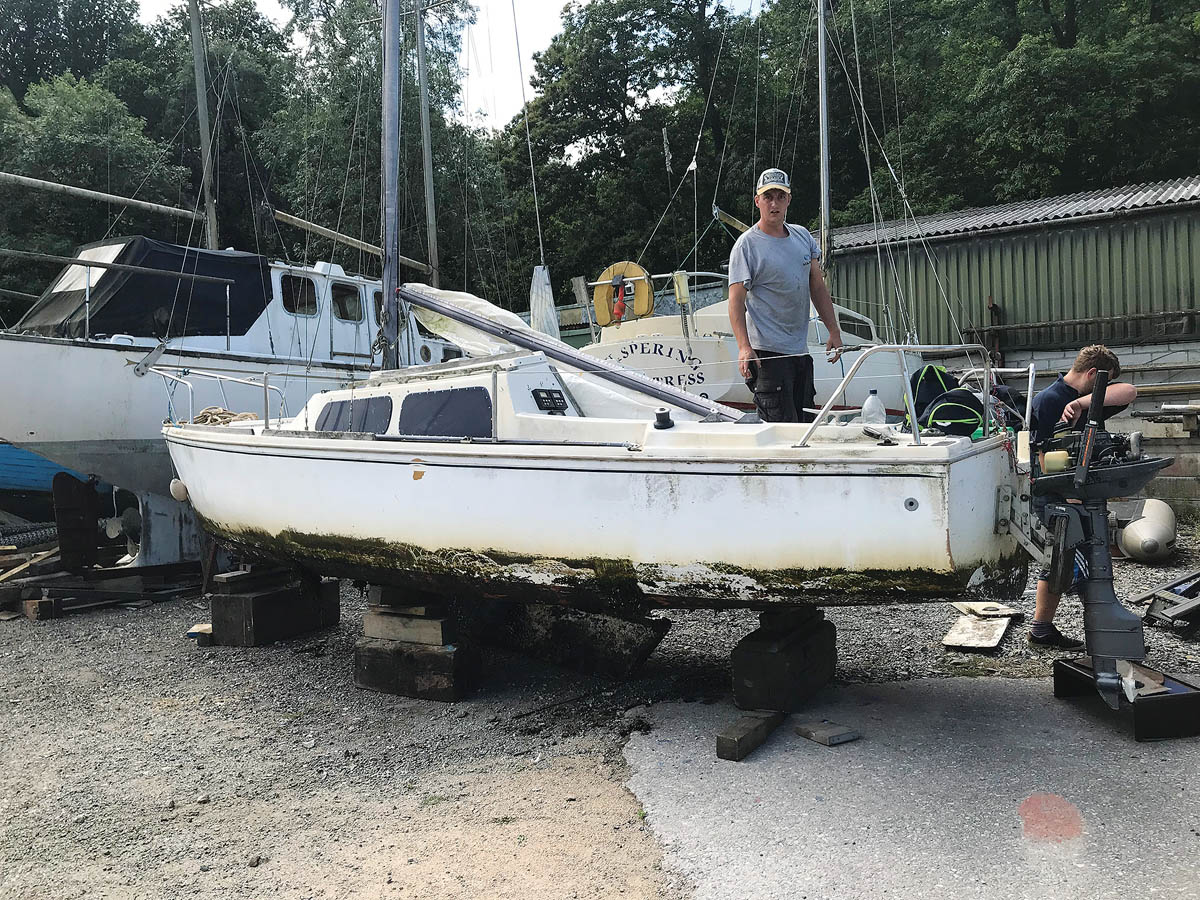
On the trailer and being prepared for launch
Time to step the mast! Having thoroughly checked all terminals and fittings, replacing clevis pins and split rings, we were ready.
The beauty of a yacht this size is the lightweight gear making it relatively straightforward to raise the mast by hand, saving on craning costs.
We attached a long line to the jib halyard and set up a block well forward of the bow to give us more purchase. We attached the backstay and aft lowers and began to heave on it.
Two of us lifted the mast and pushed it up far enough to get a purchase on the halyard, while the third hauled in on the block and tackle lifting the mast fully vertical and preventing it from falling back.
Once the mast was raised we set up the rig and fitted the boom.
Conclusion
The project cost £1,000 in materials plus 50 hours’ labour.
The owner was very pleased with the outcome and joined us for the journey downriver to his mooring back at Saltash where we put her on the pontoon to rig the sails and check that everything was working properly.

Back on her mooring and waiting for her owner’s seal of approval
Looking back over the project, I think it’s fair to say that including the labour, he spent what he would have done on a reasonable example of one of these boats, but got a newly refurbished one instead.
Potentially we added some value to his sailing as he didn’t have the time to carry out the work himself so was getting no enjoyment out of the boat before. It’s great to see him using the boat on the river and making all of the enjoyable small tweaks to put his stamp on things.
With our busy schedule at the yard we completed the work over six weeks but the job could have been broken down into two or three weekends’ work if it was condensed and tackled head on.
Given that an immaculate example of the Jaguar 22 probably has a value of £2,000-2,500, this kind of project could represent real value for money.

Will Higgs is a yacht broker who set up Combined Marine Services, offering boat refits, maintenance, breakdown cover and deliveries.
This particular boat cost £200 to buy in her original state. I’ve seen them cheaper but it’s important to remember that this boat included a 4-stroke outboard, all of her sails – in decent condition – as well as the interior cushions and most of the miscellaneous equipment needed to at least get her going. Buying a project boat without these items is risky as the replacement cost of parts can be significantly higher than the final value of the boat.
Happily, in this case the owner bought smart and we did those refit items which were necessary without overspending on non-essentials or taking the refit too far to be justifiable on a boat of this value.
Why not subscribe today?
This feature appeared in Practical Boat Owner magazine. For more articles like this, including DIY, money-saving advice, great boat projects, expert tips and ways to improve your boat’s performance, take out a subscription to Britain’s best-selling boating magazine.
Subscribe, or make a gift for someone else, and you’ll always save at least 30% compared to newsstand prices.
See the latest PBO subscription deals on magazinesdirect.com