Save money on future sail repairs with early preventative measures. Ken Endean shares some simple and cost effective sewing skills for boat owners
Chafe damage has always been a problem on yachts, and owners are generally advised to preserve their sails by adding protective devices to the rigging.
However, we don’t want baggywrinkles on our shrouds, nor do we wish to invite corrosion by encasing stainless steel rigging in plastic tubes. Shields, such as spreader caps, are not a complete panacea if they rub against stitched seams because stitches on modern canvas tend to stand proud of the surface, where even gentle abrasion will wear them down.
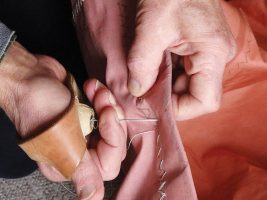
Sometimes it’s better to concentrate on adding protection to the sail, and this begins with restitching damaged seams. Every yacht should carry a basic sail repair kit, which can be as simple as a set of sailmakers’ needles, some sail thread (preferably waxed) and a leather palm – essentially a heavy-duty version of the needle-worker’s thimble.
Although sail making is a skilled occupation, restitching seams is relatively easy, especially in polyester canvas, because for most of the new stitches the needle can be pushed back through the original holes for the worn-out threads. Future chafe is quite likely to recur in the same locations but if the new thread is thicker than the original that will extend the life of the repair.
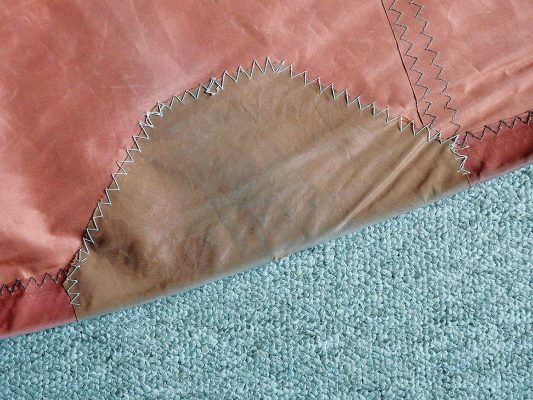
If the damaged area is obviously suffering heavy wear, it may be sensible to add an extra layer of fabric. My boat London Apprentice has tan canvas, so her sail repair kit includes a couple of spare pieces cut from old sails .
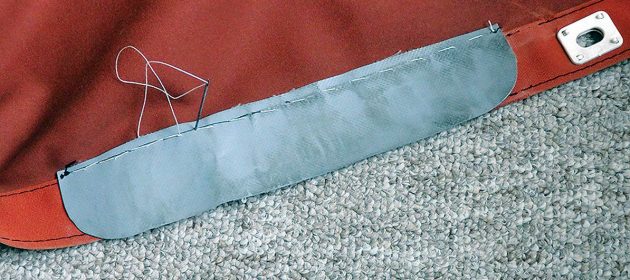
For even more serious wear and tear, protective material could include polyester-reinforced PVC sheeting (marquee material). I have used this where a kicking strap was rubbing against a concealed surface in a boom cover, and it might also be useful on sprayhoods or cockpit dodgers.
When adding extra thicknesses of material, pushing a needle through the multiple layers is difficult and it’s helpful to have a fine-pointed bradawl – thinner than a typical knife spike – for pre-forming the needle holes .
Finally, for a really tough patching job, the best material is surely leather, and I recently employed this on the leech of a genoa that was being badly abused by a cap shroud. Soft leather handles and folds easily, is not difficult to stitch and is – literally – as tough as old boots.
Which leads naturally to my last suggestion. You can buy leather patches for a few quid but there’s an even cheaper option: next time you throw away a pair of old leather shoes, cut out the tongues before you put them in the bin.
Originally published in PBO Summer 19


