
David Parker makes a simple shelf and installs strong webbing straps to stow a scuba tank securely in one of his boat’s cabins
On smaller boats, stowage space is always at a premium and while general gear can usually be packed in lockers it’s the bulkier items which sometimes have you scratching your head to find space for them.
In my case one such item was my diving tank – as you can imagine space is limited on a 23ft motor launch.
I use my diving gear to clean and inspect my props and shafts and it has also come in handy for retrieving items lost overboard or if an anchor gets fouled.
However carting all the kit back and forth in my little tender is a bit of a faff so I wanted to find a permanent home for the cylinder on board.
With the hull layout I have, the ideal and really only place to keep it would be in the cockpit.
But the cockpit sole already has inspection hatches of course and systems lockers which also double up for stowage.
I didn’t want any fitting to compromise quick access to these.
My solution was to build a tank stand that would be a sort of ‘half shelf’ design: strong enough to support a heavy weight but also compact enough to allow access to lift the hatch underneath.
The load itself would be secured by webbing straps which would be fitted to the bulkhead.
The same principle will work for my plans to carry additional water and fuel jerry cans on board.
Here’s how I stowed the diving tank.
Step by step
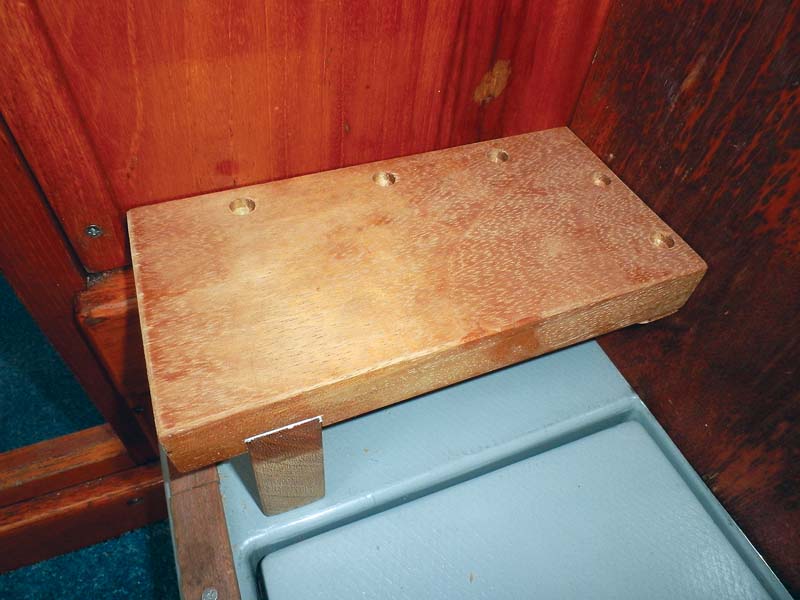
1) First I made up a hardboard template of the stand top to get the correct shape to allow clearance for the access hatch underneath, then did a test fit with the prepared timber. In this case it was a piece of 11⁄4in (30mm) afromosia hardwood measuring approximately 7x5in (180x125mm).

2) The top would sit on the existing lower bulkhead rail and I fitted a new side rail ensuring everything would sit flush. I chamfered the sides and cut an angle on the end of the 1in (25mm) square hardwood rail for neatness, attaching it to the locker side with stainless steel screws.

3) In addition to the back and side rail, the mini shelf would need another support opposite the side rail so I cut a housing joint for a leg. A joint like this is very strong and was recessed about 3⁄4in (20mm) deep. Note that the housing joint is inset from the edge of the shelf to allow for it sitting against the existing lower bulkhead rail.
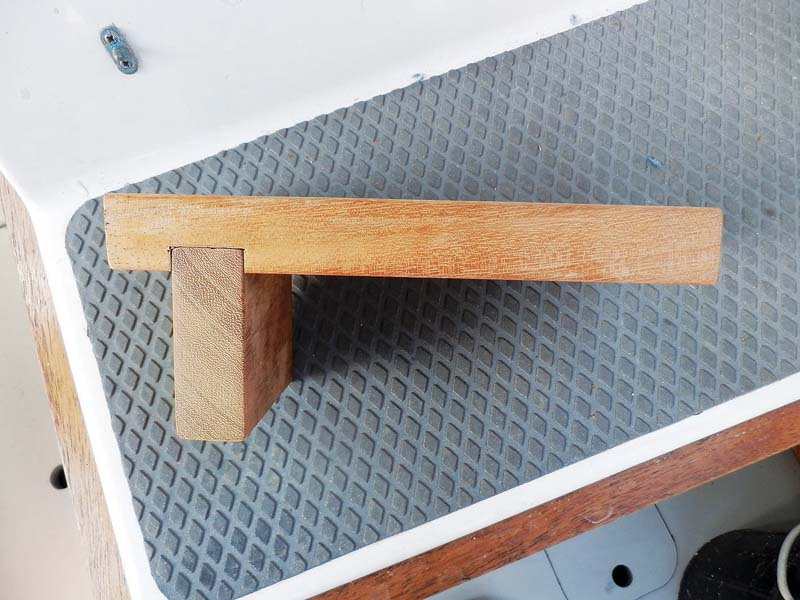
4) Here we can see what a housing joint looks like end on. This one was cut with a tenon saw and a 1in (25mm) chisel but to ensure tightness it is best to slightly undercut the housing joint with the saw and then pare away the edge with chisel as required. A sharp block plane was used to prepare the end grain on the leg.
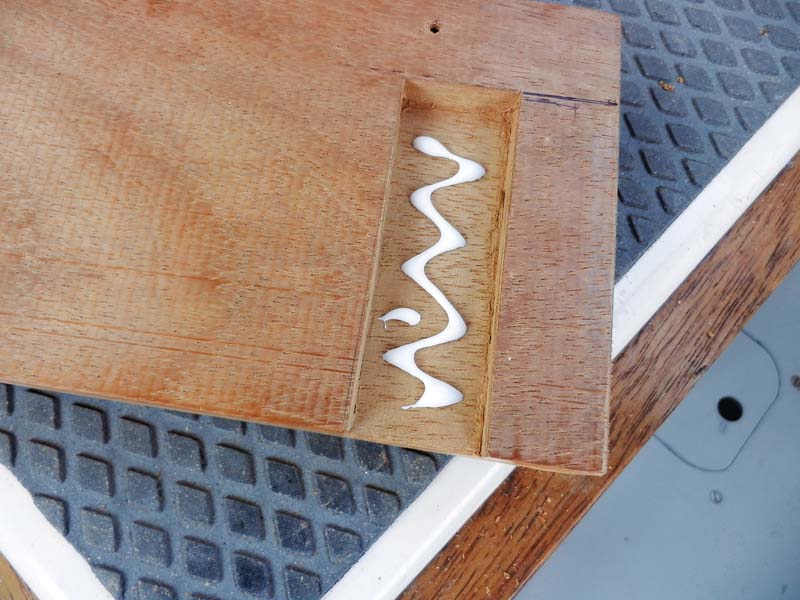
5) If the housing joint is a loose fit then top fixings may be required. This was a tight fit and standard working adhesive would do the job in the fairly dry environment of my covered cockpit. The advantage of using PVA glue as opposed to epoxy or polyurethane is that excess can be wiped away with a damp cloth.
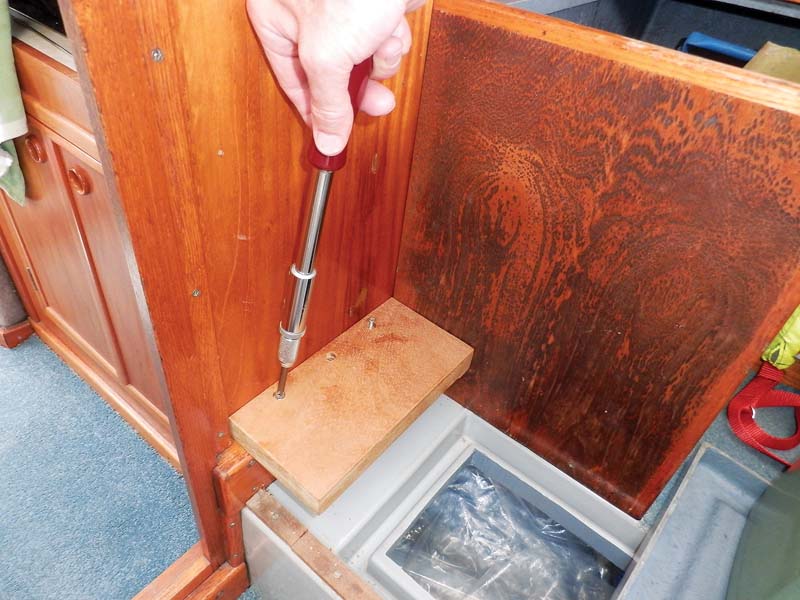
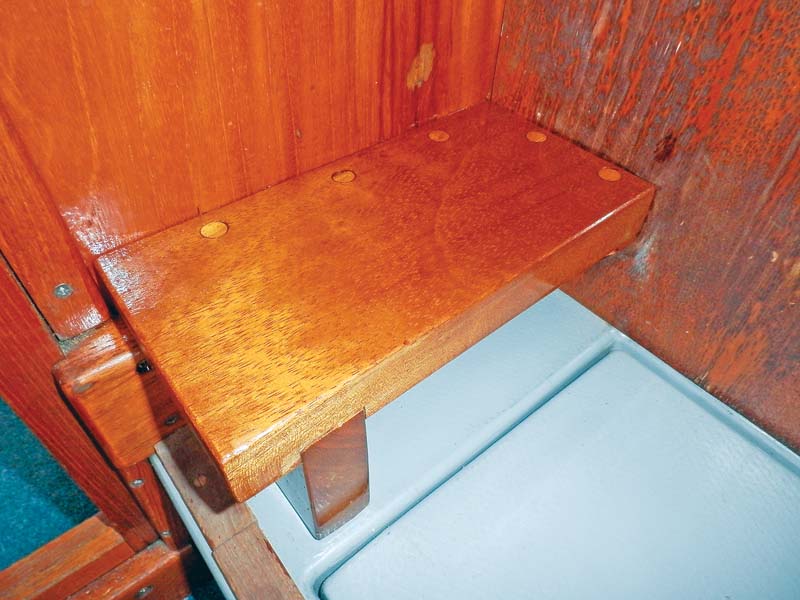
6) After the fixing holes are drilled (see page 76) ensure the assembled stand sits level. When incorporating a joint with thick sectional timber into a job it’s easy for it to distort things slightly out of true, in which case some adjustment might need to be made. This one sits flat, clear of the access hatch and is flush with the cockpit sole.
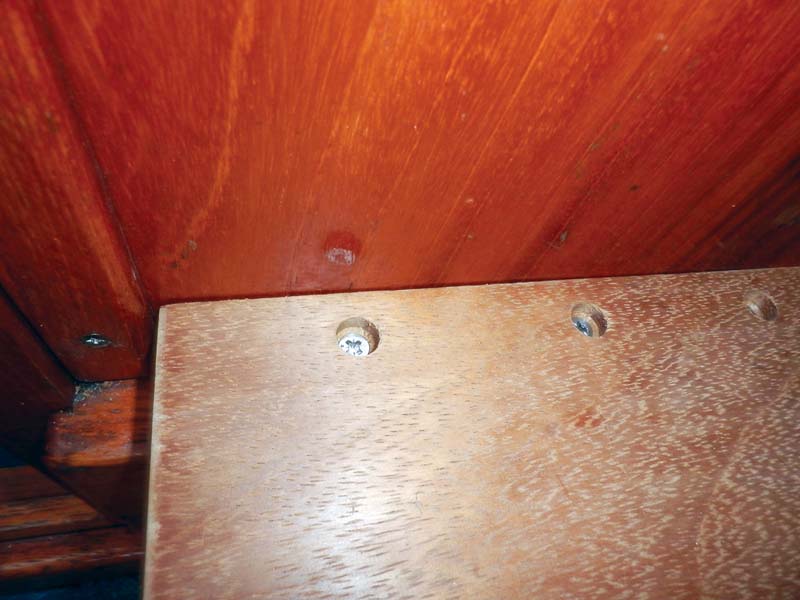
7) Chunky 10 gauge 11⁄2in (40mm) stainless screws were used through the top of the stand into the rails. The deep countersinking of fixings like this is a good idea when attaching a thicker piece of timber because you can bed them down deeply and then fill the holes with wooden plugs for a neat finish (see over for making plugs).
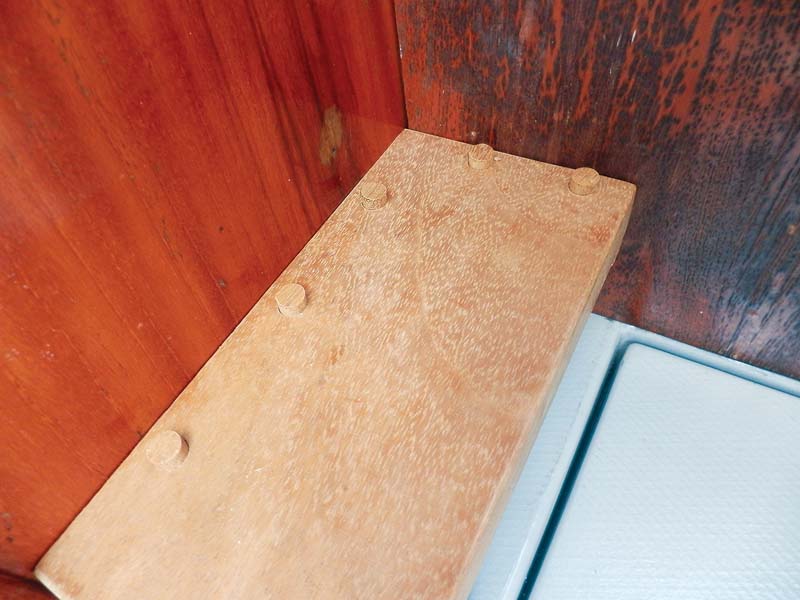
8) A dab of glue on the wooden plugs and then they are lightly tapped in with grain aligned. Wait for the glue to cure for a couple of hours before trimming them. A full PVA bond is typically achieved after 24 hours.
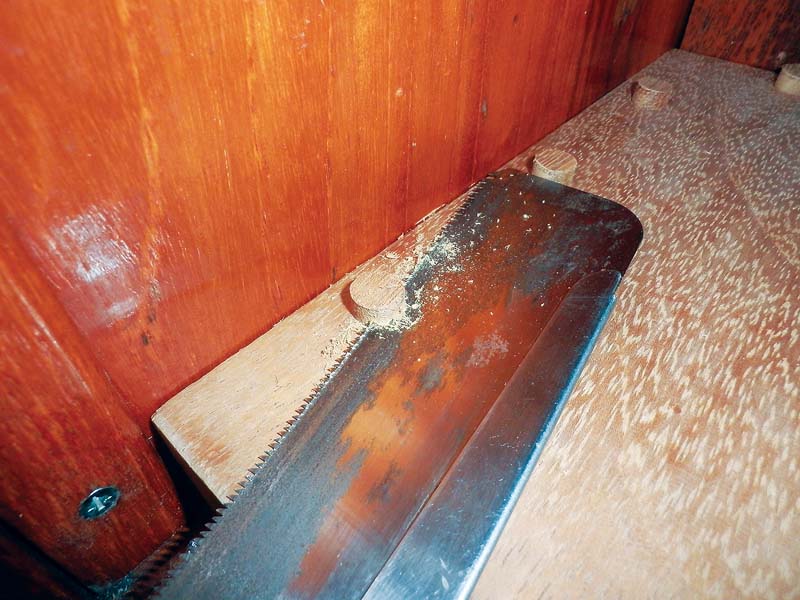
9) A fine tooth saw is ideal for trimming wooden plugs – I’m using a Japanese shark tooth saw which cuts on the pull. You can trim plugs with a sharp chisel, but they sometimes have a tendency to break away slightly below the work surface.
10) After a light sanding down, a few coats of varnish are then applied to the stand to finish the job. Without too much extra work a small cupboard or drawer could also be incorporated underneath.
How to cut wooden plugs
Because the stand would be on display I wanted it to be as neat as possible so I covered the fixing holes with wooden plugs.
Plugs can be bought in chandlers and online but over time it’s much cheaper to cut your own – and you can make them out of offcuts from the job for a perfect match.
Here’s how you do it.

1) These are the two cutters required: on the left is the cutter for the plugs themselves and on the right is the countersink bit which forms the matching recessed hole for the fixing. Cutters are available in various sizes and special types can also be used to make tapered plugs if required.

2) To make the plugs a length of the same type of timber is prepared. Ensure it is planed square before starting so you have a flat piece on which to work with the router and plug cutter bit.
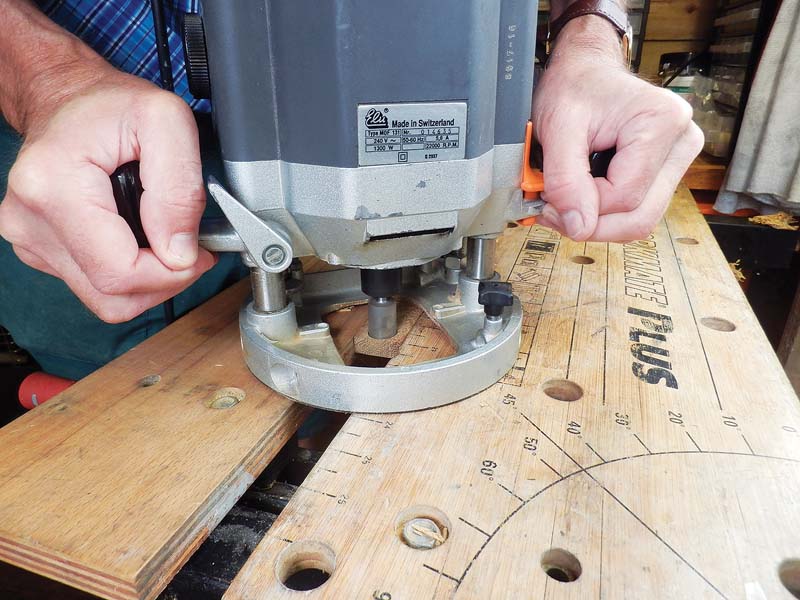
3) A standard plunge router is used with the plug cutter and the work piece must be properly clamped. Ensure a steady downward push as you cut and do not linger too long or otherwise the speed of the cutter will cause char marks on the wood.

4) Plunge the cutter through the full thickness of the wood. So you don’t mess up your prepared hardwood it’s often a good idea to practice on some scrap wood first to check you have the depth required and to get familiar with a smooth machining action.
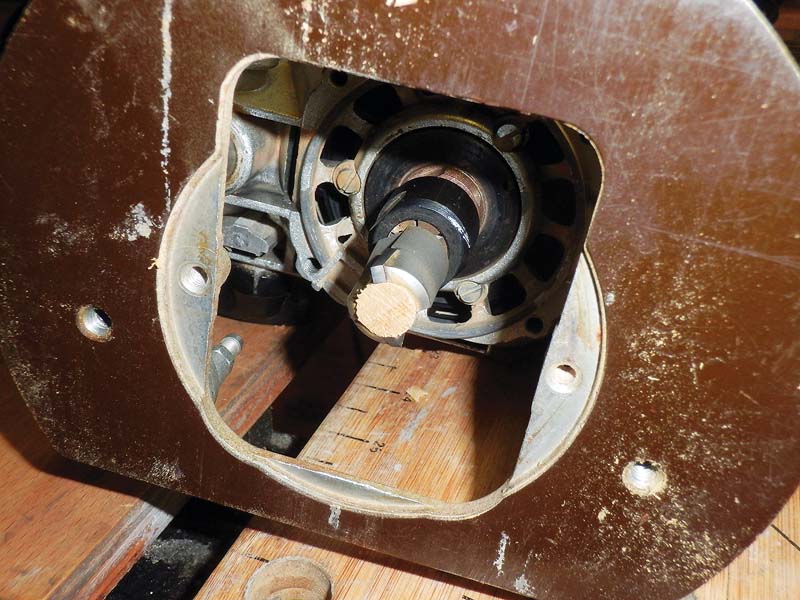
5) Once each plug is cut it usually stays in the cutter. Lightly prise it out with a suitable tool such as the shaft of a slim screwdriver. Take care not to damage the plug itself or the sharp sides of the router cutter when you do this.

6) This is what is left of the piece of donor wood. As you can see I have tried to achieve minimal waste in the hardwood. You can also see the char marks where I was just going that bit slower with the plunging action because I was cutting things pretty fine length wise.

7) The holes to take the plugs can be cut with a light portable drill. First mark up where you want the fixings to go then drill pilot holes to guide the countersink cutter.

8) The countersink cutter is also used in a drill. Ideally the work piece should be clamped but with a solid surface to rest on you can hold things by hand and do the final fitting on board.
Sewing your own webbing straps
Webbing straps have a host of uses on boats from jackstays on cruisers to toe straps on dinghies.
They can also be useful for securing larger items such as inflatable tenders on deck, or for small jobs like keeping the lid on a battery box.
They can be adapted and fitted as the job requires and here they were the perfect way to keep the heavy scuba tank secure.
To make these up I used a hand sewing machine but the seams required are not long very so they can also be sewn by hand as long as you’re confident about your stitching.
I left my straps overlong in case I want to fit something larger in the same place at a later date.
Webbing, buckles and fittings are readily available online
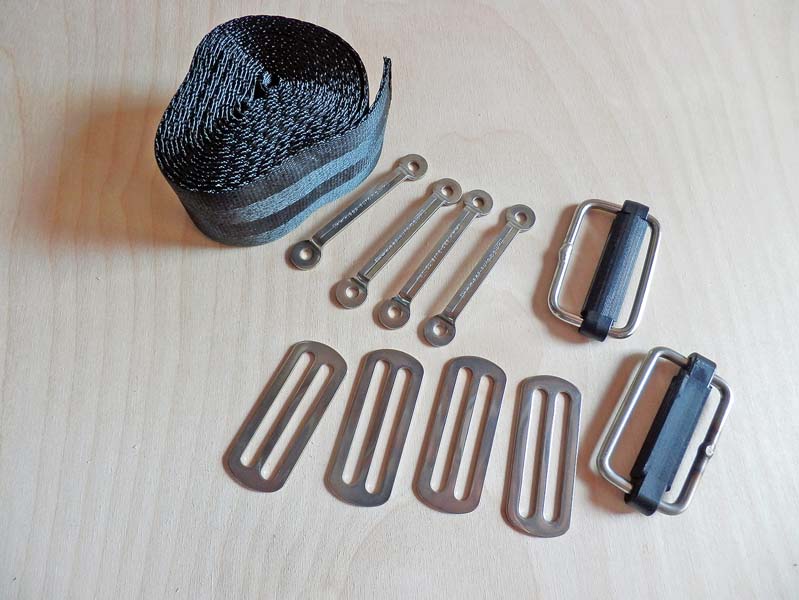
1) The components required to make webbing straps like these are relatively simple. I needed approximately 6ft 6in (2m) of webbing; 4x2in (50mm) bridges; 4x2in (50mm) adjustment slides; 2x2in (50mm) sliding bar buckles.
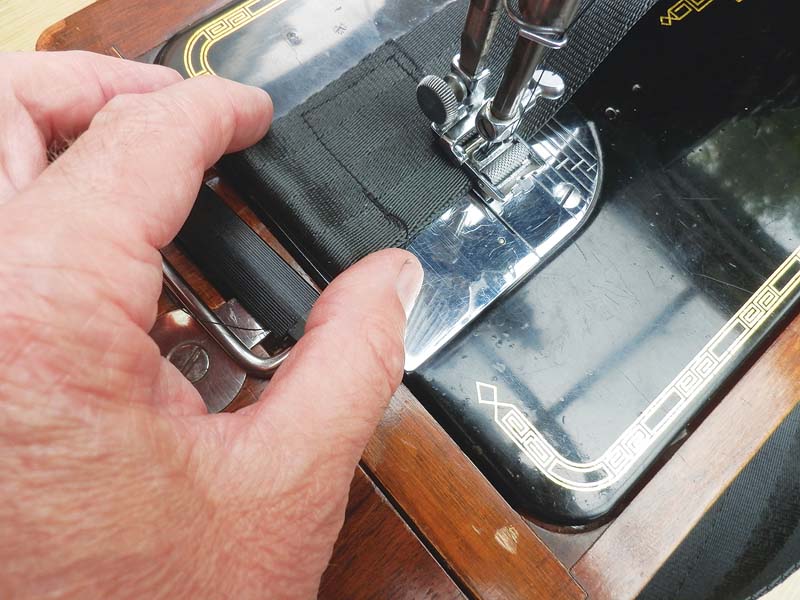
2) The first job is to sew in the buckle. Give it a generous hem, at least 11⁄2in (40mm), then sew around all the edges and across the diagonals too for extra strength.
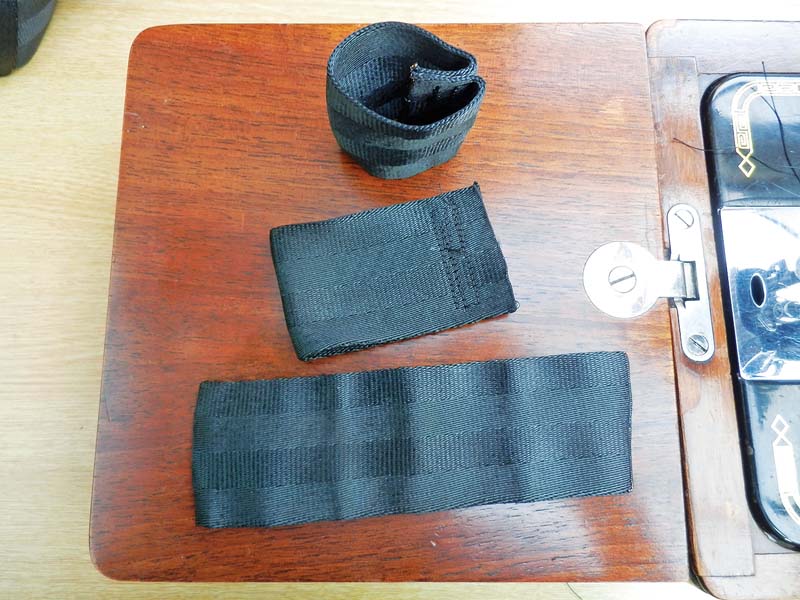
3) To make the retaining loops, cut a short length about 5in (130mm) and fold it in half. Stitch the open side securely as shown with the example in the middle of the picture and then fold it back in on itself (top).

4) The straps with the buckles sewn in and two retaining loops slid over. For accuracy it is easier to determine the finished buckle/side length and the length of the tails by offering them up to the job on board.
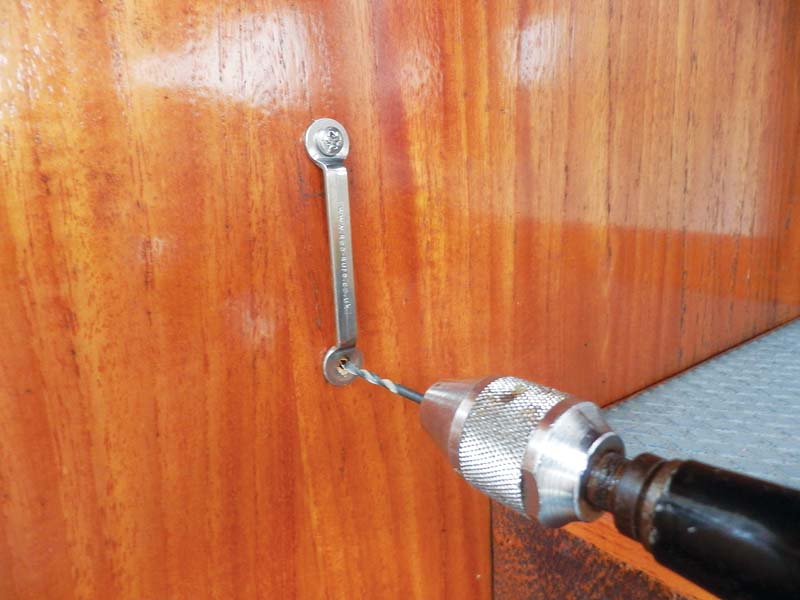
5) Mark up the position of the bridges and drill the fixing holes. Here screws are used to secure them but they could also be through bolted if necessary.
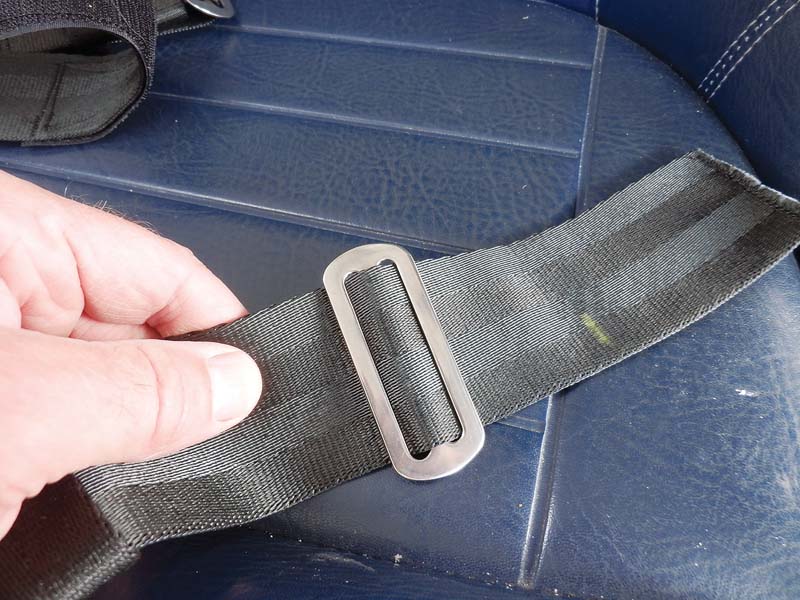
6) Determine the length of each side of the strap and then fit the sliding bar buckles which allow fine adjustment of the length of the webbing once fitted. Fit the bar on the attachment end before feeding the strap through the bridge.

7) This is how the sliding bar buckle works with the open end fed back through the bar itself to form a loop which goes back around the bridge. Experiment like this first and you can then work out the best way to fit it for neatness.

8) I fed the tail of the strap (a heat-sealed end stops it fraying) from the outer edge of the bridge, and back through the buckle so when secured the tail end can be neatly hidden by slipping under a retaining loop.

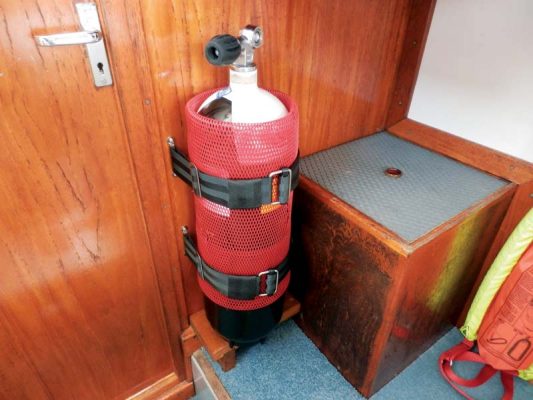
9) The tank on its new stand complete with the retaining straps. Using buckles and webbing keeps it secure and neat but also easy to undo when required.
As published in the February 2019 issue of Practical Boat Owner magazine.