
Regular maintenance and inspection of the standing rigging is essential on any yacht. Mike Pickles, foreman at Harbour Marine Services, Southwold, highlights where to look for those hidden dangers and shows how to check your rig while the mast is down over winter

When boats are out for the winter and have been chocked and winterised, it’s the ideal time to thoroughly check – and if necessary upgrade – the standing rigging.
Around half of our customers also have their rig unstepped for winter, with the wooden masts hung up in one of our sheds and the alloy ones either on an outside rack or used as a ridge on the boat which can then be covered.
As a yard we prefer the rig to be down for the winter, especially on deep fin yachts.
When the gales start blowing in quick succession it’s always a worry looking at a 12m yacht standing 3m high with a big 13m wind catcher stuck on top. The boats tend to rattle in the cradle during a blow and the cradle props need almost daily adjustment when the weather gets particularly grotty. Couple that to hull designs that really weren’t designed to sit on dry land, then given half a chance these designs would love to wriggle free and nosedive into the dirt.
Stepping and unstepping
The actual process of unstepping a rig is quite easy and using our crane three of us in our boatyard can usually manage four or five a day. That said, a rod rigged X43 took me almost a full day to get the mast down and tidied up a few days ago.
We encourage owners to reduce their costs by removing the sails and boom; we also recommend they pull halyards through clutches and deck organisers and pull out the locking split pins in bottle screws.
Often the most complicated element is disconnecting the electrics and electronics, which in many cases involves dropping the headlining. However it is always advisable to take a number of photos of the connections before disconnection. All of which at least doubles the time needed to drop the rig – which at £30 per hour yard cost can add up to a tidy sum.
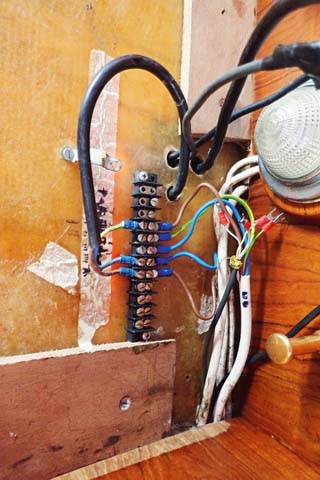
As a record of where all the connections are made we take photos of the mast wiring before unstepping the mast.
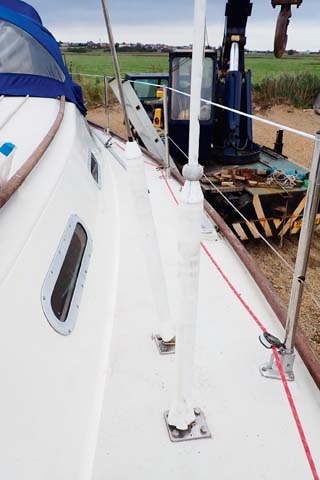
Stepping the mast is really just a reverse of unstepping, though keel-stepped masts can be awkward on bigger boats. Often there is very little space, the crane driver can’t see below decks and there is very likely to be lots of shiny varnished wood in the vicinity. Oh and don’t forget to thread the mast through the saloon table on the keel-stepped Victoria 38, as I once managed to do… oops!
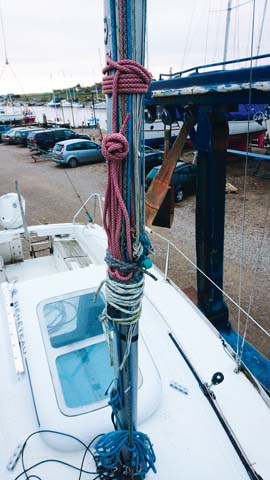
Once the wiring has been disconnected and the halyards and shrouds tidied, the mast can be removed

Most rigs can be craned using a strop just below the spreaders. Twin or triple spreader rigs will usually mean we need to sling higher than the lower spreaders
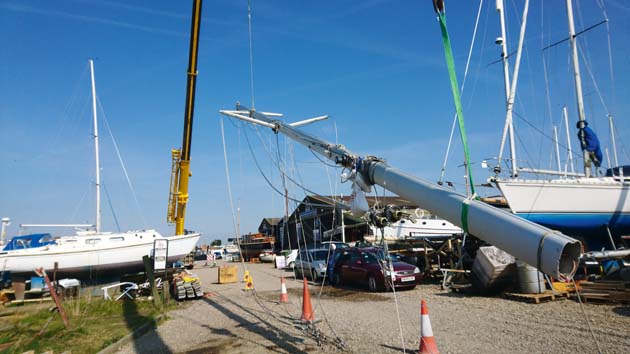
We sometimes have to draft in a bigger crane for masts over 70ft (20m)
The perils of plastic covers
With the rig down it’s an ideal opportunity to check the rigging, anchor points, spreaders, track and masthead sheaves, fittings and the like. In my experience you won’t find much wrong with the wires, the trouble always tends to be at the terminals at either end or, in the case of the cap shrouds, sometimes at the spreader ends.
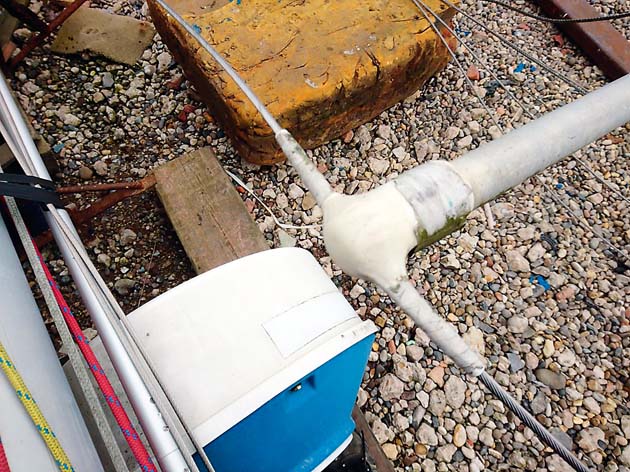
This relates to those who have not fitted plastic shroud and/or bottle screw covers and to some extent plastic spreader end caps. For those who insist on fitting these satanic accessories, the life of the wires can be significantly reduced.
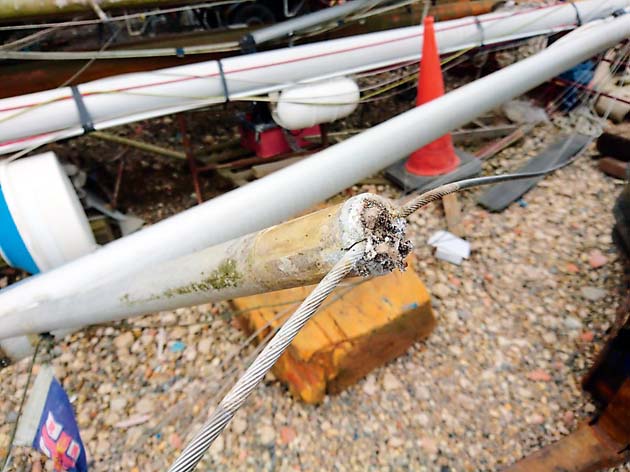
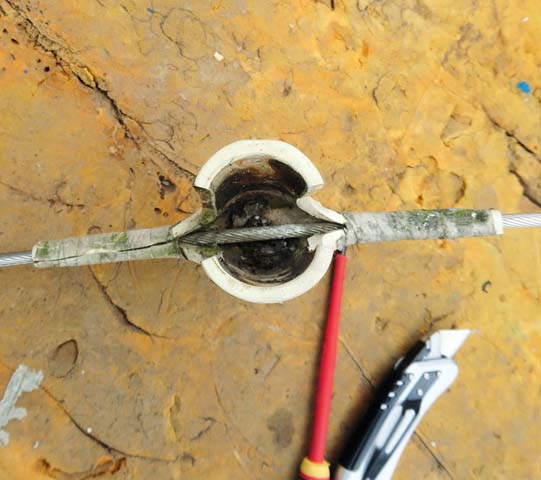
Due to the spiral nature of the wire, water, salt, crud and grime will wind its way inside the plastic cover. The wire gets coated with grime effectively sealing the inner core wires from oxygen which leads to a breakdown in the stainless steel surface protection which then leads to corrosion and failure.
The same applies to PVC-coated guardwires which, quite rightly, have been banned on participating boats by the organisers of the Atlantic Rally for Cruisers (ARC). If you have plastic-coated guardwires that are there to save your life, throw them away and replace with plain stainless or at the very least strip away the plastic coating. Just remember that stainless steel requires oxygen to maintain its protection qualities and anything that reduces this is an avoidable risk.
Another prime candidate for corrosion is at the spreader ends. Most spreaders are aluminium and these often have a stainless pinch bolt clamping the alloy end piece onto the stainless wire. Alloy and stainless are not great together at the best of times so covering them with a plastic cap and taping them up increases the likelihood of corrosion. Yes it might save a little bit of wear on the rare occasions that you over-sheet the genoa or ease the mainsail so far out that it touches the spreader end, but is it worth it?
Shroud and bottle screw covers look nice, but the normally shiny stainless steel wire will be dirty, grimy and possibly corroded underneath. The bottle screws will be stiff to adjust with the chrome peeling off.
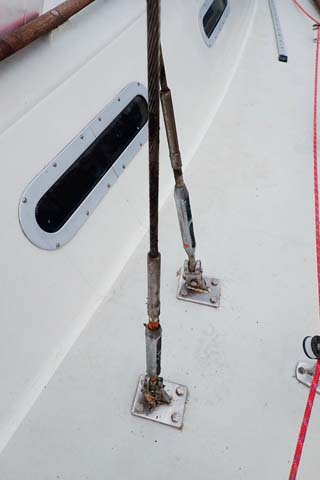
Beneath Shroud and bottle screw covers: the normally shiny stainless steel wire will be dirty, grimy and possibly corroded underneath. The bottle screws will be stiff to adjust with the chrome peeling off.
Spreader end caps look innocent and might seem like a good idea but removal of the cap often reveals the horrors hidden beneath. Either get used to removing and cleaning the end caps regularly, or find another way to protect your sails against chafe.
Spreader end caps look innocent and might seem like a good idea but removal of the cap often reveals the horrors hidden beneath. Either get used to removing and cleaning the end caps regularly, or find another way to protect your sails against chafe.
Spreader end caps look innocent and might seem like a good idea but removal of the cap often reveals the horrors hidden beneath. Either get used to removing and cleaning the end caps regularly, or find another way to protect your sails against chafe.
You could try and isolate the stainless from the aluminium by using Duralac or similar coating but I’d rather make sure there were no sharp sticky-out bits and add a small wear patch on the sails in these areas, after checking if it’s actually really needed.
Rig replacement intervals
Insurance companies seem to vary their requirements for a standing rigging change. Some say 10 years, some eight years and some also specify a maximum sailing distance like 20,000 sailing miles.
The plain fact is that apart from spotting obvious wire damage like kinks, broken strands and cracks in terminals, its pretty much impossible to check the condition of the wire core or the internal section of a swaged terminal, which has largely led to the age limit being imposed.
I have my own rule of thumb which applies only if the rig looks in good condition:
Eight years for terminals and hence wires
12 years for bottle-screws
16 years for chain-plates.
Stripping the mast of the old standing rigging generally only takes a few minutes, though dismantling of spreader end clamps can require WD40, patience and sometimes a bit of localised heat.
Furling systems
Invariably the time-consuming element is stripping out the forestay from a furler spar. Depending on the make of the furler this can take an hour or so and run the risk of ball bearings escaping in all directions. I find early Furlex systems can be a bit tricky in this respect. Pro furl systems are easier and Harken is by far the most straightforward.
Many of the older systems like Hood and Rotostay are no longer in production. These and others fitted their own terminals used in the lower drum bearing. Therefore care is needed when dismantling so that you can reuse this part. Also always remember to run a mousing wire up through the spar so that the new wire can be pulled through later. In some instances, we will have to get a new terminal machined up if the old furler is to be kept.
Pick terminals you can trust
We use Sta-lok for our wires and terminals. We’ve used other, cheaper suppliers in the past and have regretted it 18 months or so later, usually due to discolouration of the wire or chrome flaking off the bottle screws. Sta-lok inform me that they only source their wire from KOS Wires and in their opinion the wire finishing process is simply superior to other suppliers.
I usually just coil up the wire, label it and send it off to Sta-lok where they simply reproduce it using new wire and swage ends. Normally we will also specify Chrome Bronze bottle screws as opposed to stainless steel as stainless does tend to stiffen up making it difficult to adjust under load and can run the risk of cold welding (which is not uncommon).
I would say a fair percentage of owners don’t actually realise their bottle screws are chromed bronze, most believing that they are stainless. Recently we changed the standing rigging on an Oyster 435 and we used the impressive new Sta-lok Supajust turnbuckles which have a polished 316 Stainless body with threaded bronze inserts permanently fixed in each end.
When I make up rigging for a new mast I tend to use the Sta-lok self-fit terminals at both ends and cut the wire myself from our stock. Sta-lok terminals are very good quality: I’ve seen their impressive manufacturing facility and that gives me confidence in the product.
They are also easy to fit once you get the hang of it and tests show that they are stronger than conventional swage and certainly stronger than the wire itself.
The fittings are more expensive than standard swage fittings but they are reusable (with a new wedge) making the next rig change much cheaper because you’ll only require new wire. Invariably you’ll need to use a self-fit terminal for the forestay as you won’t get a swage terminal through the furler spar.
When the rig is down
With the rig down it’s also time to inspect all the terminal points, spreader brackets, masthead fittings and other equipment mounts such as radar reflectors, radar, antennas and the like.
In a lot of cases the mounts at the hounds, masthead and the numerous other brackets will be using 316 stainless fittings and bolts. You really need to ensure there is adequate isolation using Duralac or another isolator, otherwise these dissimilar metals will lead to corrosion on an aluminium mast.

OLYMPUS DIGITAL CAMERA
Check the condition of the electrical cables and light fittings. Do not be tempted to swap the old fashioned masthead light bulbs for LEDs unless the lens has been specifically designed for them. You could find you invalidate your insurance.
Another area often overlooked is the halyard sheaves. As standard they tend to be plain bearing nylon, bronze or aluminium turning on a stainless pin. The main halyard sheave is subjected to the most wear and it’s well worth swapping the sheaves about to take this into account.
One small but significant upgrade is to swap the main halyard sheave out for a ball bearing variant from Harken, Ronstan, Garhauer or similar. The difference almost always pleasantly surprises the owner as suddenly they can hoist the mainsail more easily, often negating the use of a winch. The only downside, if you can call it that, is that the sail drops a lot faster – which can catch you out for the first few drops.
Another modification we carry out on a regular basis is to convert the main halyard into a 2:1 system. This is especially useful for those of us who are knocking on a bit and starting to lose power in our shoulders when hauling up the main.
Essentially, one end of the halyard is terminated at the top of the mast. It passes from there through a high load block attached to the head of the sail and then back to the top of the mast through a ball bearing sheave and down. The disadvantage is that you have twice the length of halyard to deal with at the bottom, but the upside is you’re suddenly twice as strong. It also has the benefit of allowing you to drop down to a smaller rope size, reducing friction still further.