A correct installation and regular checks of your boat's gas system are vital for safety. Here's how to check your boat and its gas system - and we follow a professional gas checker for a final inspection
Considering gas is the most dangerous substance likely to be on board, you’d be surprised how far down the list most people place the safety of their gas system.
Many boats have dangerously old and outdated installations, but it seems owners are loth to replace them. It’s seen as a minor job compared with tasks with more visible results, like painting the hull or servicing the engine. But a safe set-up and regular checks of your gas system are jobs that could do more than anything else to protect you and your boat.
Many insurers require a Gas Safety Certificate, particularly on purchase, so they know they’re insuring a safe boat. If you use your boat for charter, the MCA’s coding requirements mean you’ll need a certificate before the boat is passed as fit for use – and it’s much the same if you live aboard or keep the boat on inland waterways. But what’s actually involved in a gas check?
I tagged along with David Brooks of Gas Check Marine while he checked one boat over and installed a new system on another. He installs and checks gas systems on boats all along the South Coast.
Gas checks
The basis for the standard adhered to is the Boat Safety Scheme, designed for inland waterways. Many insurance companies won’t cover you if your system is outdated or dangerous. Or in some cases they’ll issue an exclusion to gas-related claims.
‘In a marina, you could cause a lot of damage with a gas explosion,’ David points out, ‘And the boats around aren’t likely to be impressed when they’re left with the bill.’ What’s more, it’s a serious safety risk: only last year, a man died in Poole when a gas leak ignited and burned the boat to the waterline.
For a Gas Safety Certificate your system needs to be checked by a Gas Safe registered (previously CORGI certified) engineer. That can be pricey if you’re having a whole system installed, but you can save money by doing much of the work yourself before employing an engineer to check and test the system for its certificate.
A gas check costs in the region of £60, so if you attempt the work yourself, it’s worth making sure you do it right first time – otherwise it’ll cost you more time and money in remedial work. If you have any doubts, get an engineer to do the installation for you: it’s not worth messing around with gas, and you’ll have peace of mind that it’s correctly installed.
Boat Safety examiner, Andrew Phasey, explains the regulations regarding gas safety:
‘If your privately-owned boat is used by you for leisure or sporting purposes, there is no legal requirement for you to use a properly trained, qualified and Gas Safe registered operative to work on the gas system of your boat’.
‘You are required, though, to ensure that the work conforms to PD 5482-3:2005, the code of practice for installations in boats, yachts and other vessels of lengths up to 24m.
‘Furthermore, under the Health and Safety at Work Act 1974, you must take account of the health and safety of yourself and other persons who may be affected by your acts or omissions.
‘If, for example, you fit a gas appliance to your boat, best practice recommends that you employ a Gas Safe registered operative, who is qualified to work with LPG on boats, to examine the gas system and appliance. If the requirements of PD 5482-3:2005 or BS EN ISO 10239:2000 are met, the Gas Safe operative will issue a Gas Safety Certificate. This examination and certification may well be a requirement of your marine insurer.’
Most of the parts detailed here are available from chandleries or specialist companies like Aquafax. Buy the best you can afford, and if you need to bend a pipe more than a few degrees, it’s worth trying to borrow or buy a pipe-bending tool. Here are 16 checks that you should be able to do yourself, to get an idea of whether your system will need replacing or not. But remember, installations should only be carried out by competent persons. If that’s not you, and you’re not confident, get someone else in to do the job.
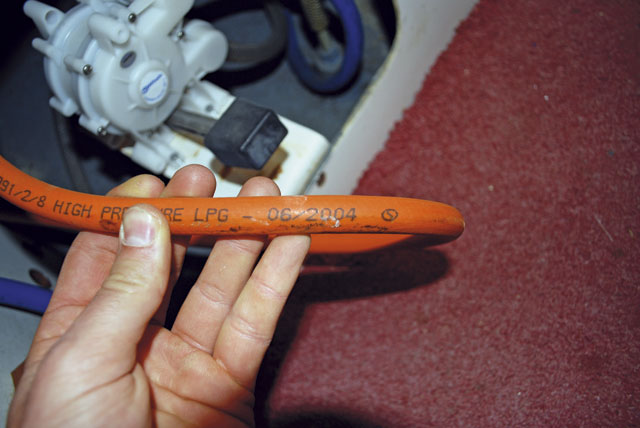
Check any flexible hoses for their manufacturing date, stamped on the hose itself – and replace within 5 years
Flexible hose length
Flexible hoses should be no more than 1m long, and should be stamped with the British Standard BS 3212/2.
Hose integrity
Check any flexible hoses for cracks or degraded parts. Even if undamaged, they should be replaced five years after date of manufacture – this is printed on rubber hoses and stamped on armoured ones. This should be checked annually.
Flame failure device
Modern cookers are equipped with a thermocouple device that shuts the gas supply off if the flame is extinguished. Light the gas, then turn the gas knob off. You should be able to hear a definite ‘clunk’ as the supply is shut off after no more than 60 seconds. If it takes longer, you’ll probably need to replace the thermoelectric valve.
Olives
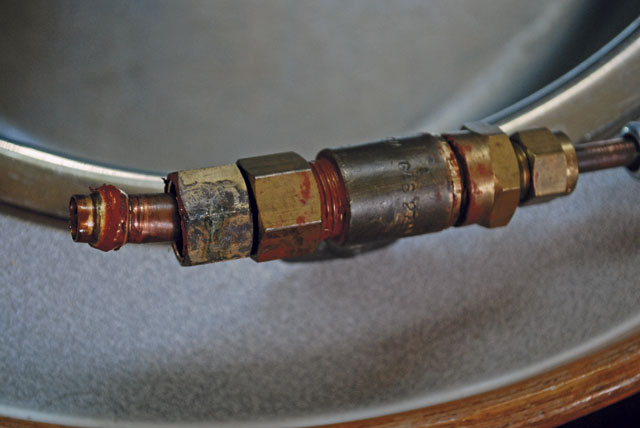
Olives, the short compressible packing pieces inside a pipe joint, should be copper, not brass, when used for gas fittings. Many shut-off valves are sold with brass olives, which don’t form as good a seal with the copper pipe. They should also have square edges, not long tapers, to form the best seal.
Sealant
You don’t need to use sealant on gas joints. It can dry out, and once that happens it’s no longer flexible and can compromise the seal, causing a leak – this is a poor joint.
Regulator
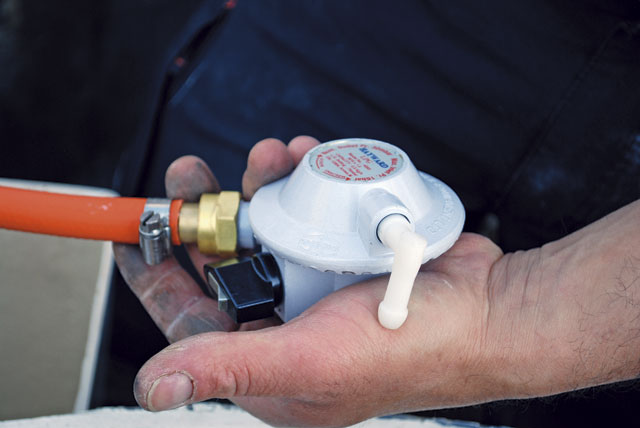
Buy a good quality regulator, ideally with a good ‘overpressure’ vent. Some cheap caravan and camping gas regulators have small holes which can corrode and close up in a salty environment. The best type are marine regulators with stainless steel innards to cope with corrosive marine conditions. Regulators should be checked often and replaced at least every 10 years.
Locker
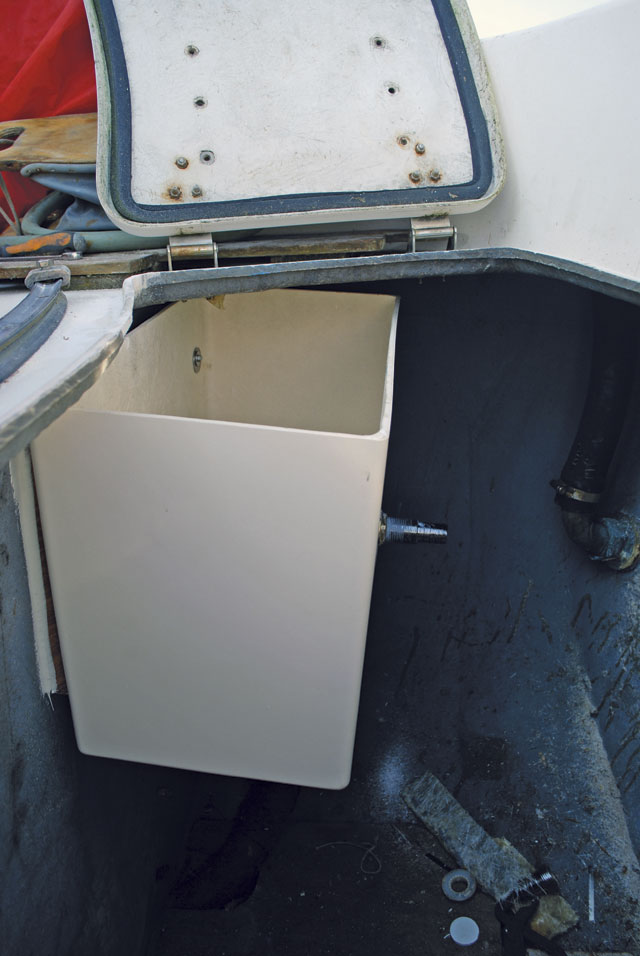
A gas locker should drain to the outside, never into a bilge. Check the drain hole for blockages. The locker should have a lid to keep gas in and water out, and no extraneous openings. If completely airtight, you need a second breather intake to keep the locker pressure at atmosphere.
Drain hose
The hose should be good quality, and preferably fuel hose, which is fire retardant. It should have a minimum internal diameter of 19mm.
Hose clips
Any hose clips should be stainless steel and must be ‘worm drive’ Jubilee-types, not the ‘crimp’ type.
Pipe installation
Copper pipe should be run as high as possible above the bilge level, and above locker drain level.
Run of pipework
Where the pipe runs through a bulkhead, it should be protected, either in a plastic tube to prevent chafe, or by using a bulkhead terminal fitting. It should be supported every 500mm by a P-clip, and every 150mm either side of a join.
Pipe diameter
Modern cookers, which have ovens, grills and multiple burners, can use a lot of gas. Therefore, it’s important the pipe has sufficient capacity. Ideally, it should be 10mm (3⁄8in), not the 6mm (¼in) often used in the past. The bigger pipe also has a thicker wall, making it stronger and safer.
Shut-off valve
The shut-off valve, which should ideally be turned off whenever you don’t use the cooker, should be positioned so you can turn it off without having to reach over or around the cooker. This one is located behind and in line with the cooker – bad idea!
Overhanging items
Make sure no curtains or other soft furnishings overhang the cooker. There should be heat-proof material, like the aluminium shown lining this galley area, behind and around the cooker.
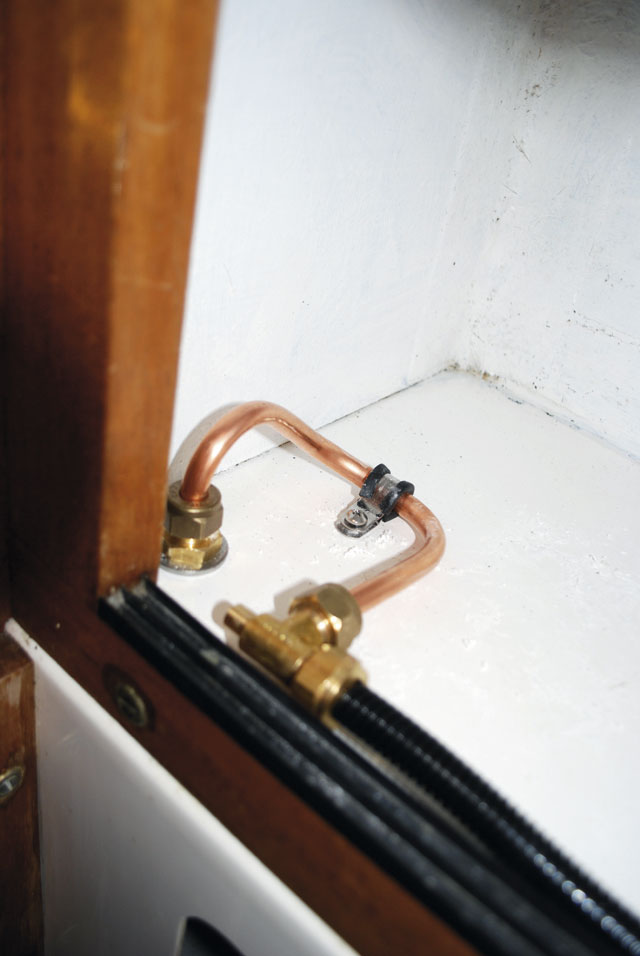 Test point
Your gas system needs a test point where an engineer can attach a manometer to check the system over. Modern cookers should have these, but on older systems, you’ll need to install one near the cooker.
Proximity to electrics
A copper gas pipe should not be run within 30mm of electrical cables and within 100mm of open-ended electrical terminals. It should be sheathed in plastic pipe or conduit to protect it from corrosion and damage.
A COMPLETE NEW INSTALLATION
We followed David Brooks as he installed a new system on board Palikonda II, a Westerly Berwick. Her new owner’s insurance survey had flagged up the gas system and the insurance company required a certificate before they would provide him with cover. The existing system ran from a wooden, non gas-tight locker bonded to the inside of the transom, through the bilges to an elderly Plastimo oven via a 2m-long flexible, non-armoured hose. Hardly any of it met with current regulations.
Locker and drain
David installs a flame-retardant GRP locker in the lazarette, with a 19mm drain hose to a skin fitting on the transom and a tightly-fitting lid. He uses fuel-grade hose, which is fire retardant. The regulator he uses is a marine ‘Gas Boat’ brand, with stainless steel parts.
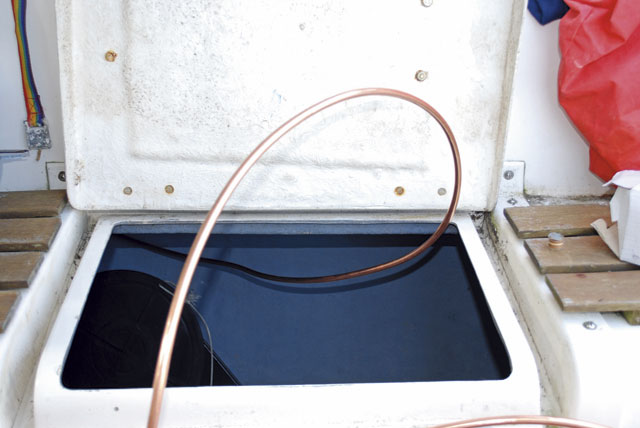
Palikonda II’s new gas pipe runs from the gas bottle locker, forward through a cockpit locker at gunwale level to the saloon bulkhead
Pipe run
From a bulkhead fitting, the pipe runs at gunwale level through the cockpit locker and to the bulkhead at the aft end of the saloon. David uses black plastic conduit to protect the pipe from water and damage, and uses stainless steel P-clips to secure it every 500mm.
Valve
David installs a shut-off valve a good distance away from the cooker, removing the brass olives which came with it and replacing them with copper ones.
Test point
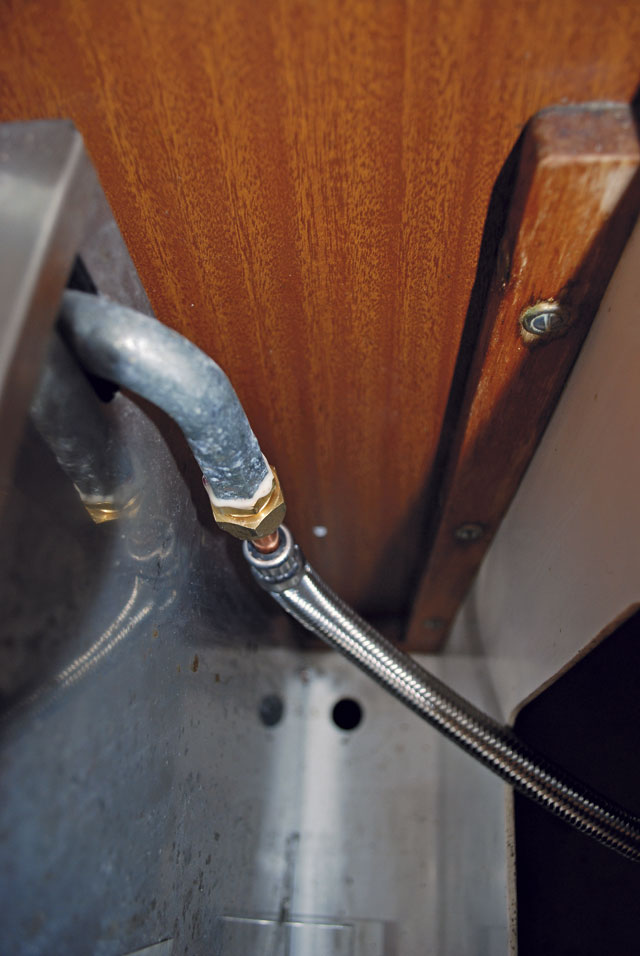
Just before he joins the copper pipe to a flexible hose, David installs a fitting with a test point where he can connect his manometer. He bends the copper pipe so as not to create sharp kinks or take up too much space in the locker.
Flex hose to cooker
Finally, David can connect up the cooker, using an armoured hose between the cooker and the copper pipe.
GAS CHECK – WHAT DOES A GAS CHECK INVOLVE?
So you’ve done your bit, and it’s time to call in an expert to make sure your installation isn’t a ticking time bomb. Once David had finished fitting the new system to Palikonda II, he disappeared to his van and emerged with a pile of specialised equipment. First off, he checked the items detailed in our DIY checks section, before testing the system for leaks. Don’t try to do this yourself: you must get a professional in.
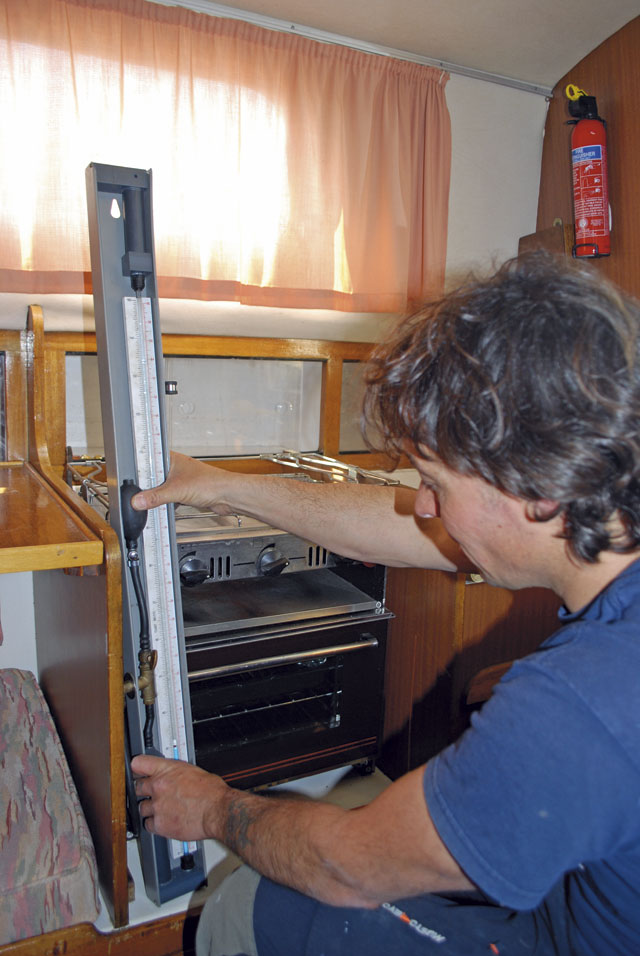
1 David removes the blanking screw from the test point before connecting his manometer. This pressurises the system, and gives a pressure reading on the scale.
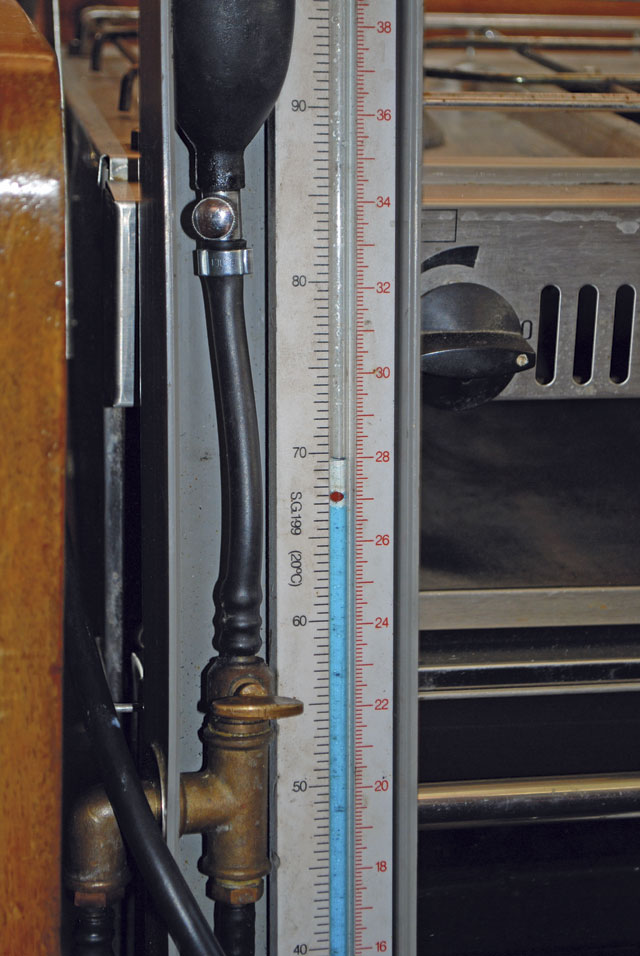
2 The system is pressurised to 30mb, normal pressure. New systems are then tested at 31⁄2 times the normal pressure. Pressurising the system like this tests everything between the valve and the regulator for leaks.
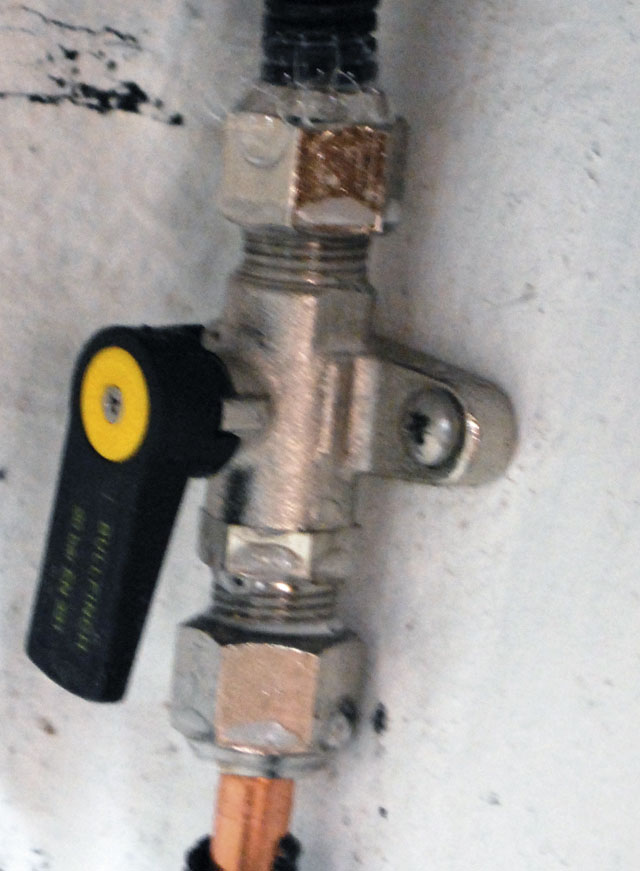
3 If there’s a leak, David sprays any likely culprits – for instance, joints and connections – with gas leak detector liquid – which bubbles up around any air leak. ‘We used to use washing-up liquid’ said David, ‘but we found it ate away at any brass fittings’. He then tightens the fitting until the leak is gone.
4 The tester is left for five minutes to stabilise, then pressurised again and left for five minutes to test it, before the regulator is shut off and the system is tested for a further two minutes to check it doesn’t ‘let by’ when closed.
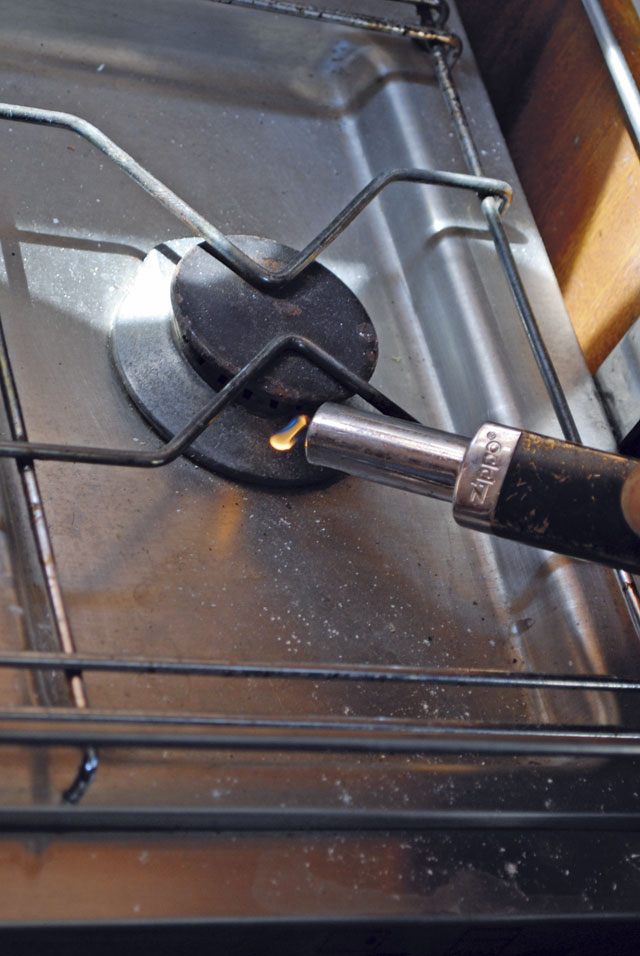
5 David then purges the air in the system using the cooker’s burner, but holds a naked flame next to the burner in case there is any gas present.
6 Finally, David lights all the cooker’s burners, checking the pressure reading as he does so. There should be no more than a 2.5mb drop between the readings taken when only one burner is lit and when all burners are lit at once.
Many thanks to David Brooks of Gas Check Marine, www.gascheckmarine.co.uk, 02380 453633, for his help with this article.


