
Is this boat seaworthy? Ali Wood gets an insider's view of what the marine surveyor is looking for in a pre-purchase boat survey
Thinking of having a boat survey? If so, take a look at this video of marine surveyor Ben Sutcliffe-Davies as he performs a pre-purchase survey on Maximus, a Maxi 84.
The 43-year-old Swedish-built 28ft cruiser is PBO’s latest Project Boat, donated to us by reader Daniel Kirtley.
As PBO’s features editor, I’m normally confined to a desk and editing other people’s renovation stories. As Maximus’s new owner, however, I’m doing it for real, and hope to get the boat back on the water this autumn.
Filming the survey proved incredibly useful, so if you can find a surveyor like Ben, who’s willing to let you stay and observe the process, there’s plenty to be learned… especially if you’re a first-time boat owner like me.
“Surveyors should be considered like GPs,” says Ben. “We’re here to identify the problems and identify what’s not right – for example, the rigging, the gas, etc. – but then you need to call in the specialist for further investigation.”
THE HULL
Ben was holding a Tramex moisture meter up to the hull when I arrived.
“How does she sound?” I asked.
“Ridiculously dry,” was Ben’s reply. Well, that’s a good start, I thought.
No osmosis
Osmosis is a worry for boat owners, and whilst there was no sign of the tell-tale blisters, it’s still important to check the hull’s not compromised by high moisture ingress, delamination, hull stresses and possible damage.
“Once we get inside we’ll probably find there’s water inside the bilges,” advised Ben, “I know there’s a water leak because I’ve just seen one, but externally the hull to me is in pretty good nick.”
Woven rovings versus chopped strand matt
Maximus is built in GRP using a grey gelcoat backed with polyester resin, the layup is woven rovings and chop strand matt. Ben explained why woven rovings – common in Scandinavian boats – indicate a good-quality build.
“These countries tend to build more woven rovings than the chopped strand mat you get in Westerlies and other UK boats of this age,” he said. “Woven rovings are less susceptible to moisture because they haven’t got loads of end filaments, whereas a lot of our UK boats have very short filaments – what’s known as chopped strand mat – and when moisture gets into those it’s a lot harder to dry out.”
Ben explained that when laminate gets saturated it loses about 25% of its strength and that’s when you start to see high moisture meter readings.
“When you see the boat rested down on its keel you see the hull is actually sagging over the top of the keel and likewise when the boat is lifted and you give the keel a bit of a push you’ll see the hull start to oscillate.”
Moisture readings
Fortunately for us, Maximus’s hull was dry. The meter is an impedance/ resistance meter with a scale of 1-100. The readings of the topsides were recorded at 10-18 and the underwater areas between 15 and 30.
Interestingly, the meter started beeping at the forepeak and in the aft starboard pilot bunk near the anode fastenings – areas where we later identified standing water from deck leaks. The needle at these points whizzed up between 45 and 70.
As well as using the moisture meter, Ben walked around the hull tapping it with a ball pein hammer.
“You can get an idea of where everything is just by listening,” he said. “I’m not smacking it, it’s just a gentle knock.”
Boat owners are often alarmed to see the hammer come out, but what they don’t realise is that when the boat first comes out of the plug it’s tapped all over to ensure there are no voids in it.
The hull had good symmetry and by using the hammer Ben was able to rule out any issues of detachment or deterioration of the plywood framework.
“You can hear the hull is actually really nice and crisp and there’s nothing there that really worries me at all,” he said.
Verdict: Hull moisture readings very acceptable for a craft of this age and the fact she’s been out of the water for over two years has made a significant difference to the moisture levels. However, it’s essential to regularly ensure the lockers and bilges are kept dry.
ANTIFOULING
The antifouling is a mixture of blue erodible antifoul systems, and was extremely flaky. Ben scraped back an area and showed me the early epoxy coating system underneath.
“You can see a fairly loose antifoul product at the top which is an incompatible product to the one underneath,” he said. “If you look really closely, underneath that you can see a grey and a green where the epoxy manufacturer has used two different colours.”
Verdict: Scrape back the antifoul to the epoxy finish, prepare the surface and apply a suitable primer and antifoul system
TOPSIDES
The topsides were not easy to inspect, being covered in bird poo, grime and algae, though Ben did detect where there had been a repair.
“You can see someone’s tried to wet and dry too much and they’ve actually started going through to the laminate below. You’ve really got to be very careful about doing much more here in the way of t-cutting,” he advised.
The repair from the gelcoat didn’t match the original colour but Ben was happy the topsides were in fair condition for their age.
Verdict: Compound and polish topsides. Note, further surface defects may be identified once clean
RUDDER
Before checking the rudder, Ben tested the helm from hard-over to hard-over, with no issues. He then hammer-tested the rudder with no sign of poor reverberations, which would indicate a problem with the laminate. Maximus’s rudder is transom hung and supported on a gudgeon and pintail arrangement at the top of the transom and a stainless steel shoe and strap supported off the small GRP skeg.
Rudders frequently hold moisture because of their split-moulding design, but there were no obvious osmotic blisters. Ben did, however, note some light play in the lower bearing from the bush being worn, and he pointed out that with stainless steel fastenings there is a risk of crevice corrosion.
Verdict: Monitor lower rudder bearing and consider replacing the fastenings
KEEL
Ben was satisfied with the cast iron keel, and there was no evidence of damage.
“You’ve got a nice keel joint here,” he said. “It’s a stepped keel joint which is actually a lot stronger, especially from an impact point of view.”
He tapped along the laminate and pointed out that when there’s delamination you can hear the difference in the thickness. Fortunately, there was no hollowness here – though there was an awful lot of antifouling hanging off.
There was a lot of mastic stuck in the keel joint (not for structural reasons, but to provide a smoother surface for the antifoul). Ben scraped a lot out with the sharp end of the hammer to reveal a nice, bright gelcoat.
“This is a point where it really it wants a good clean off,” he said, pointing out corrosion at the joint. “As you can see, it’s pretty much contained to the iron keel and it hasn’t damaged any of this. I can’t get my fillet knife in, which is a good sign. I’ve been to some jobs where you can actually push the knife in as the corrosion has actually jacked the two apart.”
Check for movement in the keel
Though pleased that the joint was really tight, Ben did advise that when the boat is lifted on her strops ready for launch, to get the boatyard to check and sign-off that there’s no movement of the keel before Maximus goes in the water.
Later, when Ben was inside he inspected the keelbolts and was astonished to find only five.
“On modern boats now you rarely see less than 8 or 10 fastenings,” he said, shaking his head.
He suggested at some point drawing a couple to see what they look like, especially given the known development of crevice corrosion in the hull-keel join, but this isn’t urgent. First of all, we could simply inspect the keel when Maximus was lifted on her strops.
“There’s certainly no movement, no moisture, it looks good,” he added. “Certainly from the external point of view there’s no movement at all.”
Drawing keelbolts
So what would be involved in drawing the keelbolts? I asked.
“You slacken off the nut a fraction, put a lock nut on top and basically unwind them and draw them out of the keel casting,” said Ben. “With this I would draw the rear fastening because if any are going to be bad, it’s always the back one which is more susceptible. Really, everyone worries about taking keels off but it’s not really that hard with a boatyard and a lift.”
After undoing the fastenings you’d need to break the joint. Ben has seen some keels stay put, even when lifted and the bolts removed, because the mastic is so strong!
“You then replace the keelbolts and get the keel shot-blasted – get all that corrosion of, epoxy it and you’ll be good for another 30 years.”
Verdict: Clean off the corrosion at the keel joint. Check for movement when lifted. Consider drawing a keelbolt in the future.
COCKPIT
“You’ve got some fantastic compost here,” joked Ben, scooping out the piles of dead leaves that had gathered in the cockpit. “When boats are stored ashore it’s really important to make sure they’re level.”
The build-up of dead leaves had allowed moisture to run through the cockpit locker.
“Damp lockers are common, where everyone chucks their wet ropes and equipment in them, but in this case it’s probably been caused by the fact the boat’s been stored ashore and there’s nowhere for the water to go other than in the locker.”
Companionway leak
More alarming was the leak from the companionway hatch where the washboards weren’t correctly sealed and the slider was butting the top washboard and not closing. Later, we’d realise this had caused damage to the engine brackets and plywood casing.
The cockpit was self-draining via two drains through the transom – though surface corrosion to the copper piping will need monitoring.
Ben disappeared almost entirely in the port locker when he went inside to inspect the vent.
“Surveyors have to be really careful not to get trapped in lockers,” he said, “It happens, believe me!”
Detached conduit pipe
In the locker he discovered a small motor for the fridge, secured in a wire guardbox, and that the conduit pipe that draws air to the engine had become detached.
Either side of the companionway were two Barlow 16 winches and cam cleats for uphauls, and in the cockpit was a pair of Barlow 24 genoa winches.
Winches
There was some play in the winches, and they’re not self-tailing, so definitely something we’d consider replacing. However more urgent was the fact that the backing washers were seriously corroded and needed replacement.
“The last thing you want to do is haul on the sail and watch the winches being yanked off the deck,” said Ben.
Ben rubbed away at the aluminium plate beneath the tiller and managed to identify some of the writing, including the engine horsepower – 15HK (hästkraft is horsepower in Swedish).
“The bottom number is the HIN (hull identification number), or in their day, just the builder’s number as the Recreational Craft Directive (RCD) wasn’t introduced until 92,” said Ben.
Verdict: The cockpit will quickly drain should the craft get knocked down. Protect against water ingress through companionway, replace winch backing washers
GAS LOCKER
Ben knew immediately there was something wrong when he opened the aft locker to inspect the gas. There was visible cracking on the 20-year-old gas hoses.
“It’s recommended you change gas hoses like this every five years,” said Ben. “Some people say 10, but frankly for the sake of a couple of quid’s worth of hose, I don’t see the point in the argument.”
Not only were the gas hoses unsafe, but there was a makeshift gas locker – basically, a plywood box with a hole in the side of it to relieve the water and fumes.
“It’s not even fibreglass-lined, so there’s no guarantee it’s leak-proof… if you were to chuck the water in here I suspect it would leak everywhere,” Ben said.
To test the theory, Ben emptied a bucket of water into the box and it poured right out. “The gas locker is pointless,” he concluded. “If it’s not water-tight, any gas fumes are going to leak into the boat.”
Verdict: The gas locker requires significant upgrading for the storage of gas bottles.
DECKS
The moisture meter revealed high levels of moisture around the deck plugs by the mast step. When we looked at these, the screws had gone altogether on one of them and you could lift it out by hand. Not a good sign! The forward deck cleat was also leaking, as noted from the moisture to the backing pad in the forepeak cabin.
The anchor locker hinge was broken and the locker itself blocked with dead leaves (the bow is right under a hedge). When Ben pulled out the extremely rusty CQR, brown water dripped all over the decks.
Missing bow roller
Curiously, there was a (rotten) plywood backing pad for a bow-roller installation but no bow roller, which would be essential if we are to keep Maximus on a swinging mooring.
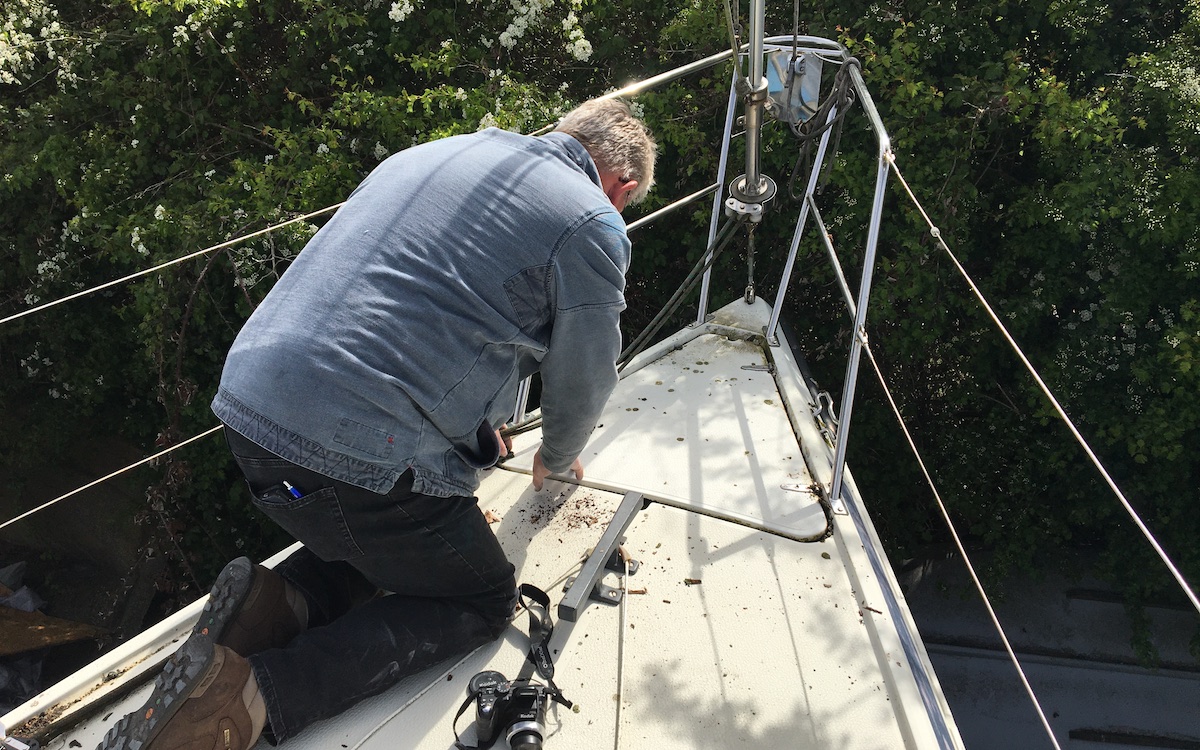
Later, when we spoke to the owner, Daniel, we learned that the bow roller had been ripped off in a collision with a Solent channel buoy!
The stanchions and guardwires were secure and there was little movement. Ben was satisfied with these, as well as with the pulpit and pushpit. Ben advised it’s prudent to replace guardwires every ten years and regularly monitor fastenings.
Bendy forward hatch
Unfortunately, the forward hatch was in pretty bad shape.
“Look, you can do CPR on this,” chuckled Ben as he flexed the hatch with the palm of his hand. “You certainly wouldn’t want to stand on this.”
We opened the hatch and Ben pointed out how the woven rovings had flexed out and lost their strength. “Perhaps it wants a bit of agitation and probably glassing in a couple of foam struts to take some extra support,” he said.
The lock also needs replacing. “If you’re sailing into a bit of a storm the last thing you want to be doing is relying on that to keep it shut.”
Verdict: Replace deck plugs, seal deck fittings, repair anchor locker hinge, strengthen foredeck hatch
ANCHOR
The CQR plough anchor was very corroded and needs replacing. The shackle and ground chain were also in very poor condition, as was the splice of the multiplate to the chain.
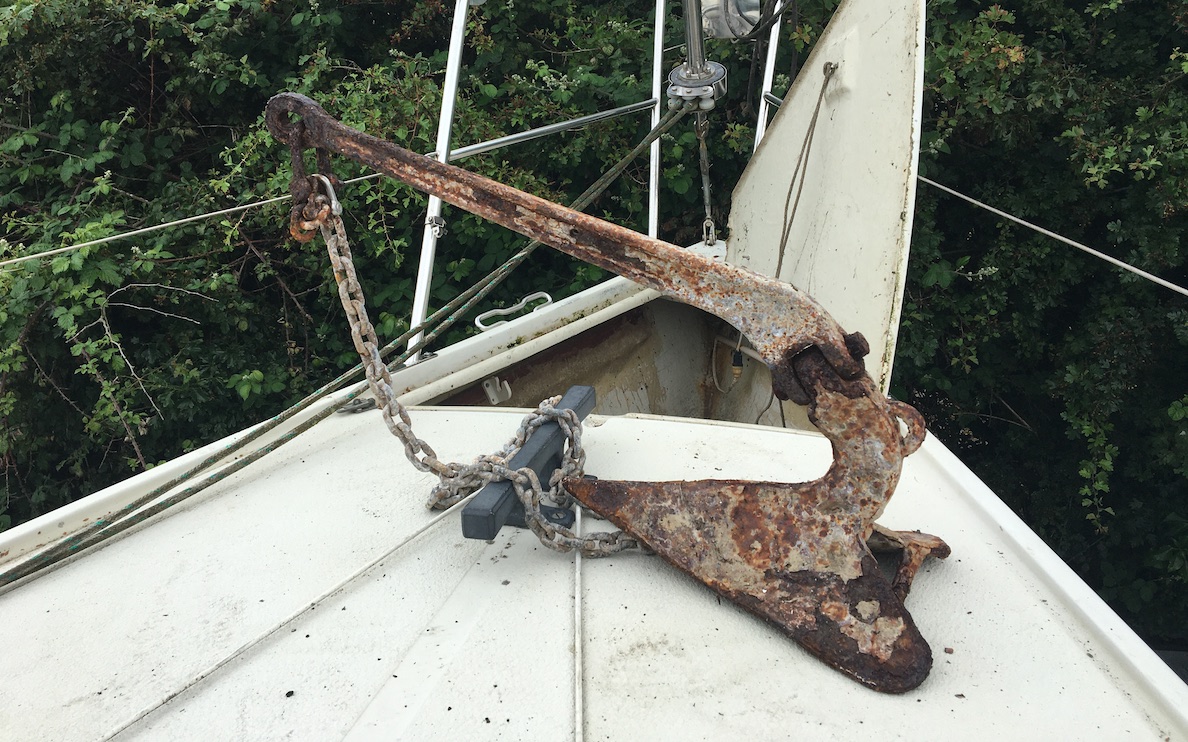
This very rusty anchor will need replacing
Verdict: Replace anchor, chain and rope run
MAST AND STANDING RIGGING
Maximus has a fractional rig and the mast is stepped in a deck shoe. All the fittings were secure.
Ben had a good shake of the rigging and noticed a little bit of movement in the spreader. “That needs looking at,” he advised. “Maybe there’s something missing, a washer or a sheave or something simple like that.”
Ben points out that boat owners shouldn’t rely on surveyors to check the rigging.
“A surveyor should be able to sight a mast and look up and see if it’s straight or bent if there’s damage to the track and likewise with the boom but to tell the general condition of a spar is a rigger’s job,” he said. “Really, after every 10 years the mast should come down regardless and be properly sighted and the housing looked at where the wire goes in.”
That said, everything Ben looked at – the bottle screws, the deck fittings, chainplates (which riggers never check) and their anchorage inside – seemed good.
“Certainly looking up, where the swages run into the mast, they all look fairly nice and straight,” he said. “Sometimes you’ll see, almost like a slight banana-ing of the wire, going in at an angle to the swage. That’s not good because that’s where the wire into the fitting will start to work loose.”
Gooseneck and boom
The gooseneck and the boom take a lot of wear and abuse, explained Ben, pointing to the boom socket. One pop rivet he described as ‘pretty dire’ and the other was missing altogether.
“When one’s gone and the other’s on its way, you’d be better to change all the pop rivets so you’ve got some reliability there,” he said.
Otherwise, apart from being green with mildew, the fractional rig and boom looked ok. The spars, sighted from deck level, showed no sign of impact or damage.
The standing rigging was last replaced in 2017 so it’s just as well it all appeared to be good. Replacement would have been a significant cost. That said, Ben recommended we put aside a couple of hundred pounds each year towards its replacement.
“Be mindful that no-one can tell when stainless steel wire can fail,” he said. “Have a rig check every five years.”
Verdict: Rig satisfactory, replace pop rivets to boom
RUNNING RIGGING
Unfortunately, the running rigging wasn’t in such good shape as the standing rigging. It didn’t help that the lines were crusty and green and horrible to the touch. I’d hoped that maybe a good clean with a pressure washer would go some way towards improvement, but Ben pointed out they were beyond this. The main halyard and much of the running rigging had hardened and succumbed to UV light damage, the mast lower blocks were seized, and where the upholds where left aft were in fair condition, the sheets required complete replacement.
Verdict: Replace all the running rigging, free-off all seized pulley blocks
ANODES
There was a zinc collar anode fitted to the saildrive leg, which was satisfactory, though Ben was unable to get any good resistance signal from it onto the leg casing. The propeller had its own anodes, one missing, though all should be replaced.
There was also a tear-drop anode with badly corroded fastenings that needed to be replaced.
Verdict: Depending on where the craft is to be kept the right type of anode should be fitted. Do not bond seacocks.
Thanks to our Project Boat Supporters

Dell Quay Marine, Osculati, Raymarine, Shakespeare Marine, TruDesign, Screwfix, Coleman Marine Insurance, MDL Marinas, Premier Marinas, seajet,, Clean to Gleam, West System, Farécla, Navigators Marine, RYA, Aqua Marine, Ecobat, Victron Energy, Scanstrut, T Sails and XP Rigging.
Why not subscribe today?
This feature appeared in Practical Boat Owner magazine. For more articles like this, including DIY, money-saving advice, great boat projects, expert tips and ways to improve your boat’s performance, take out a subscription to Britain’s best-selling boating magazine.
Subscribe, or make a gift for someone else, and you’ll always save at least 30% compared to newsstand prices.
See the latest PBO subscription deals on magazinesdirect.com