
David Parker makes quick work of these lightweight and strong wooden boxes using fast curing epoxy to house fragile items on board

On any boat, particularly smaller craft, the stowage of more delicate objects is always a challenge and for expensive items some sort of protective casing is required.

How to buy PBO Digital for your computer, phone, tablet or eReader
PBO Digital is the best way to get the full magazine experience if you’re unable to buy your regular copy…
Metal cases (when available) are, of course, strong but heavy and prone to rust; and while sealed plastic-type boxes are useful, they have their limitations and there are some objects which deserve a better home to keep them safe and secure.
These plywood boxes are ideal and you can custom make them to fit the required shape exactly. In this project I show how to make them for the oil lamps I keep on board – the mantle on my pressure Tilley lamp is easily damaged if it gets knocked and similarly my standard oil lamp with its glass shade is vulnerable when stacked away.
However these boxes can be adapted to any size or shape to be used for navigation instruments, electrical items or engine spares such as injector pipes or the glass bowls for fuel filters, for example.
A tough plywood box can be readily made out of varying thicknesses of plywood and the heavier the item the thicker the box panels need to be. The main thing I like about this construction method is that it’s ideal for thin plywood only 5mm thick, which means boxes are light as well as strong. This plywood is also readily available as exterior grade material in half and third sheet sizes – sometimes you even see offcuts of it in the remainder bin at timber merchants or DIY stores.
 This is a good project for those who are less experienced with woodwork and you can get satisfying results with a modest skill level. The step-by-step design I have outlined here uses no fixings. You can of course use a combination of fixings and/or standard wood adhesive, but to cut and plane edges of thin laminate neatly and then hold it perfectly square while nailing pins can be tricky. The method described here demonstrates the use of fast curing epoxy to get the box shape accurately and is much more straightforward.
The box, once assembled, can then be reinforced if required with epoxy fillets or small, square section batten glued in place.
Step by step illustrated guide to making a basic wood-epoxy box
These boxes are made using three-laminate 5mm plywood: four side panels with two smaller panels for the top and base are required with four narrower strips of trim to hold the lid in place.
Size will depend on what’s required but in this case for a hurricane lamp the large panels measured approximately 11in x 6in (280mm x 150mm) and the smaller panels 6¼in (160mm) square.
The trim was 2in (50mm) wide.
 I used the West System Five-Minute adhesive for this project. Prices vary but it costs about £20 online for a 200g pack and a little goes a long way (in fact for this project I only used 10-15ml of the quick drying epoxy for the whole job – the bottles still looked full when I finished!).
If you’ve never tried rapid adhesive before this is a handy way to get familiar with it because it also offers a host of uses for general work, repairs and the fabrication of tricky shapes.
You should always mix equal amounts of the resin and hardener and you can also mix small amounts easily on any clean scrap of hardboard, wood or plastic to hand. A plastic lid is a handy mixing palette and lolly sticks and coffee stirrers make cheap spreaders.
The glue dries clear and is quite thixotropic so does not run off the job to cause a mess.

1. With any irregularly shaped object it helps when sizing it up accurately to use a similar size box as a guide. As an alternative you could make a template using cardboard and tape.

2. When the first side panel is marked out on the material, cut on the waste side of the line. A shark tooth saw is ideal for cutting thin plywood and leaves little break out.
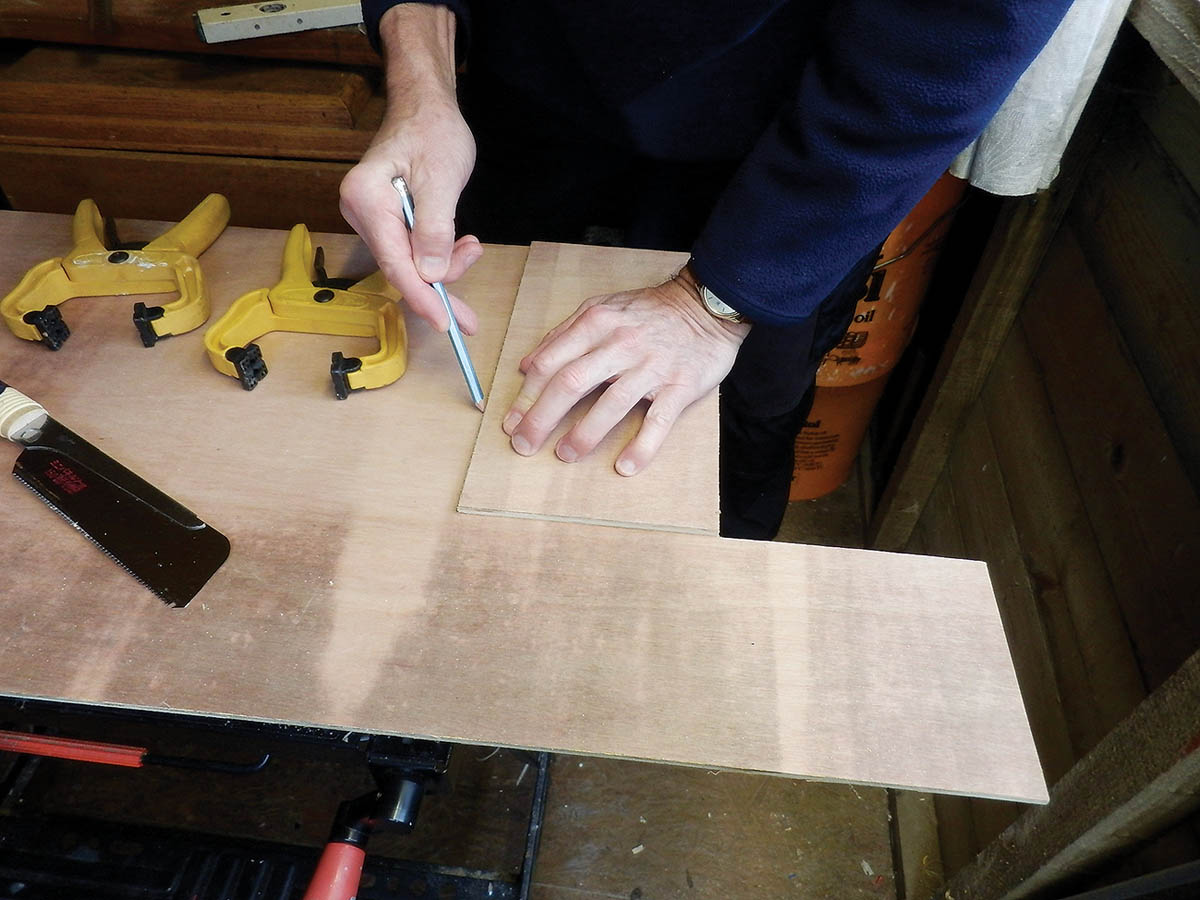
3. To ensure other panels are exactly the same size use one cut panel as a template for the next.

4. This is a simple construction and 4 side panels will form the main carcass of the box.

5. Because the laminate is thin it’s best to butt the pieces together in a vice before planing the panel edges together. This ensures a clean, uniform finish with nice straight edges.

6. A small amount of the Five-Minute epoxy will be enough for each panel edge. It helps to make a neat glue line by marking a guide line along the joint where the panel edge will sit.
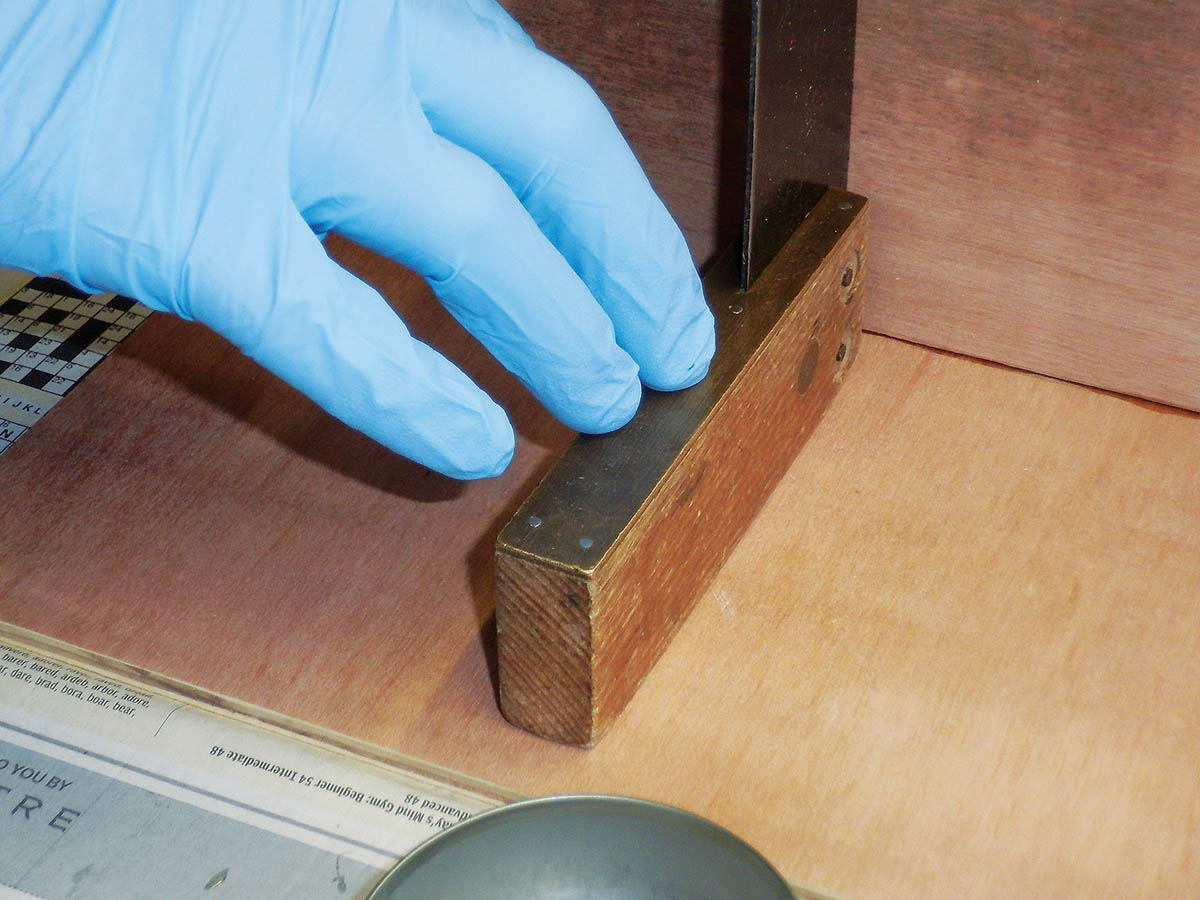
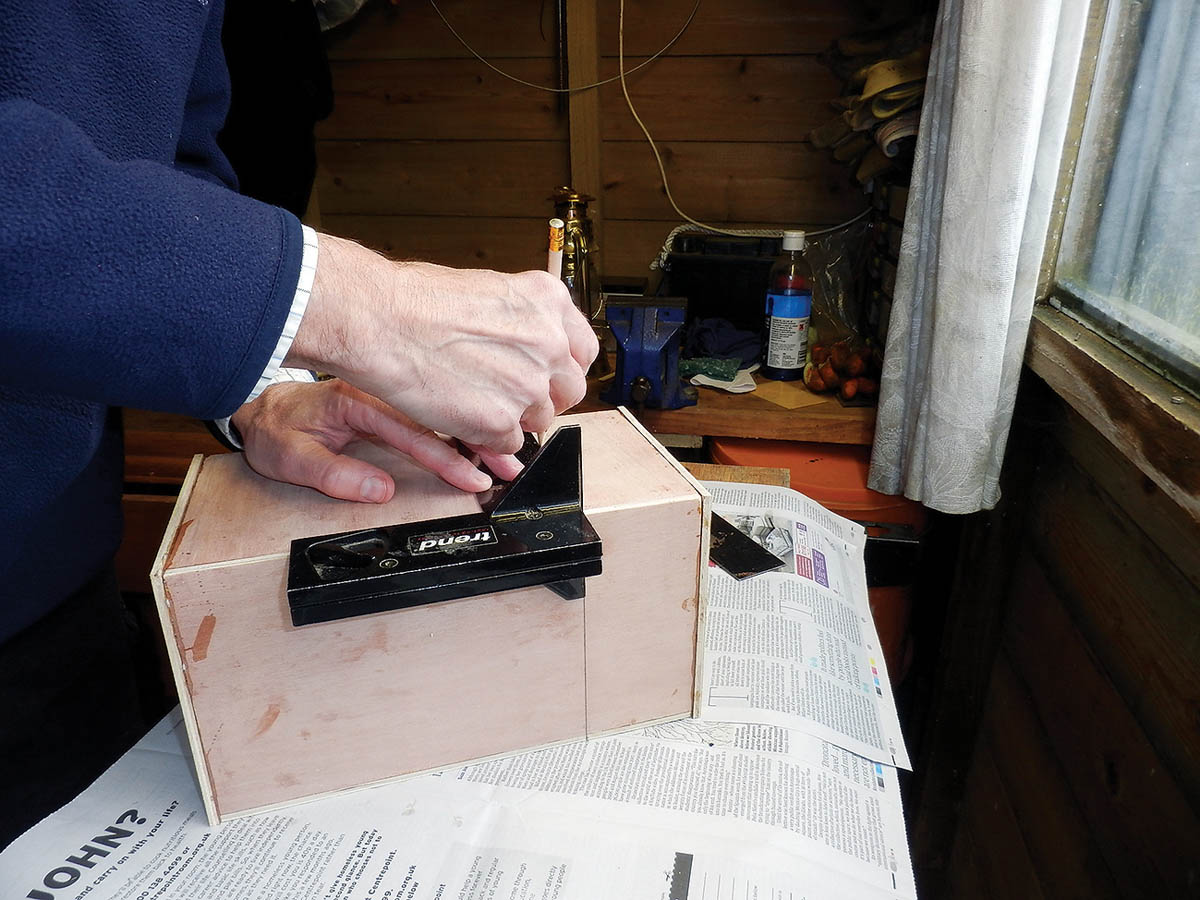
7. Line up the panels to be joined and use a square to ensure they’re being held at 90°. The square can be held in place while the glue sets.

8. Here two halves of the sides of the box have been glued together. Be sure you glue the correct edges so, when assembling the pieces, the box will fit together as you planned.

9. Mix up another small amount of glue and apply it to the panel edges to be jointed. Bring both halves of the box carcass together for gluing and line up the edges so that the box is square.
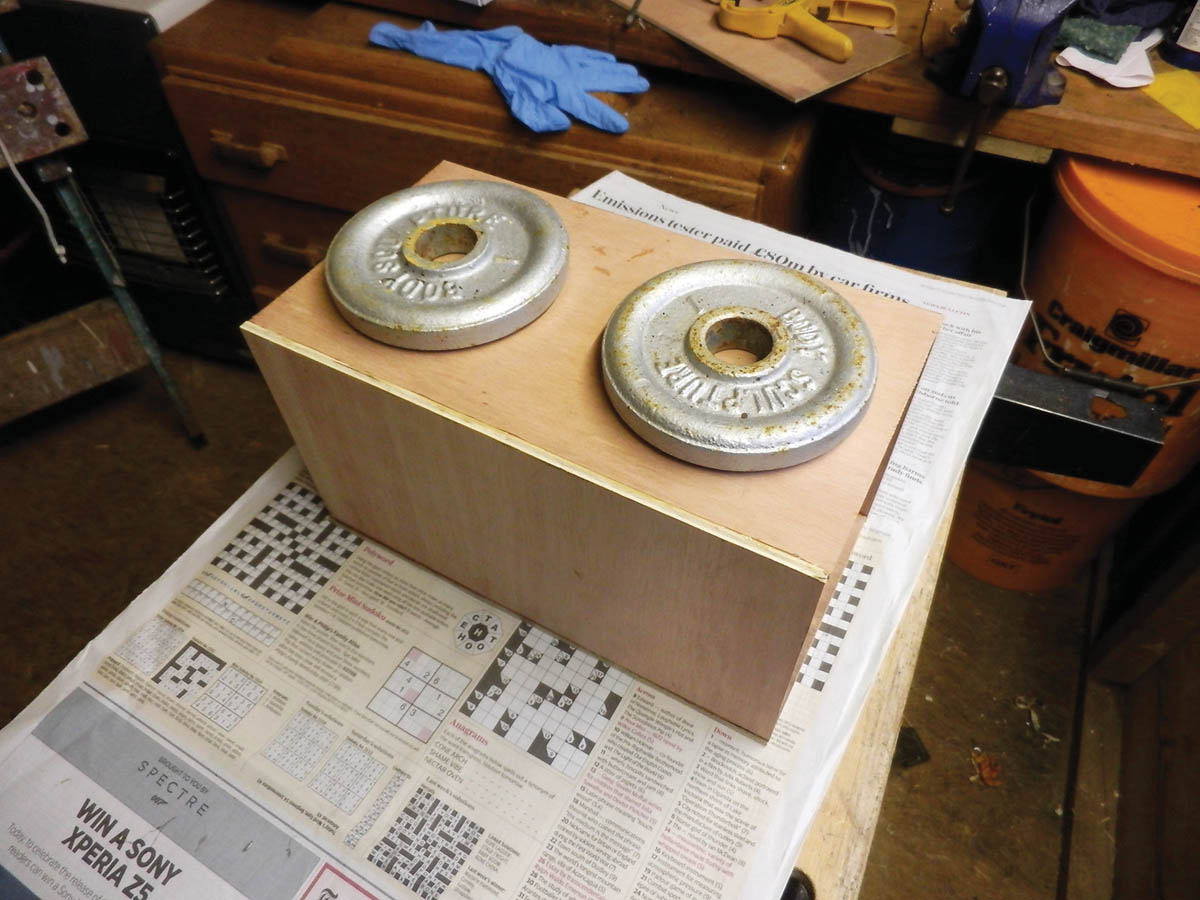
10. Like regular epoxy, rapid epoxy requires little pressure. Light weights suffice to hold the panels in place while the glue sets.
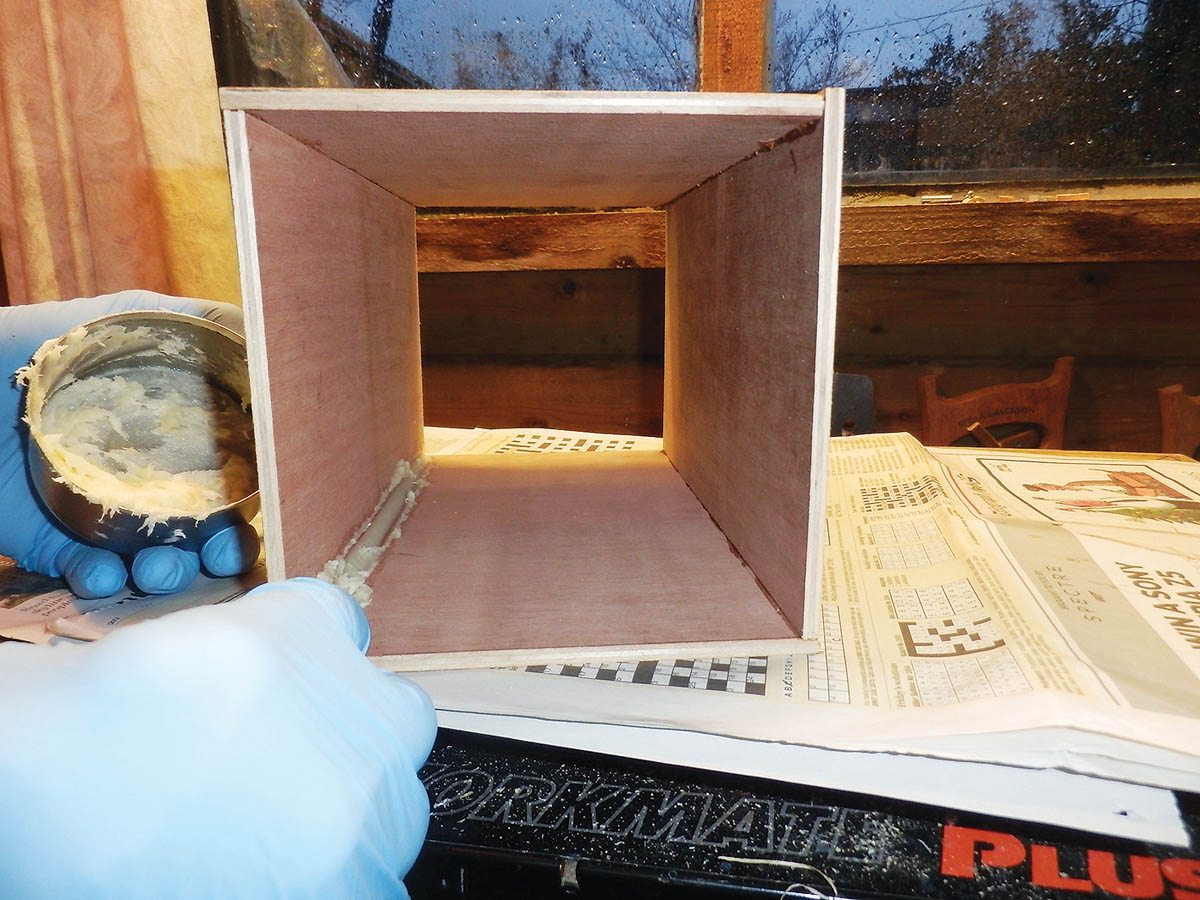
11. The box can be left just with the panel edges bonded, but for a really strong job an epoxy fillet along the seam ensures durability. Clean up excess epoxy with a spatula before it sets.

12. This is what the finished joint looks like – only a thin fillet is required for a lightweight box like this one.

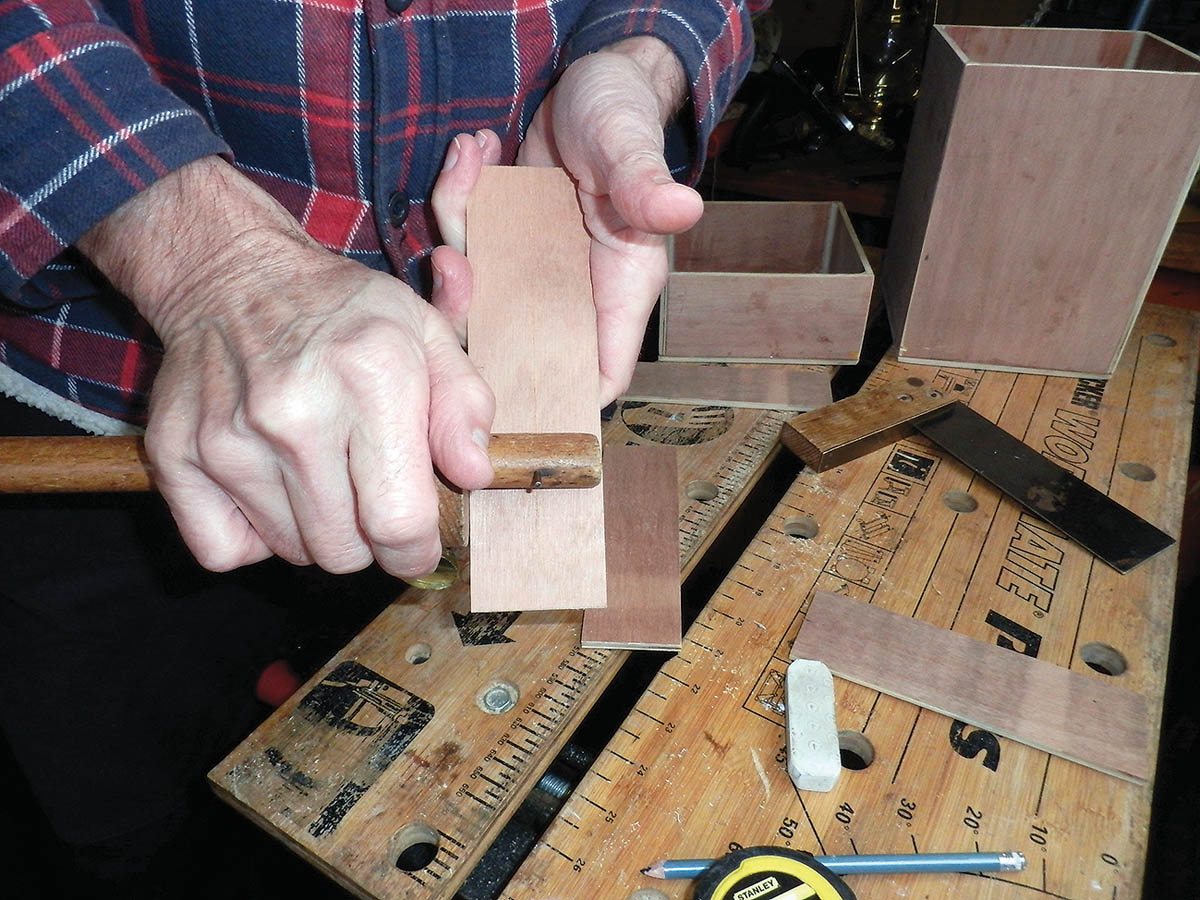
13. Once the epoxy has cured you can plane the panel edges flush with a small block plane.

14. Use the carcass to draw the shape of the base and lid then coat the joint faces with glue to attach them.

15. After the glue has been applied line up the panels with care. Light weights on top of the box will keep both top and base in position as the glue sets.

16. When the glue has set line the box up with the planned contents to mark out a convenient place for the lid.
17. With a square mark a line around the whole box the required width of the lid – in this case it is approximately 2½in (65mm).

18. Cut the lid off with a fine saw taking care to keep to the lines accurately so that the top will sit correctly later.

19. Here’s the box with the lid removed. Now the edges are ready for cleaning up with sandpaper.

20. The box base and panel edges of the lid can also now be filleted with epoxy for added strength.

21. Four strips 5cm wide are cut to form the trim of the lid. Two are cut the exact width of the box 6in (150mm) and the others 6¼ (160mm) allowing a ¼in (6mm) overlap to be cut flush after fixing.
22. Scribe or mark a pencil line as a gluing guide half way along each inner face of the trim.

23. Using the guide line apply glue to one half of the trim only.

24. Attach each piece of trim and use light pressure as the glue sets. For clarity one side is shown here but you can fit and clamp all the pieces at the same time if preferred.

25. Once the epoxy has cured, cut away the overlap flush with the side trim to give a neat edge.

26. The box complete with the panel sides and edges lightly sanded and ready for coating.
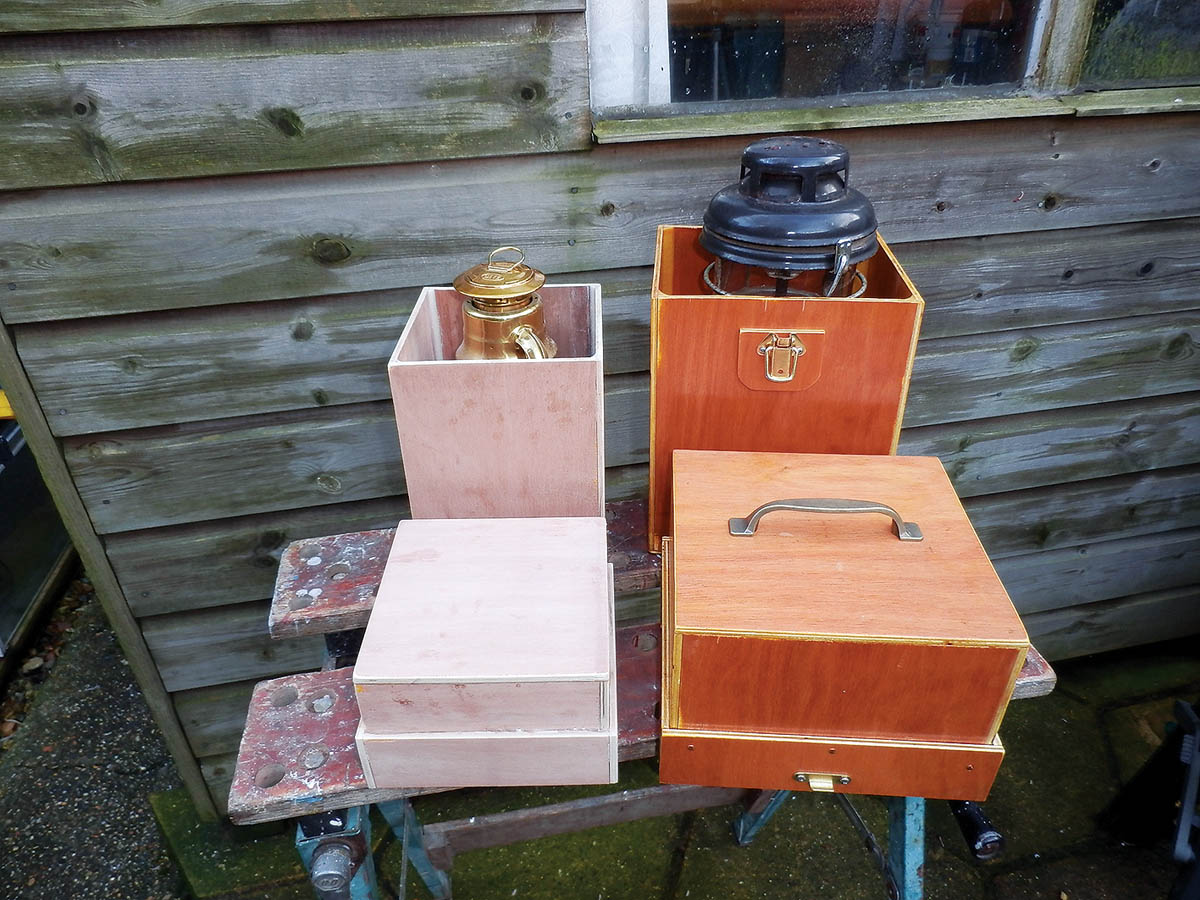
27. The larger box has been given a few coats of varnish to protect it. I also used some copper tacks for decorative effect and a handle has been fitted and toggle fasteners to secure the lid.
Originally published in PBO May19