Stu Davies repairs a whisker pole by drilling out and setting four new ‘Pop’ rivets

It was a cracking day, mid-May on the Algarve. We had sailed our Beneteau 381 from Gibraltar to Bruce’s Yard in Faro earlier on in the year, had her lifted and had antifouled her. Now it was time for some fun in the sun.

Our plan was to leave and go to Ayamonte in Spain at the mouth of the River Guadiana about 30 miles away.
The weather forecast was for light south-westerlies which would give us a nice beam reach all the way.
 It usually takes about six hours for the journey so leaving on the last of the ebb from the Rio Formosa, where Faro is located, eventually gives a tidal lift along the coast to Ayamonte.
The winds were light at first so we poled out our 150% genoa and settled down to some nice sun and a calm passage.
As the tide turned we noticed that we were going well – more than 6 knots SOG. At this rate we were going to arrive early at the tidal gate off Ayamonte. The wind had also started to strengthen, a common occurrence in the afternoon off the Algarve coast – as the land heats up, the warm air rises drawing in cooler air from the sea.
So we decided to take a few rolls in the genoa to slow us down. The whisker pole was hooked on to the sheet eye on the genoa and usually it swings around following the genoa in.
All seemed well and we carried on. The wind continued to build and we were flying, so a few more turns on the roller furler were in order.
But as I pulled on the furling line I noticed that the pole seemed to be sticking a bit and the furl was getting harder.
Suddenly there was an almighty bang and the genoa was flapping with a 4.5m whisker pole attached to it. The end-fitting hooked on to the mast had snapped and now we had a flapping sail with a lump of aluminium pole attached to it!
We were on the autopilot so I changed our heading to calm the flapping and I went forward to capture it.
I carefully pulled at the furler line until I could go and lasso the pole.
We were in luck: I was expecting dents in the deck etc but there was nothing. In fact the only damage was a broken jaw in the pole.
How to fix a riveted aluminium spinnaker pole end
The pole consists of a 70mm diameter aluminium extrusion with two aluminium castings (end fittings) pop riveted into the ends.
It’s an easy fix, but only if you know how to drill out and re-set monel rivets.
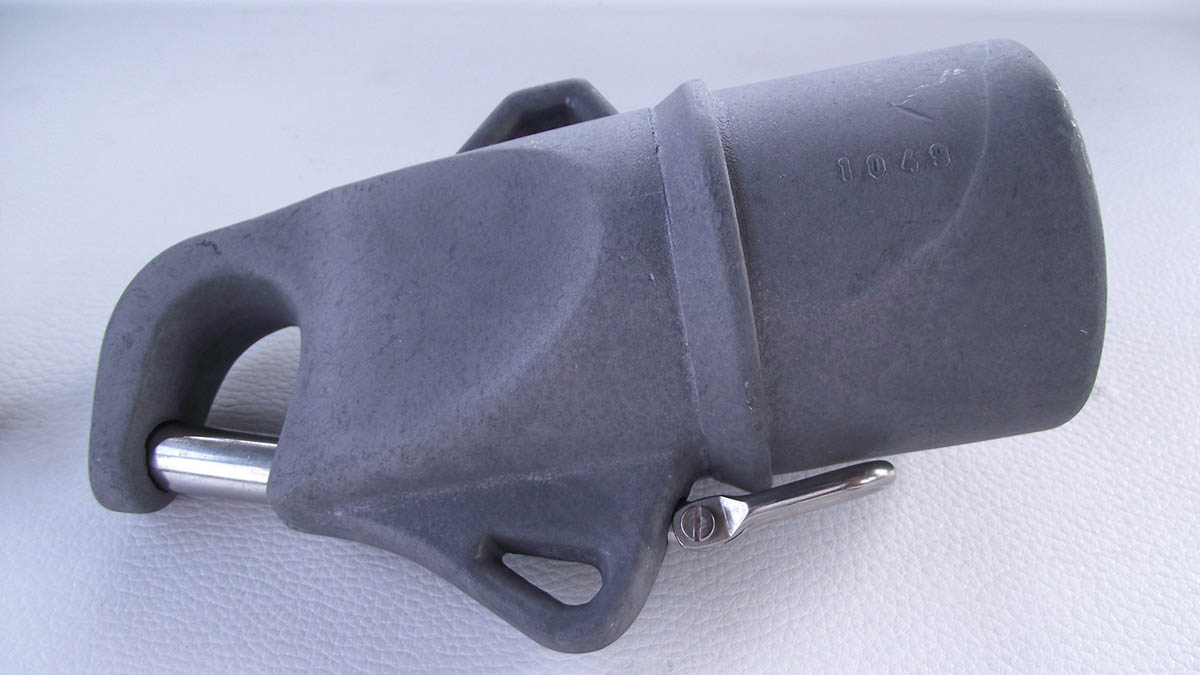
A complete new end fitting from Z-Spars
Zspars carry stock for all their range, even the older stuff fitted to our 1999 boat. I phoned them up and they sent me a new end fitting from stock for just under £60.
Removing the old fitting
The old fitting was riveted in place with four 5mm rivets and the new fitting arrived complete with four new rivets.
To get the old rivets out, I used a 5mm drill straight down into the rivet head.
As the drill passes through the head of the rivet to the shank, the head comes off and rides up the drill.
I used a 3mm nail with the point ground off as a pin punch to knock the remnants of the old rivets into the tube.
Then, after a few taps on the extrusion around the casting to loosen a bit of oxidation between the parts, the old fitting separated from the aluminium tube.

1. Drilling out the old rivet head would require a 5mm drill bit.

2. Demonstrated here on another fitting, carefully start drilling the centre.
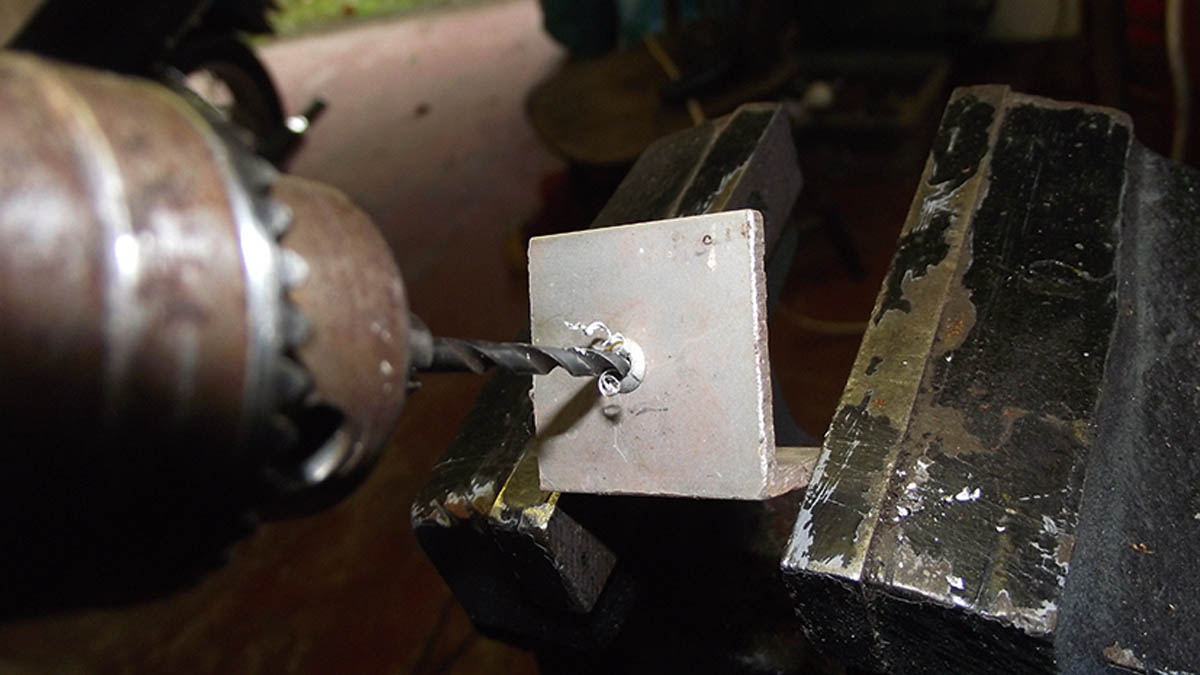
3. Swarf will spiral off cleanly with a sharp drill bit.

4. Soon the rivet head will detach and wind its way up the drill.
Fitting the new casting
I cleaned up the oxidation on the inside of the pole and smeared Duralac anti-corrosion paste inside it and on the new casting where it slots into the pole. This paste prevents corrosion and reaction between the different metals used to make the pole and the fitting
I dry fitted and oriented the new fitting to line up with the one on the other end. The existing holes in the tube were then used as guides to drill new 5mm holes in the end casting, the walls of which were about 10mm thick.
Top tips for working with Monel ‘blind’ rivets
Rivets for aluminium boat parts are usually made from Monel, a non-reacting metal which doesn’t corrode in contact with sea water. They are usually a bit more difficult to ‘set’ than everyday aluminium ones.
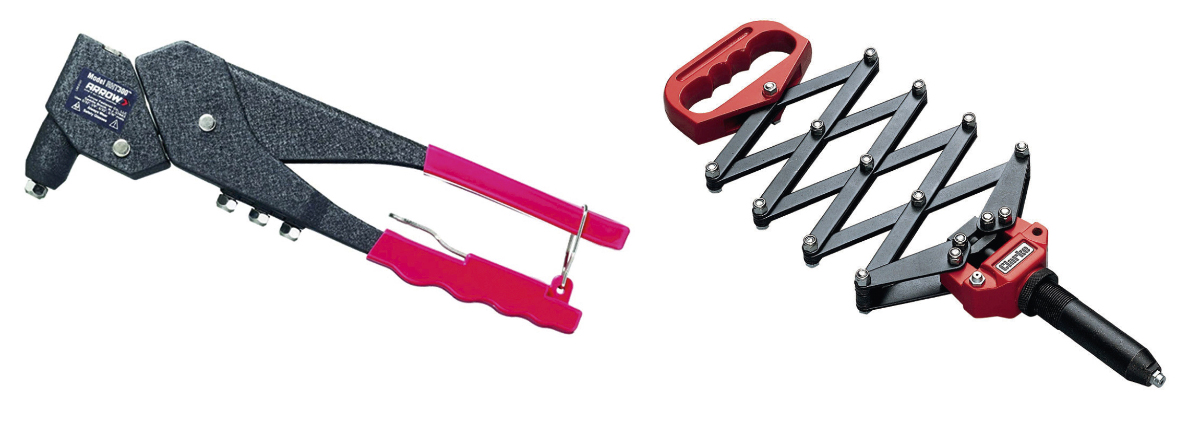
The typical one-handed squeeze pop rivet gun (left) may struggle to set Monel rivets, which are less pliable than normal aluminium rivets. The increased purchase of a lazy tong riveter (right) means it’s much better able to deal with Monel rivets.
Consequently the tool required to set them is a lot beefier than the one-handed ‘squeeze’ tool that people are used to.
So for this job I used the ‘Lazy tong’ instead, which gives a lot more mechanical advantage to set the rivet.
As I mentioned earlier, this is a simple job if you have the right tools. And with the price of the rivet tools now very competitive – this is one that can be done by most practical boat owners.
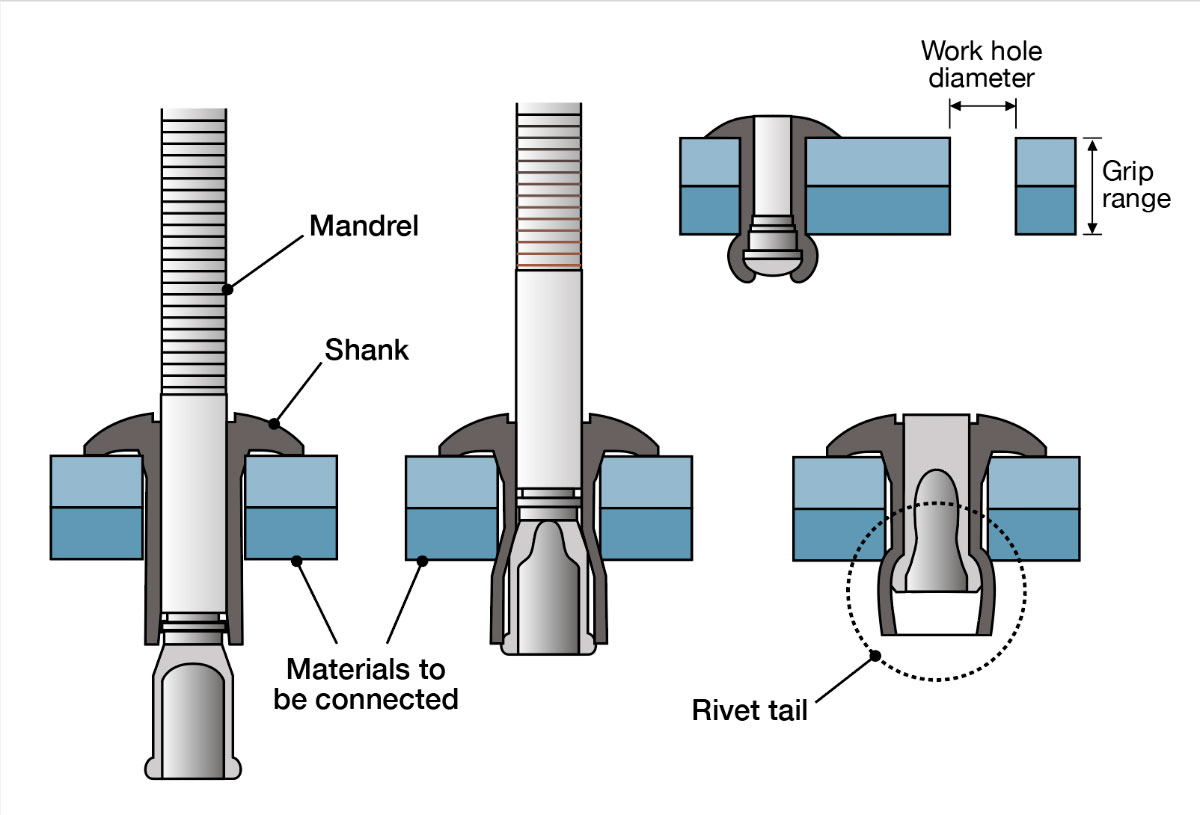
What is a rivet and how does it work?
Pop, or blind, rivets are a handy way of joining metal parts together. They can also be used to join hard plastics but not usually wood.
‘Pop’ is a trademark owned by Stanley Black & Decker and was a technique originally developed in the aircraft industry for use when only one side of the joint is accessible.
Pop rivets work by pulling a pin head through a tube made of weaker metal.
The action expands the underside of the tube to ‘pinch’ the materials together.
The shaft or shank of the pin (known as the mandrel) breaks off with a ‘pop’ sound, leaving the head in place to seal the tube.
The one-hand squeeze rivet tool is normally used with rivets up to 3⁄16in (4.76mm). Bigger rivets and anything made of Monel may require a lazy tong riveting tool to set.
To set a rivet, drill holes through both of the parts that are to be connected. Match your rivet size to the drill-bit size (this also applies to drilling out rivets).
Rivets come in various lengths as well. This is known as ‘grip size’. Longer grip rivets will join thicker materials together.
A good guide online that shows the grip size you need can be found at blacksfasteners.co.nz/assets/RivetChart5.pdf
When removing rivets you should find a clean hole that can be reused. If there has been fretting between the parts, a larger rivet can be used. Just open the holes up with the next sized drill bit corresponding to the size of the new rivets.