
Gordon Davies and Alison Mainwood share their tried and tested design for how to make lightweight, cost effective and east-to-build kayaks…

Building your own boat is an absorbing pastime leading, hopefully, to an enjoyable result. Kayaks are about the simplest boats to make, and they give tremendous fun. There are plenty of kits available for amateur building and some result in extremely beautiful boats, or you can buy a set of plans.
However, a kit or a set of plans may not give exactly the kayak that you’d like. In our case we dislike carrying heavy kayaks, and that provides a convenient excuse for the enjoyable challenge of making a strong, lightweight boat.
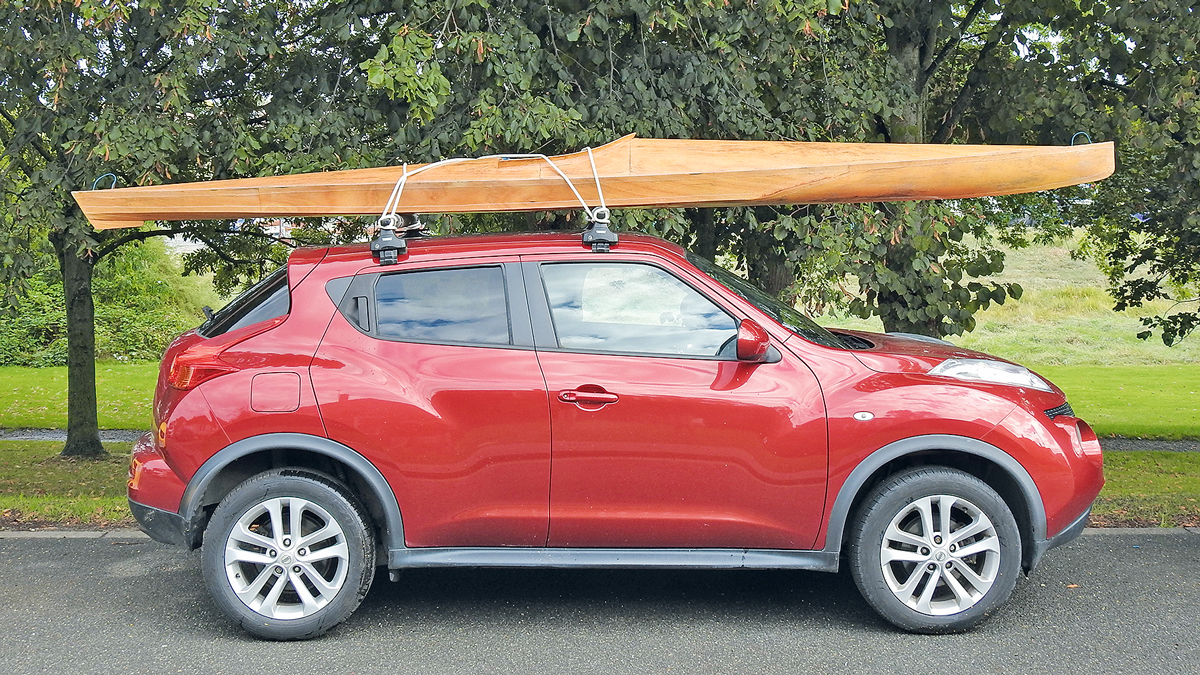
These kayaks are suitable for recreational use in calm estuary and coastal waters but at 8-9kg are far lighter than comparable commercially available boats, and are also significantly cheaper than either a kit or a complete kayak.
To keep the weight down, we make the hull from 1.5 mm marine ply. As a result, our kayaks are liable to damage if they go aground on a sharp object, but used carefully they can have a very long life.
One of our kayaks made in 1992 has travelled hundreds of miles over sea and estuary, and thousands of miles on top of the car, all for the cost of just three repairs to the hull.
Our aim, then, is to make a very light kayak that feels secure on the water. It is easy to adapt the design, and as examples we will show a one-person kayak (a ‘K1’) and an ‘Adult and Child’ version suitable for introducing children to the joys of small boating.
Article continues below…

Best inflatable kayaks for families and beginners
Inflatable kayaks are the ultimate way to have fun with family and friends. No boating experience needed, no faffing around…
How to build a boat: Essential guide to building your first kit boat
You don’t have to be a boatbuilder to learn how to build a boat, argue Roger Nadin and Polly Robinson.…
Kayak design
Since a one-off can be tailored to an individual user, each one will be unique. The detailed dimensions are simply those that work well for us, and may be a helpful starting point for your kayak design.
Before putting pen to paper it’s worth considering where the boat will be built. In our case, we have a workshop-shed, but if we build in the winter it is warmer to work in the house.
We have chosen a length of 4.5m since our work-place, the conservatory, is 4.8m across the diagonal; ideally it would be better to have more room to be able to stand back and look at the boat as it comes together.
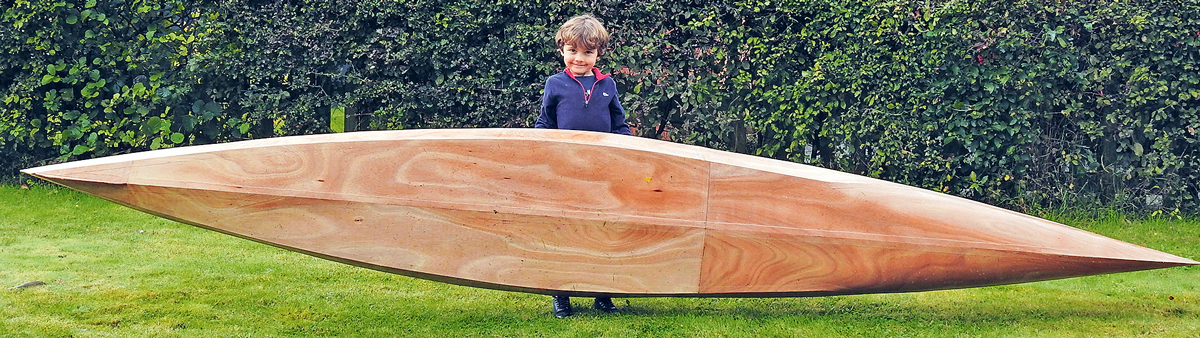
Our boat is light enough for a 6-year-old to lift
Remember that once the boat is built, it has to be extracted from the workplace. The length may also be constrained by the place where the kayak will be kept, and the size of your car for transporting it.
K1 version
For simplicity of building, our K1 hull has a single chine, which has the added advantage of giving more initial stability than a round-bilge boat. Experience of coastal canoeing and in tidal estuaries has told us that a beam of about 610mm measured at the deck gives a stable boat which feels safe on the water.
The bottom has a shallow V-shape; at the maximum beam the chine is only 20mm higher than the centreline. At that maximum beam, the sides of our boats rise vertically by 120mm and lean outwards by 40mm.
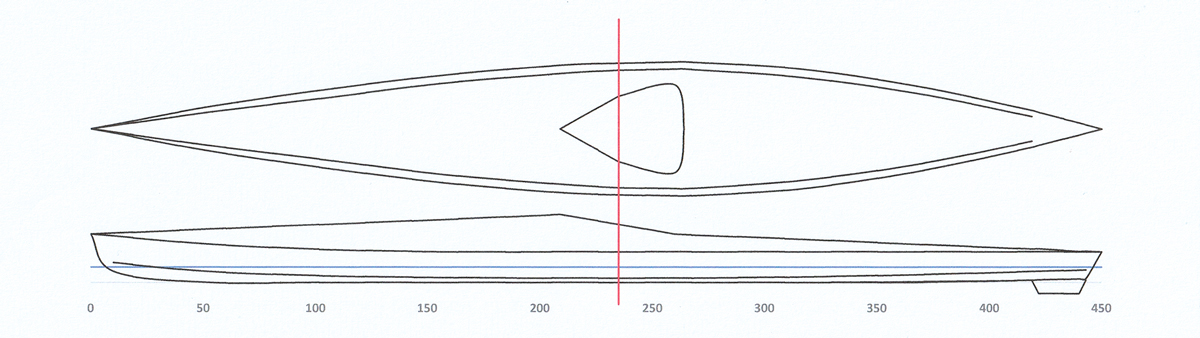
Plan and elevation of a K1. Since the hull has a simple shape, we use a spreadsheet to calculate the centre of buoyancy (which lies on the red line) and the waterline
This gives a freeboard that is adequate for someone like us, weighing up to 75kg fully dressed. (For a significantly heavier person, the sides of the kayak can be raised at the rate of 1mm for each extra 1.5kg).
Stability is very important when getting in and out of the kayak and so we place the maximum beam just at the back of the cockpit.
Buoyancy
A hull like this has its centre of buoyancy slightly behind the midpoint – in our kayaks it is about 100mm behind. Since the centre of gravity of a paddler is about in line with the front of their stomach, that determines where the paddler must sit.
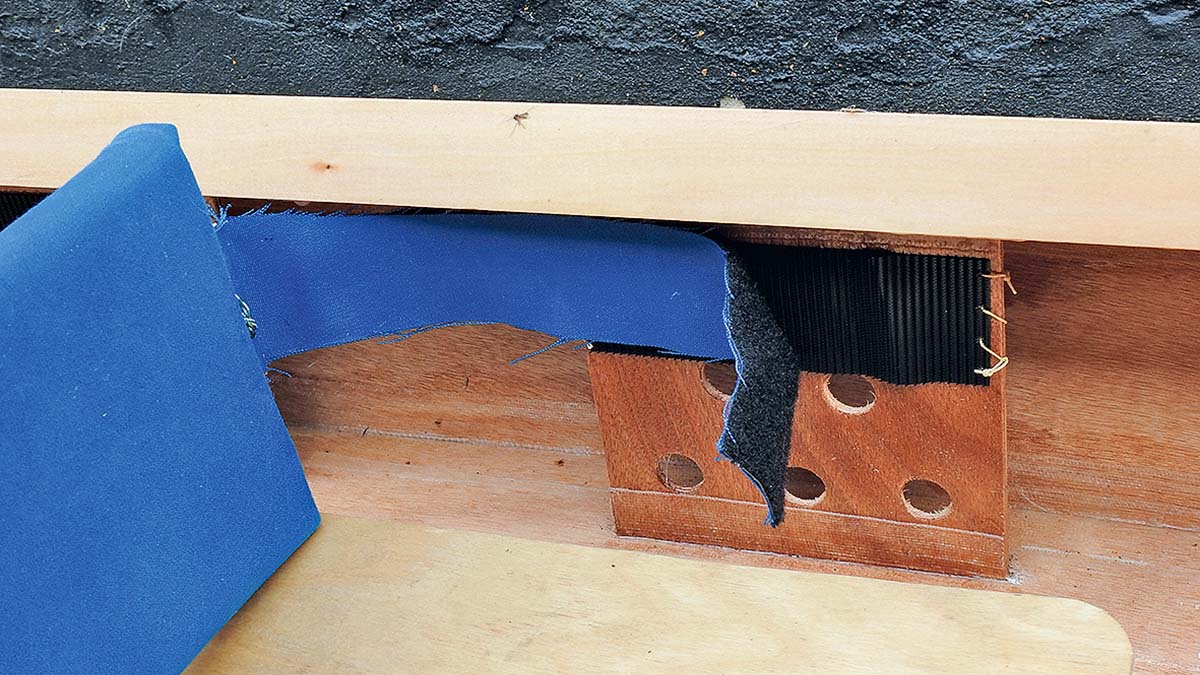
Strong Velcro (shown partly peeled back) holds the adult’s backrest in position
We find that a cockpit 560mm long is compact enough to keep out water without feeling to be a squeeze. The length of the paddler’s legs locates the approximate position of the footrest, which will be adjustable.
For reasons best known to itself, Nature has designed us to have our feet sticking out perpendicular to our legs – they will be almost vertical in the kayak. It is important that the foredeck is high enough to give comfortable foot-room, but as low as possible to minimise windage.
We draw a sheerline that rises at the bow, which gives buoyancy when going into waves and disguises the height of the foredeck required to accommodate those awkward feet.
One of the transverse ‘bulkheads’ that will support the aft deck, in particular the critical area behind the cockpit
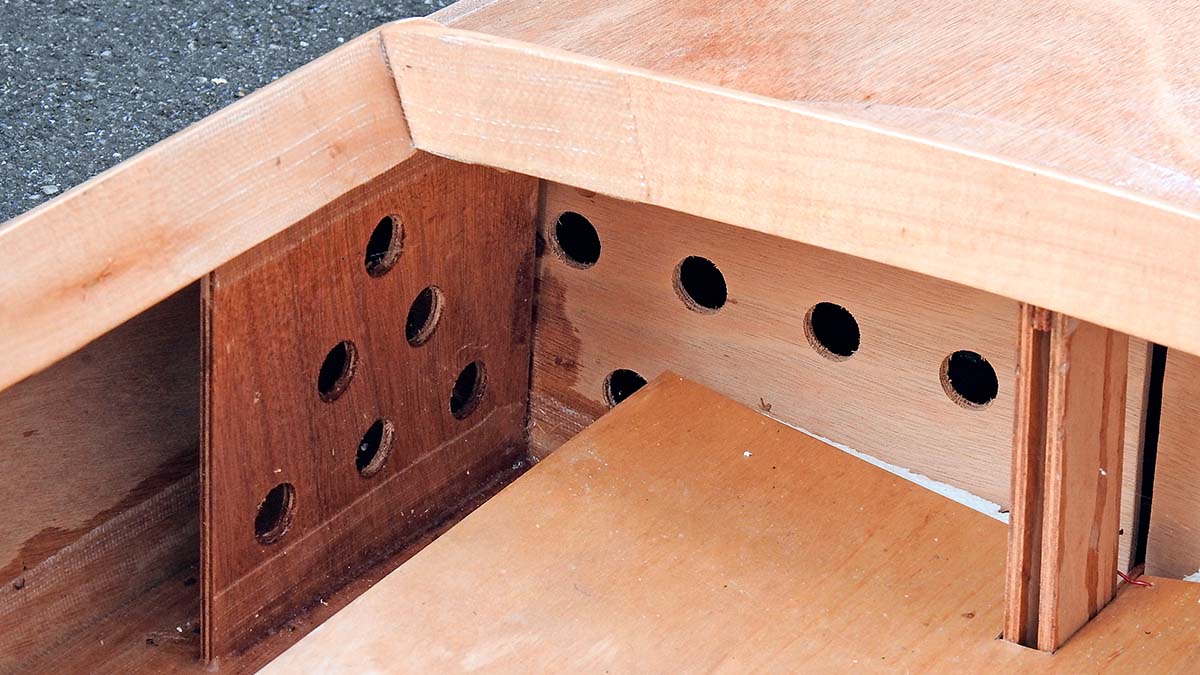
Detail showing the bulkheads fitted immediately behind the cockpit. along with the cockpit coaming

The slotted footrest is adjusted by sliding it along the supports. It is anchored by lines taken back to small jamming cleats
The sheerline is essentially flat for the back half of the boat, and at the back of the cockpit the stern deck only bends upwards by 70mm. The result is a cockpit that is high enough at the front so that a spraydeck is not necessary, but is low at the back for easy entry.
This design results in a boat that is not the optimum shape for speed and will not do Eskimo rolls, but feels comfortably safe, which is our primary concern.
Adult and Child kayak
Let’s now take the same hull and use it for the Adult and Child kayak. We are thinking here of a child up to the age of maybe 10 years, at which point they can have their own boat. On the K1 version, with the dimensions given here, the front of the cockpit is 2m from the bow.
In choppy water made by wind against tide, waves may come on the foredeck but then the buoyancy of the bows lifts the kayak clear – water has never come over into the cockpit of the K1.
It is safe to lengthen the cockpit, extending it both further forward and backwards to make room for the adult and the child – we use a cockpit 1.6m long.
‘Our aim is to make a very light kayak that feels secure on the water’
Of course, a larger cockpit increases the risk of water entering, but the purpose of the boat is for the child to get enjoyment, and definitely not become afraid – our Adult and Child kayak is strictly limited to use on calm water.
The adult’s seat is unusually long, at 750mm, so that when the kayak is used without a child, the paddler sits forward in the cockpit, using a soft backrest, held in place by strong Velcro. The foredeck has to be made high enough for the paddler’s feet in this position, just as for the K1.
One constraint may be the size of your car
With a child as well, the adult moves to the back of the cockpit and the child sits in front of their feet, comfortably clear of the adult’s paddle. For a perfect trim, the centre of gravity of the adult and child should be above the centre of buoyancy.
We can calculate the combined centre of gravity, but since children tend to grow it will be different next year. To future-proof the kayak we simply place the back of the cockpit 1.4m from the stern, and trim the boat by moving the child’s seat and adult’s backrest.
That’s all that there is to the design process. We’ll come to the internal framework when we look at construction.
The mould has a 6mm plywood spine with transverse ply frames. Pine-wood strips define the chine and the edge of the deck, as well as helping to keep the mould in shape. All the components are screwed together for ease of storage until next time
The mould
The hulls are made using 1.5mm marine-grade 3-ply. Ply of this thickness is floppy. Traditional boatbuilding skills are (thankfully) not very relevant here – a dressmaker is of more use than a shipwright.
The kayaks must be made around an accurate mould. Making it takes about half the total construction time, but it can be used repeatedly and can easily be modified.
We make the mould from interior-quality 6mm ply. Eight transverse frames, equally spaced along the mould, are cut to the sizes measured from the design drawing and screwed to a longitudinal frame.

Pine-wood strips are screwed to the frames to define the edges of the panels that will make up the hull and deck, and they help to keep the mould in shape. The last stage is to cover all the frame where it is likely to contact the hull panels with parcel tape – epoxy doesn’t stick to the shiny surface of the tape.
How to make a kayak
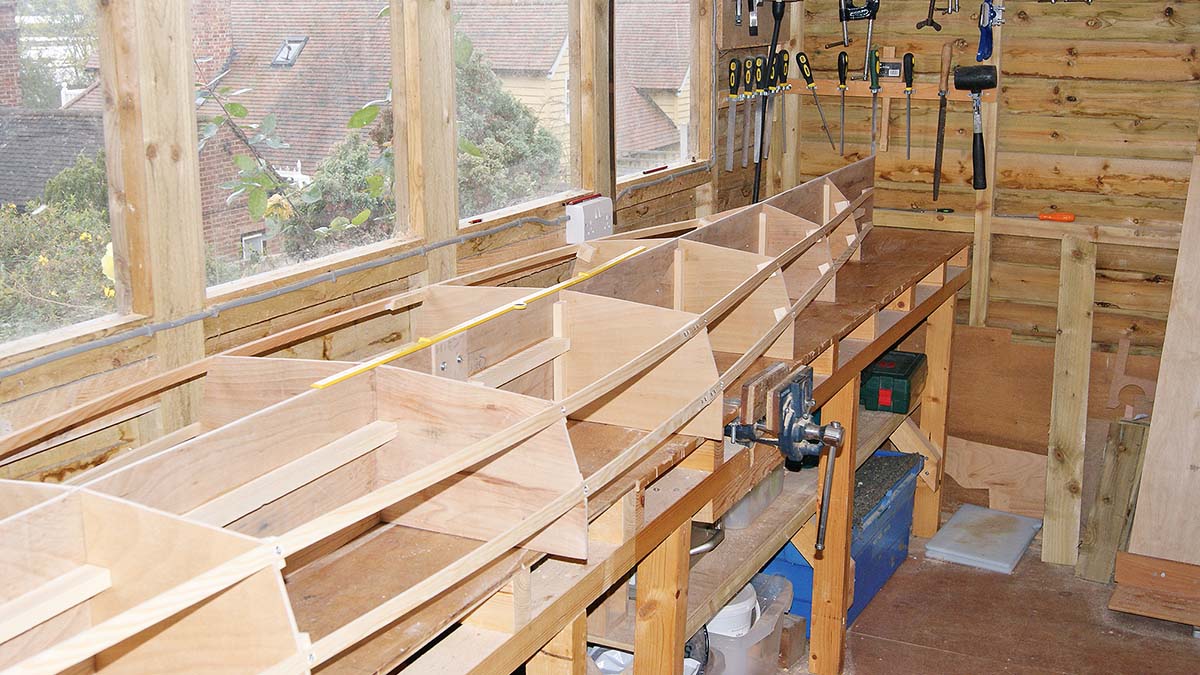
It’s essential, for reasons given later, that the full length of the canoe will be supported on tables. Make sure they are level and at the same height (back copies of PBO are useful here!).
Before starting construction there is one final decision. The mould has a hard chine along its length. However, a bow with a hard chine creates more resistance through the water than a rounded bow, and so we prefer to bend the ply around the mould at the bows, and merge the rounded shape into the hard-chine hull.
The hard-chine bow is very simple to make, but the more challenging rounded shape gives a better boat.

Thin cardboard can be cut on the mould to the approximate shape of each panel to create patterns and help plan out how to cut the panels from the sheets of marine ply with minimum waste.
If the bow is to be hard-chined, the hull can be easily made, trimming the bottom and side panels accurately to size using a Stanley knife. There is no need to use wire to hold the panels in place – strong masking tape or parcel tape, plus the weight of books, are sufficient.
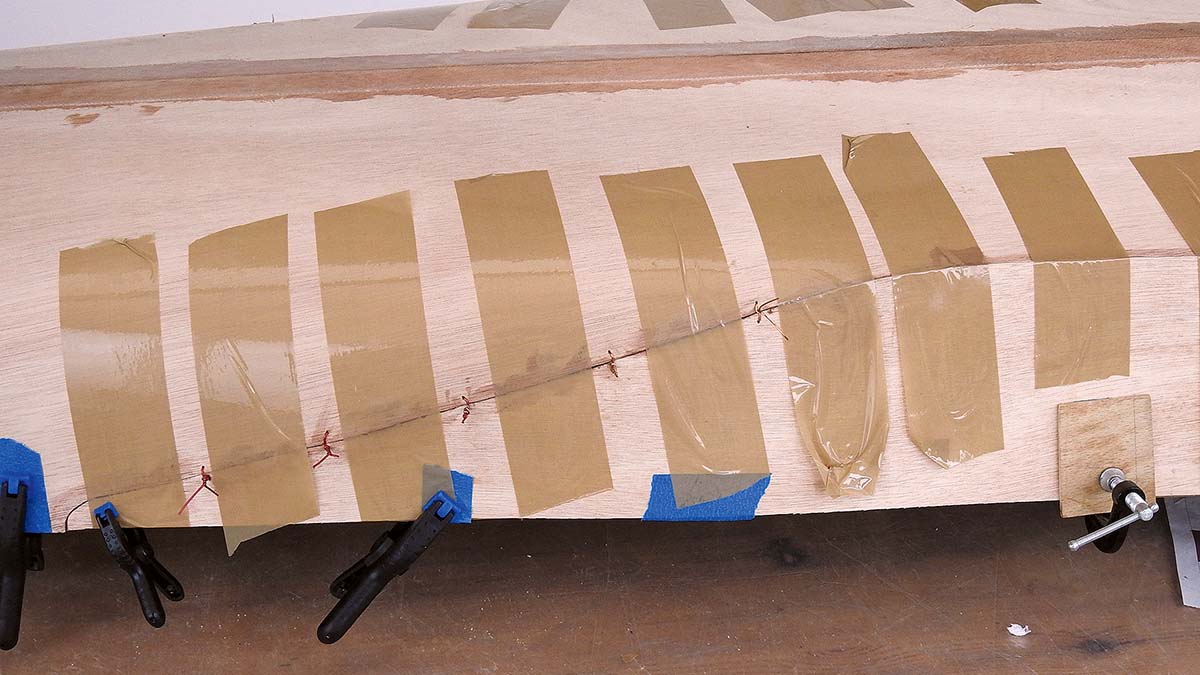
The panels are tacked together with a paste of epoxy and filler, and when that has set the joints are reinforced with glass tape and epoxy.
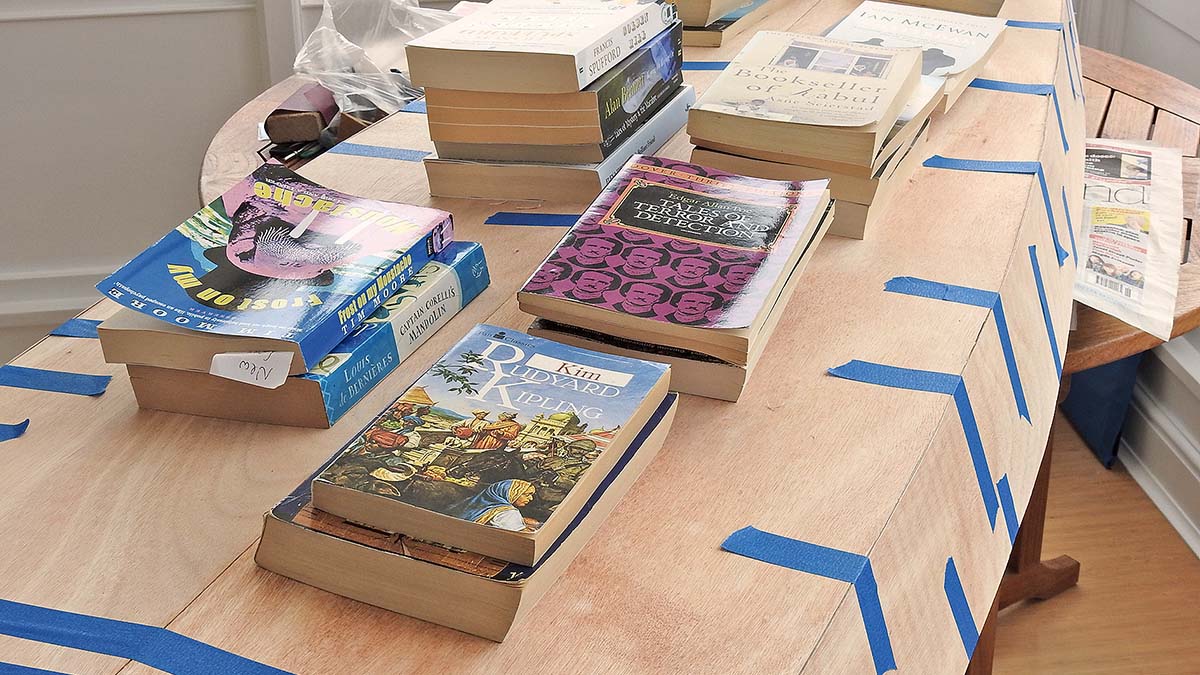
The lightweight panels, cut to size, are held in place by masking tape and books while they are tacked in place with a paste of epoxy
Rounded bow
For a rounded bow, we put on the bottom and side panels in the same way, up to where the bow panels will be. A pattern of the bow panels can be made in the usual way using thin cardboard, but for the complex shape of the side that abuts it, it’s easier to use something transparent such as plastic sheet.
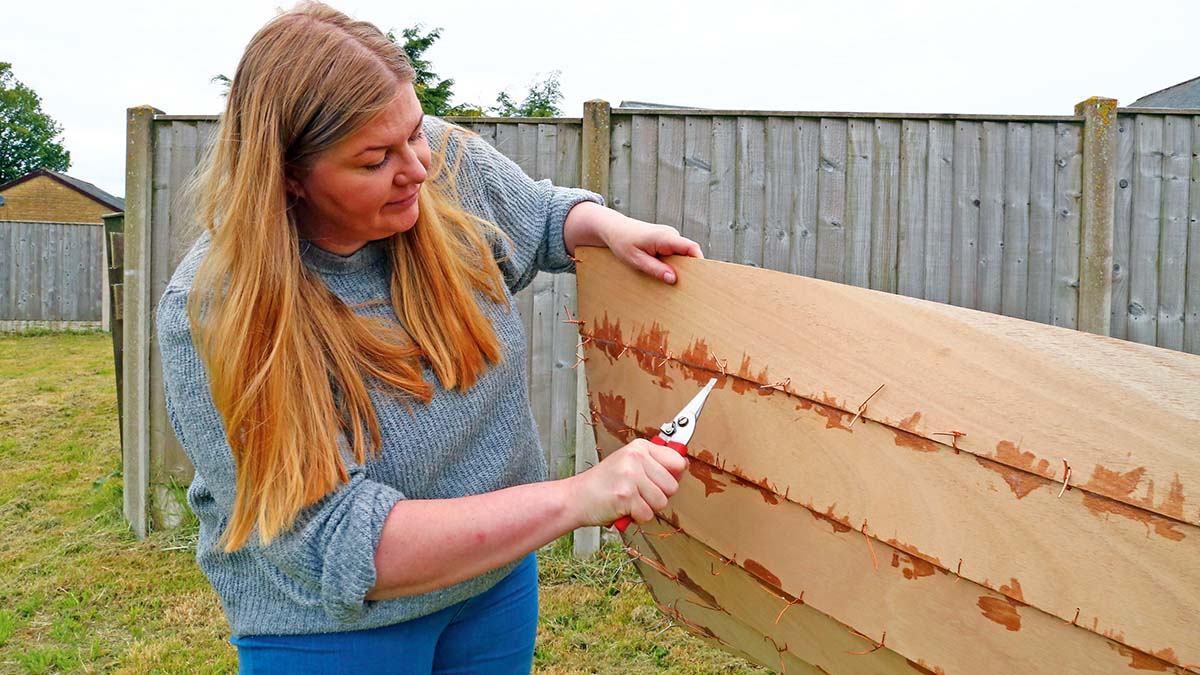
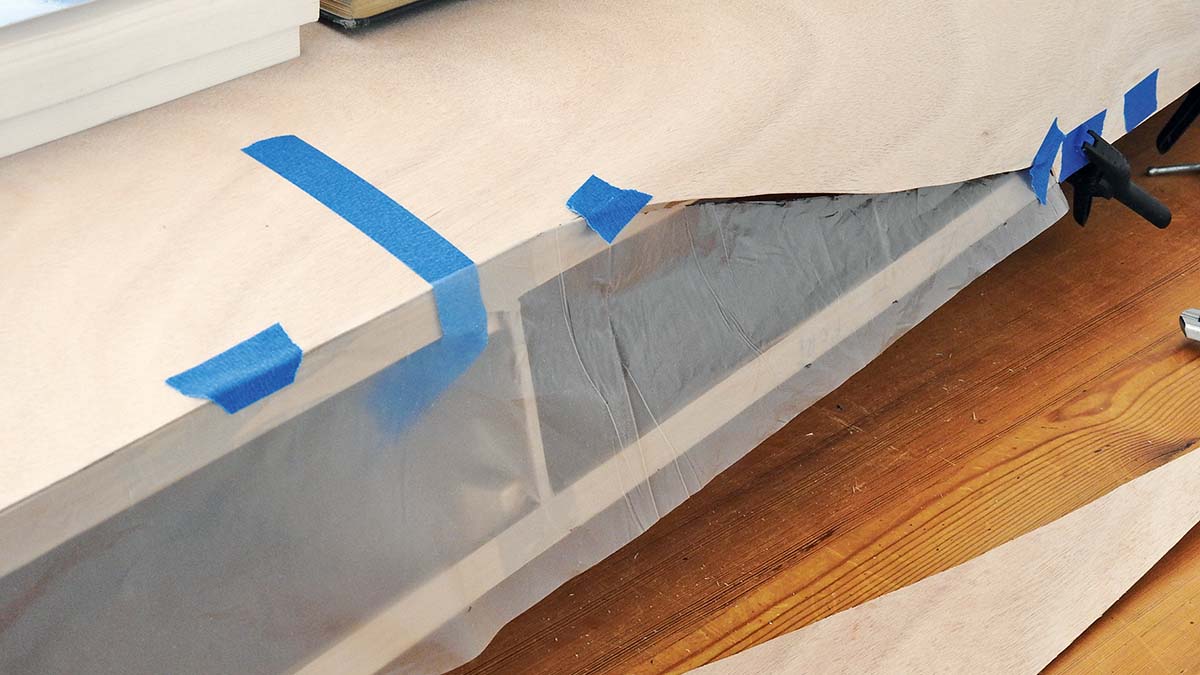
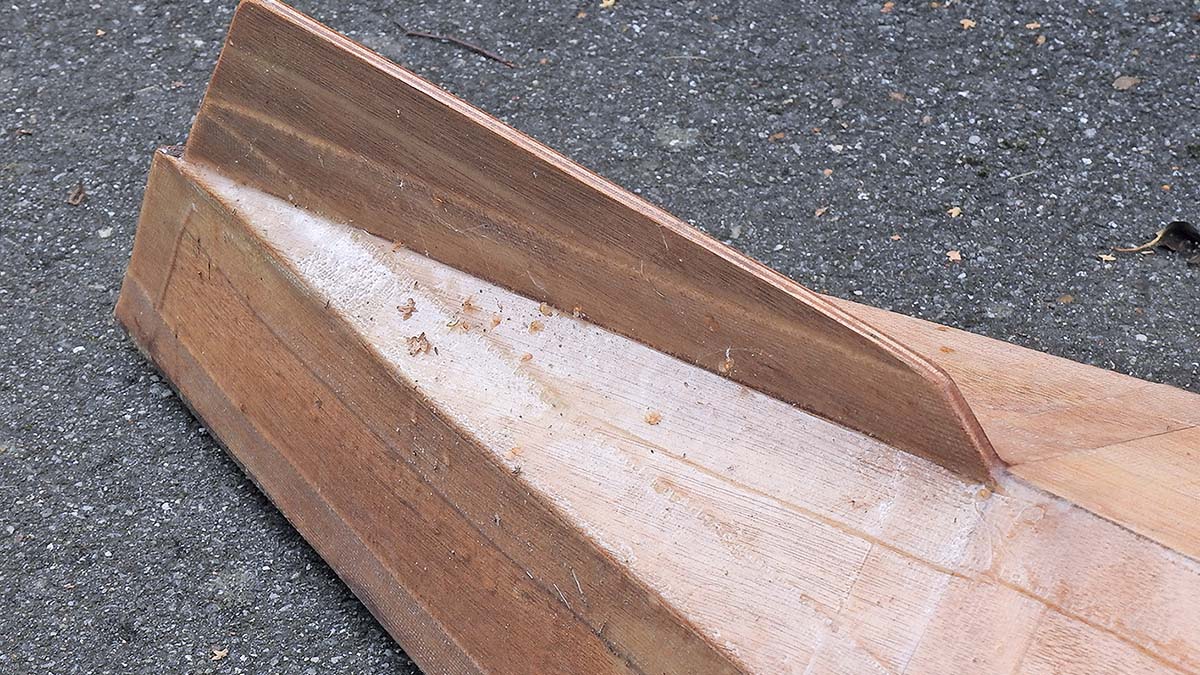
It is then a matter of patiently forcing the bow panels into shape, and stitching with copper wire at the stressed pieces where the rounded bow runs into the chine. This is the only joint where wire has to be used.
Permanent framework
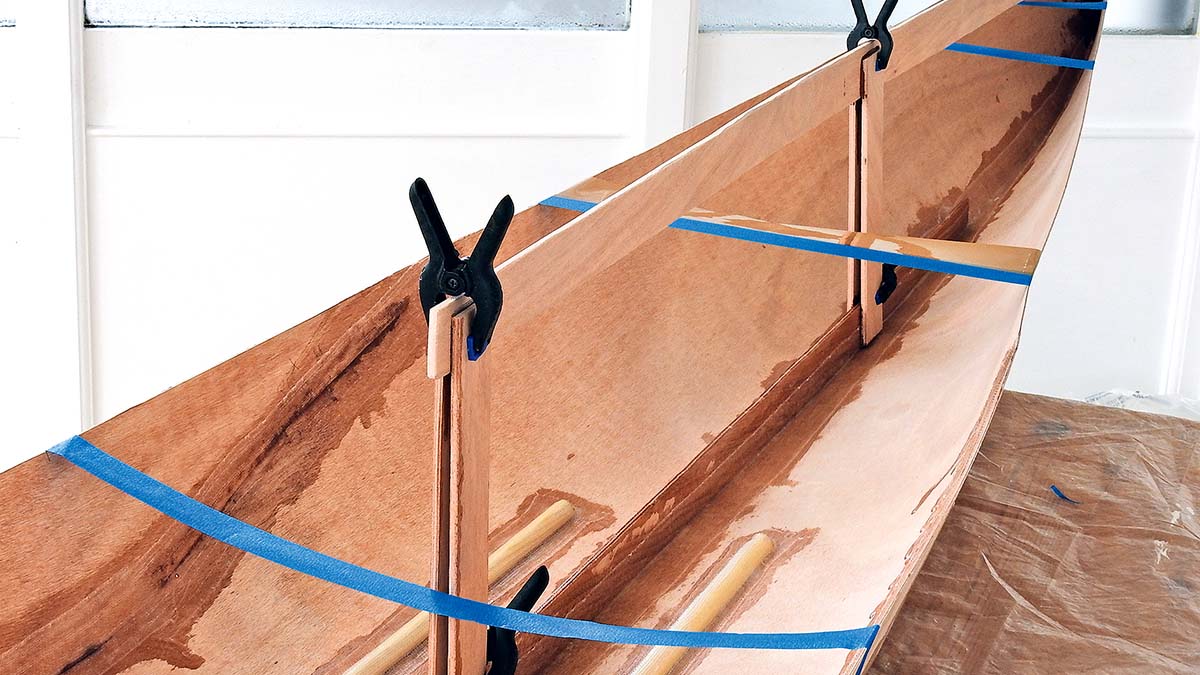
We’re now ready to build the permanent framework into the boat. The kayak is turned the right way up and the mould is lifted out.
The hull inevitably distorts – which is why it has to be supported along its entire length on the flat tables. The sides of the kayak flop outwards, but can be pulled back into shape by lengths of masking tape across the hull.
Instead of using cardboard to make a pattern, it’s sometimes useful to use transparent plastic sheet
The framework has to cope with the different stresses on the kayak. We use our K1 boats on the tidal Blackwater, where wind can quickly raise choppy water, and passing motorboats often create large wash.
It’s essential that the kayaks are rigid enough to feel safe when they’re supported at only one or two places on the waves. A large part of the rigidity comes simply from the K1’s shape – the deck and the bottom of the hull are joined by the side pieces, making the kayak into an almost closed box.
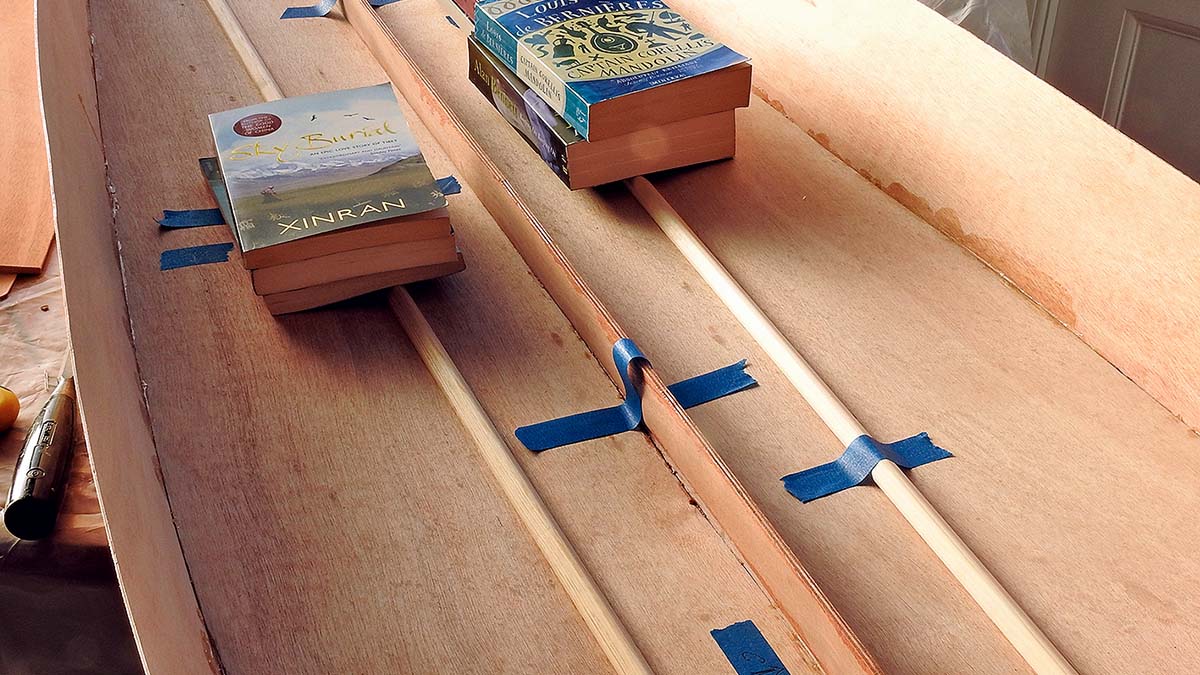
The floor of the kayak must be reinforced to stop the large bottom panels from being buckled inwards by water pressure. We cut a strip of 6mm ply, 40mm wide, and glass it in on end along the centreline of the kayak.
Temporary copper wire stitches are needed as well as an abundance of tape until the joint has been tacked with epoxy paste. The stitches can then be removed…
Parallel to it and 100mm away on each side we place 1.8m-long, V-shaped pine angle moulding with the apex upwards, and this is covered with glass tape to create, in effect, a moulded-in hollow tube.
Since there is already a glass tape down the centre line on the underside of the hull, and glass tapes connect the bottom panels to the sides, these extra reinforcements are sufficient for the bottom of the boat.
When the paddler is seated in the kayak their weight is primarily on the seat. Supporting the 1.5mm ply seat base on a block of polystyrene is enough to spread the paddler’s weight across the boat.
 Getting in and out of the kayak creates local stress points when the paddler’s weight may be on just one foot.
The strengthening that we have already done to the bottom of the kayak is sufficient to handle those stresses.
Foredeck and sterndeck
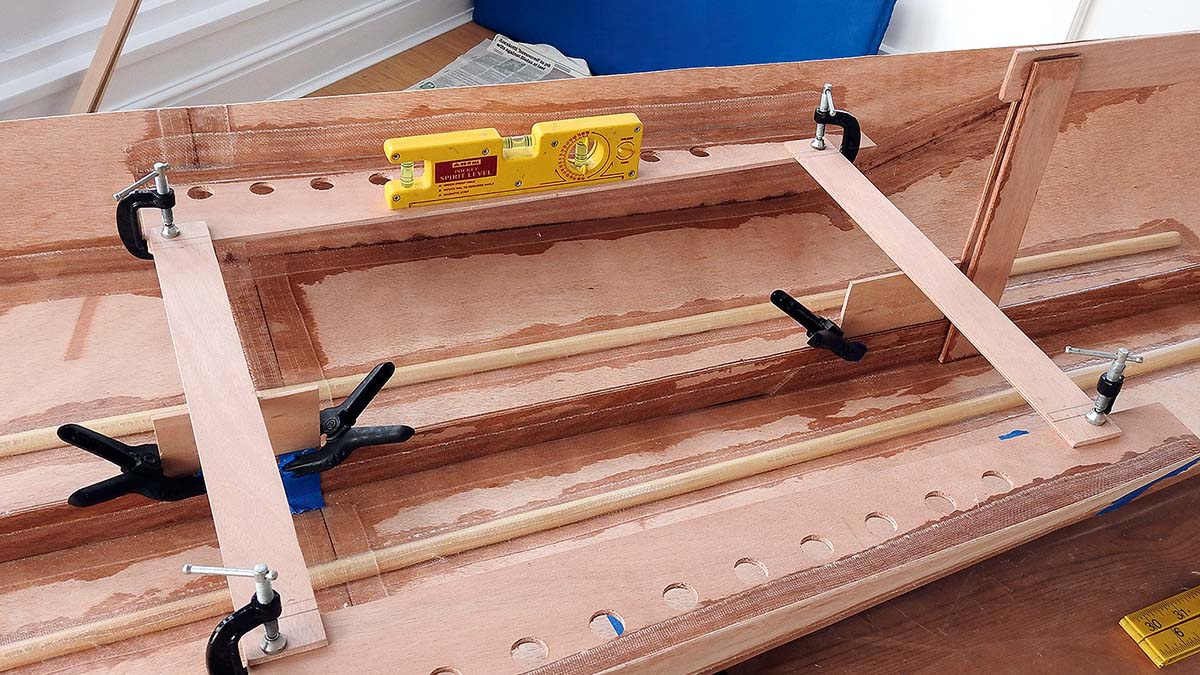
The foredeck is supported along its centreline by another 40mm-wide strip of 6mm ply, supported on two struts, one at the front of the cockpit and one half way to the bows.
We check there is enough room for the paddler’s feet before glassing the framework in place.
The panel for the foredeck can now be cut to size. In contrast to the foredeck, the stern deck requires considerable support.
Getting into the kayak involves sitting on the stern deck and sliding forwards and down into the cockpit.
For about 300mm behind the cockpit the stern deck has to be able to take the weight of the paddler.
Angled V-shaped moulding is glued in upside down and then glassed over
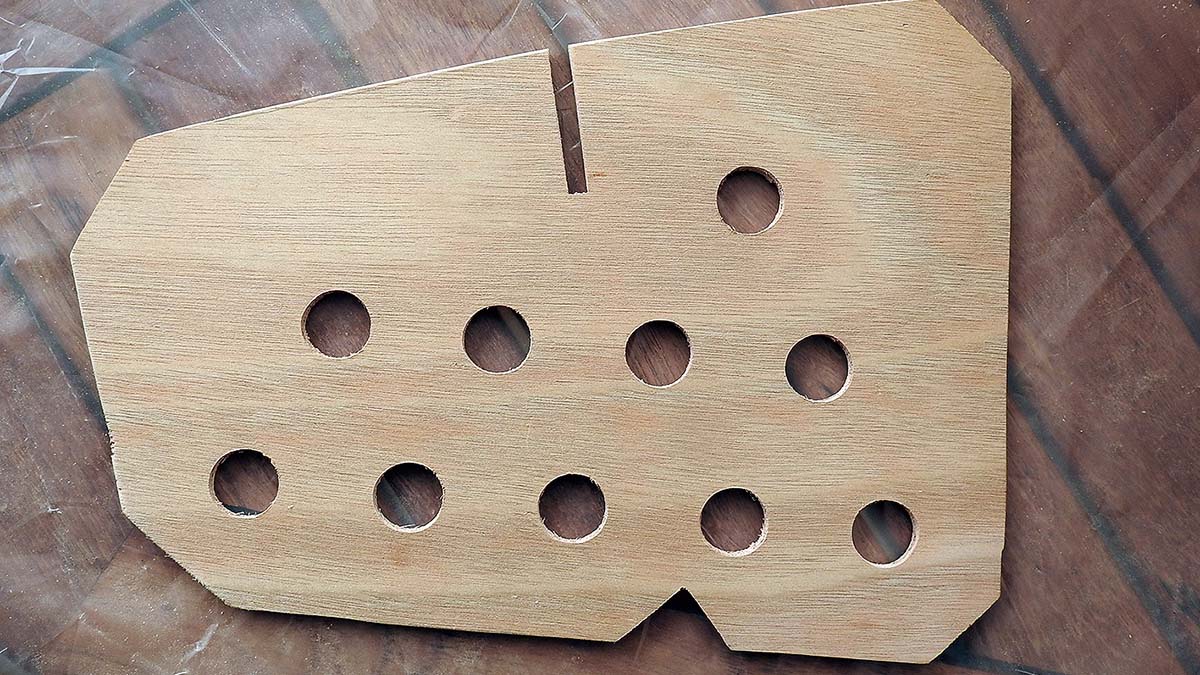
We support the deck with 6mm ply panels, which we drill out with 20mm diameter holes, partly to save weight but also because solid panels would stop ventilation of the stern, leading inevitably to rot.
Some of these supports are placed fore-and-aft and some transverse. They also support 40mm wide strips of 6mm ply, one down the centre (from the stern to the back of the cockpit, as for the foredeck’s support) and one each side in the critical 300mm length behind the cockpit.
Temporary setup of the support for the foredeck, with its two struts clamped in place
Footrest and skeg
The footrest is adjustable for different lengths of leg and is made from three layers of 6mm ply, glued together with the middle layer shorter than the outer pieces. We find that having the centre of the footrest 90mm above the bottom of the hull is about right.
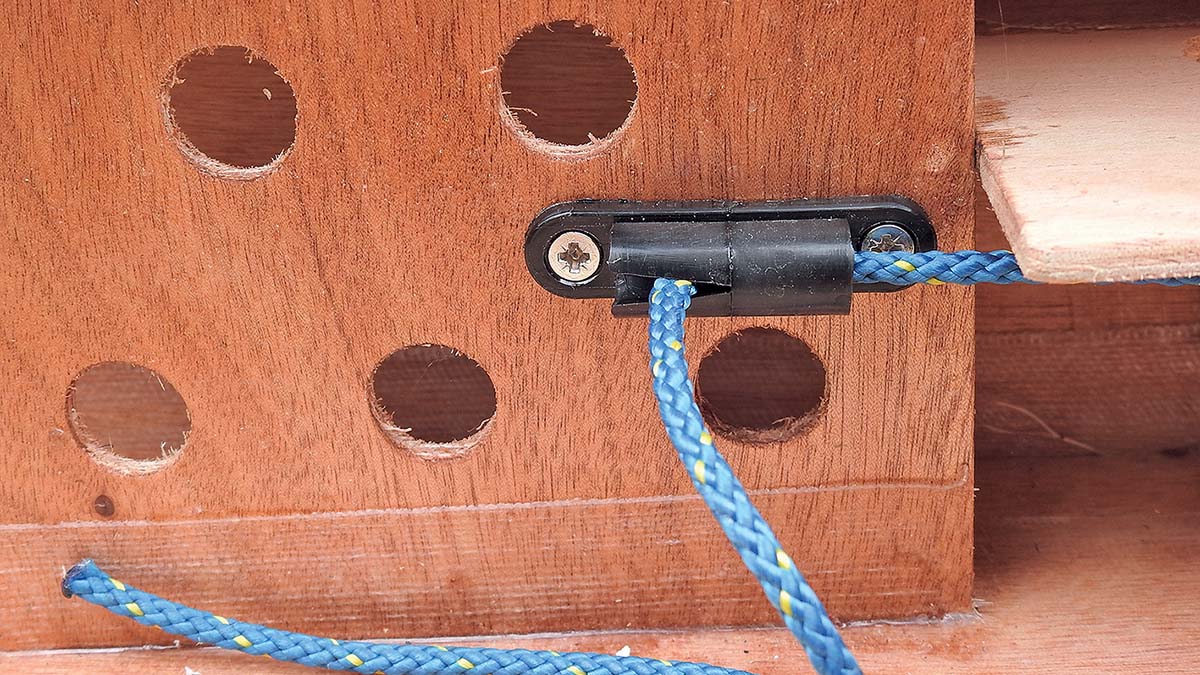
The jamming cleats allow adjustment of the ropes controlling the footrest for different sizes of paddlers
Supports for the footrest being glued in. Inner edges are parallel and they’re drilled with 20mm holes to save weight
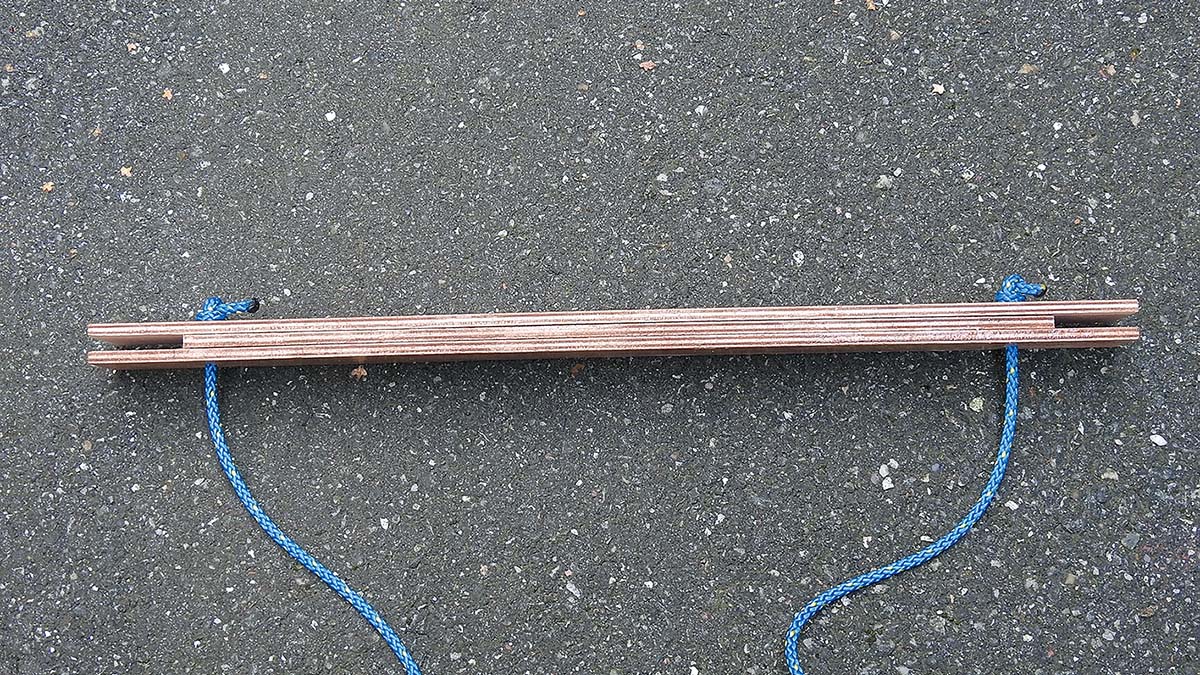
Side view of the footrest, which is built up from three layers of 6mm ply. Slots at the ends engage with the supports
The footrest slides on supporting pieces that are glass-taped to the sides of the hull. The easiest way to adjust its position is to use string taken back to jamming cleats mounted on the frames that support the side deck.
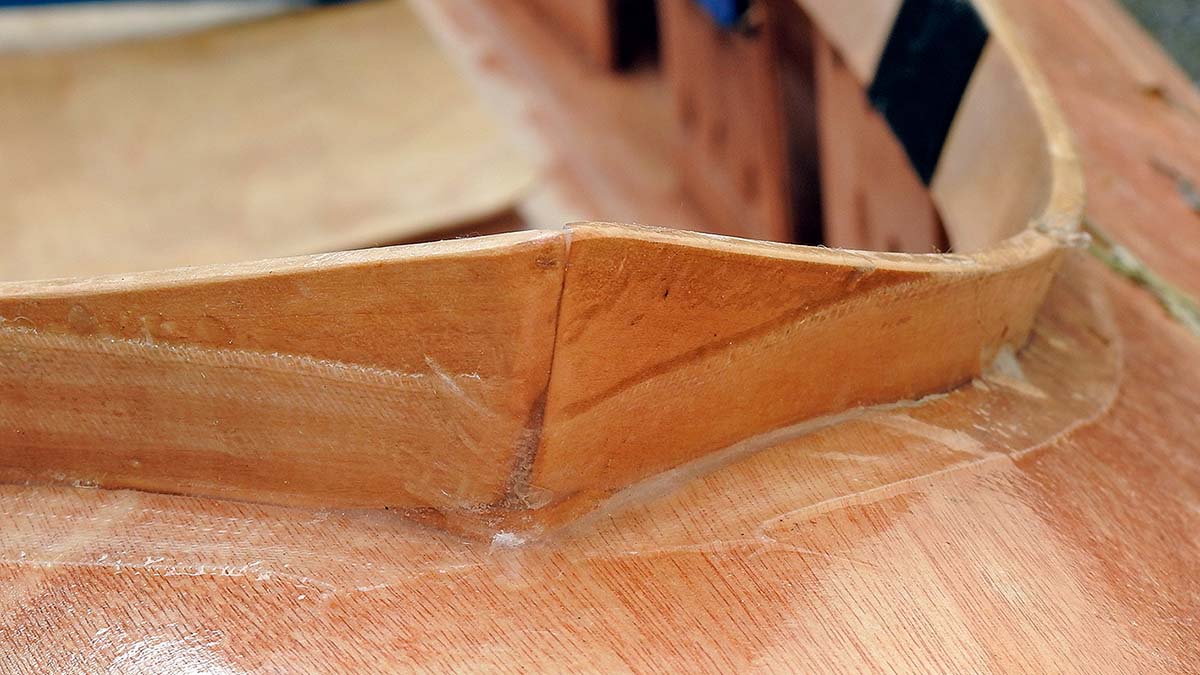
One fiddly job is to attach the skeg which provides directional stability – to keep the design as simple and light as possible we don’t use a rudder. The skeg also protects the kayak when landing on a gravel beach – you back on to the beach so that the skeg arrives first, and the hull is still floating.
We use a skeg about 250mm long with 50mm sticking below the hull and with sufficient (around 80mm) inside the hull to be able to glass-tape it strongly to the end of the keelson and to the hull.

Polystyrene spreads the weight of the seated paddler and gives a smooth base for the 1.5mm-thick ply seat
Decks and grips
The fore and aft decks can now be fixed permanently in place. As we do this we fix a loop of cord at each end of the kayak to provide hand-grips.
In the event of a capsize, you swim to one end of the kayak, put your hand through the loop, and swim to safety, or just use the kayak for extra buoyancy – in the worst case it’s an easy way of staying with the kayak and being more visible to a rescuer.
The side decks can be taped on now, but only making a good fit to the sides of the hull. The cockpit coaming is bent into a satisfactory shape, and the side decks are then trimmed to fit the coaming (it’s trickier shaping the coaming to fit pre-cut side decks).
The side decks are also supported using rectangles of 6mm ply, which are drilled out as for the aft-deck supports. One support each side is sufficient for the K1, and we use three for the longer cockpit of the Adult and Child boat.
Finally, the outsides of the hull and deck are sealed by coating them with epoxy, followed by a coat of polyurethane for UV resistance, and the kayak is ready for use.
Taping the joints
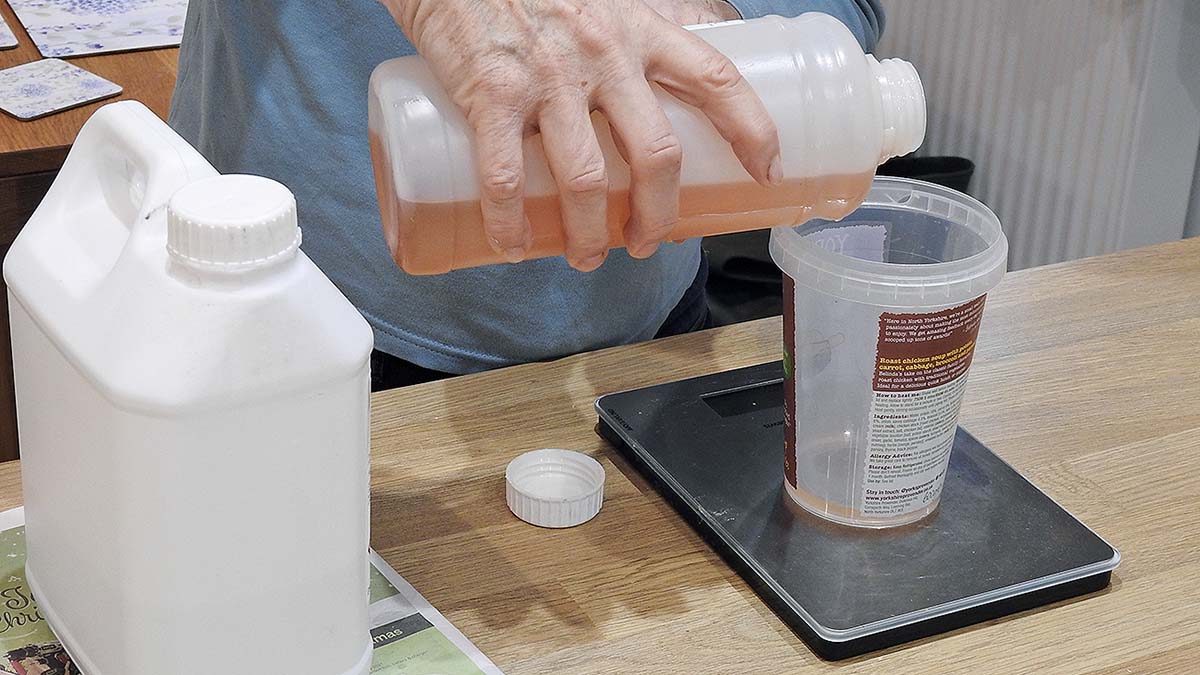
Kitchen scales help to get the correct mixture for the resin

Creasing the tape by ironing it on the hottest setting
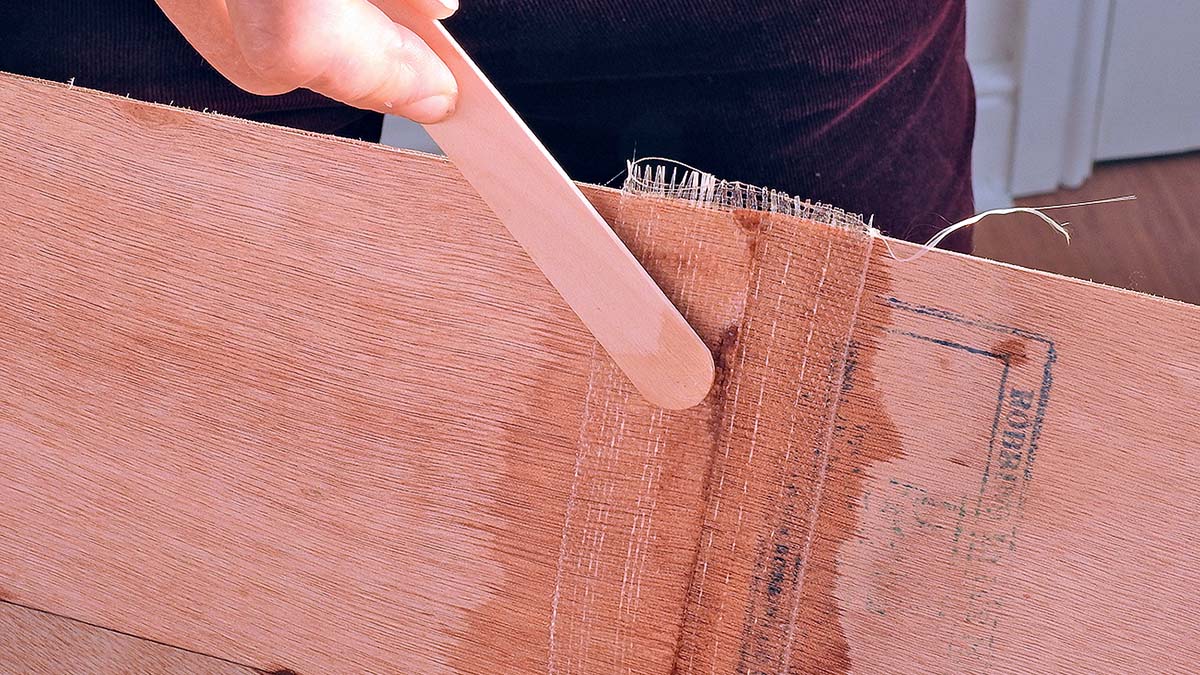
A smooth stick is useful for smoothing the tape down
Only very small quantities of epoxy are required at each stage. As a rough rule, we reckon 75g of made-up resin will cover 5m of 50mm-wide glass tape. Most of the tape is used with a lengthways pleat, for example joining the deck to the sides.
It pays to iron the pleat into the tape using an iron on its maximum setting. Then the joint is given a smearing of epoxy to hold the tape in place before more is stippled into it with a brush.
Forming the coaming
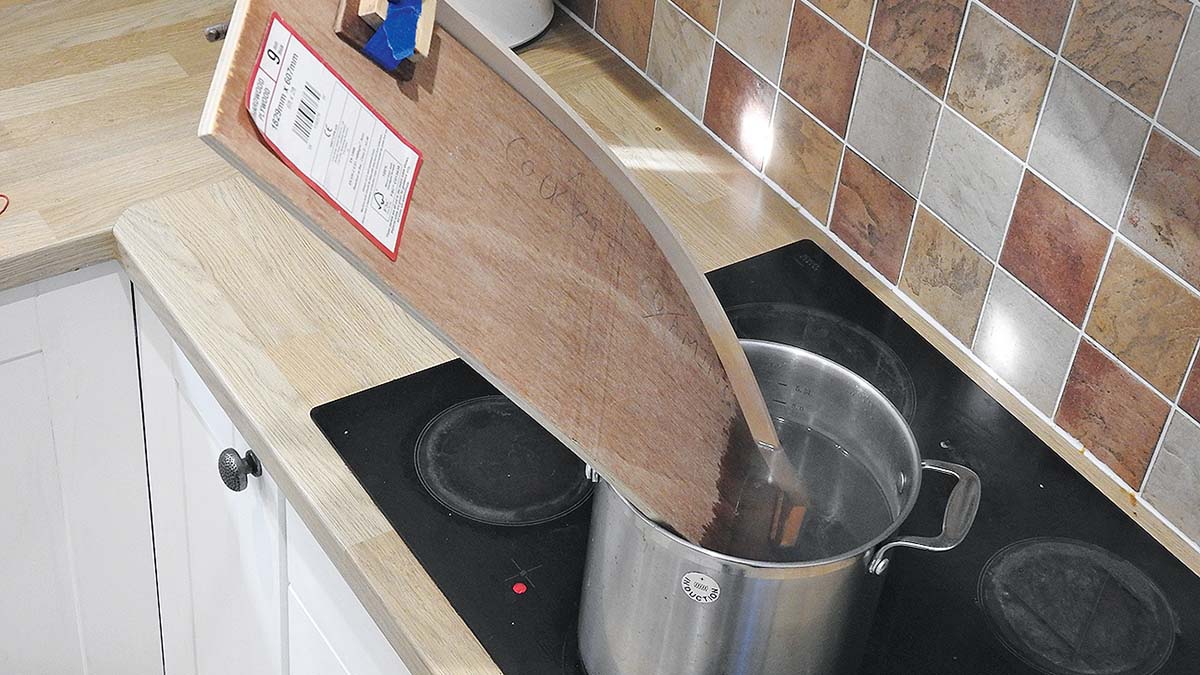
Boiling water helps bend coaming piece around former
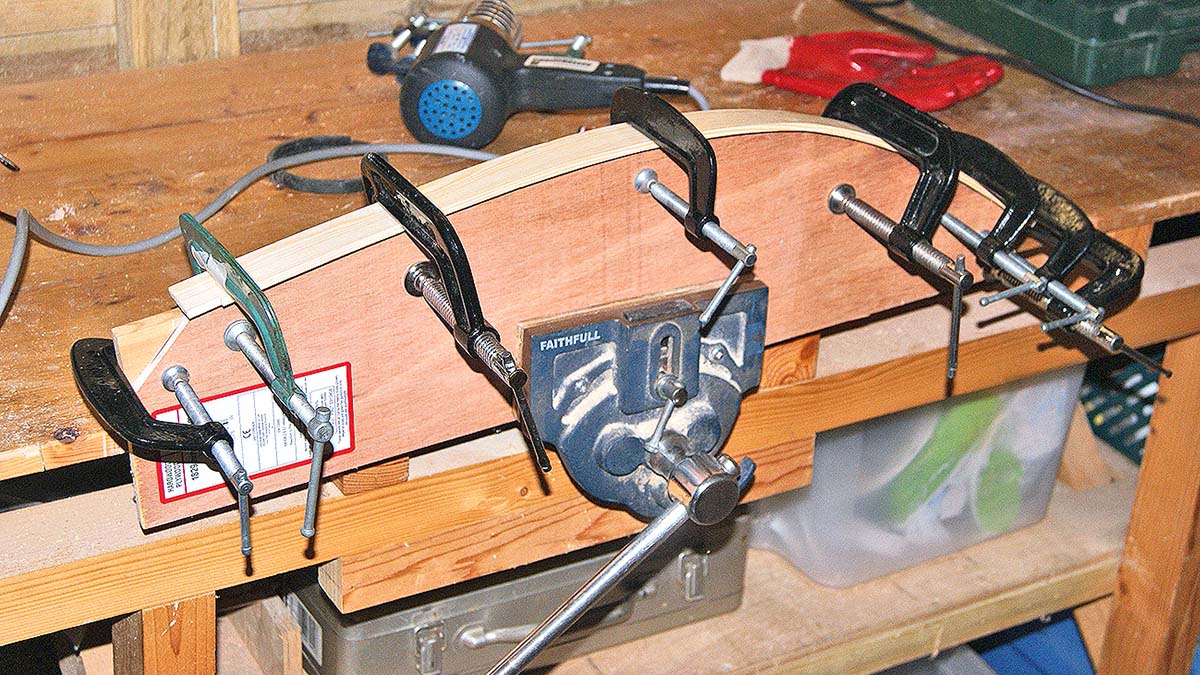
Coaming clamped around former until it cools and dries
Coaming glassed to the deck
A cockpit coaming can be made from pine, 38mm by 5mm. We make a former out of scrap 10mm ply, bend the coaming pieces round it using boiling water and clamps, and leave it to ‘set’.
It’s easier to shape the coaming and then cut the deck to fit it, rather than cut the deck and have to bend the coaming to a precise fit. At the front of the cockpit we either bring the sides together into a point, or square off the front with a small insert.
Child’s seat and paddle
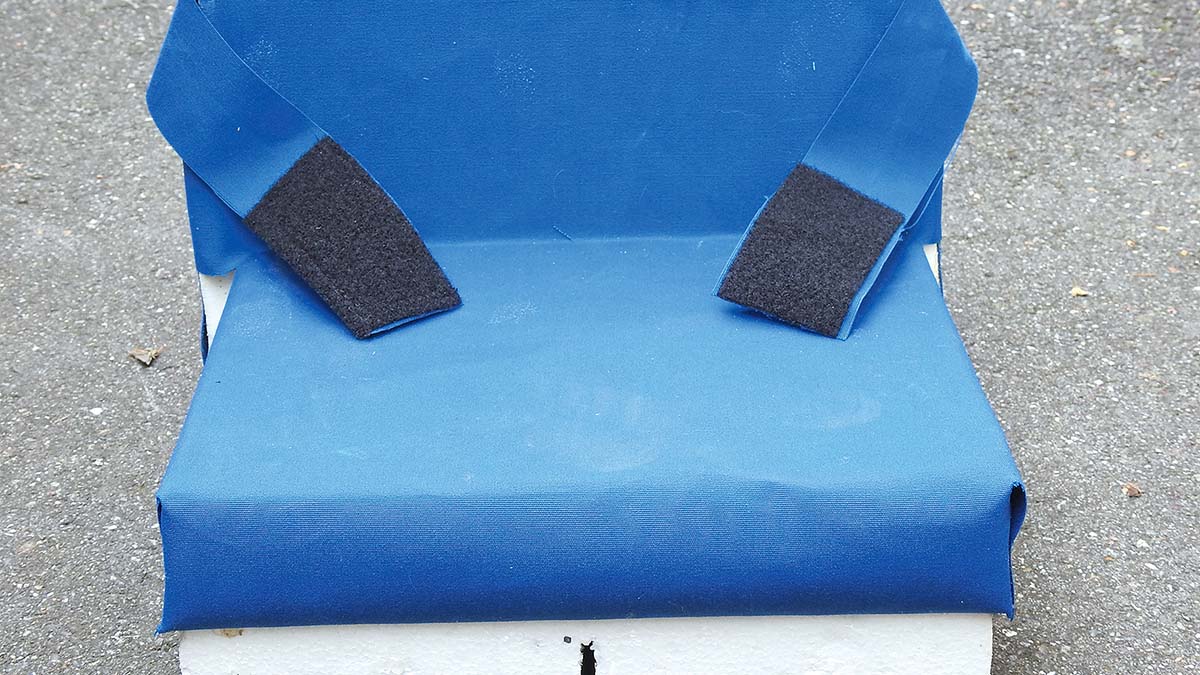
The child’s seat. Velcro secures it to the cockpit coaming and allows the seat to be moved to trim the kayak
The child must be involved, and not simply be a passenger. He or she might ‘navigate’ with a compass and map, or join in with the paddling. The child is sufficiently light that they can sit high in the boat, which makes paddling easier.
We make a polystyrene seat 100mm high, 300mm wide and 250mm long, covered in water-repellent cloth, with a small backrest secured to the coaming by strong Velcro.
The paddle has to be small enough to suit the child’s strength but large enough to reach into the water – about two-thirds the size of an adult paddle seems about right for children of 6-8 years old.
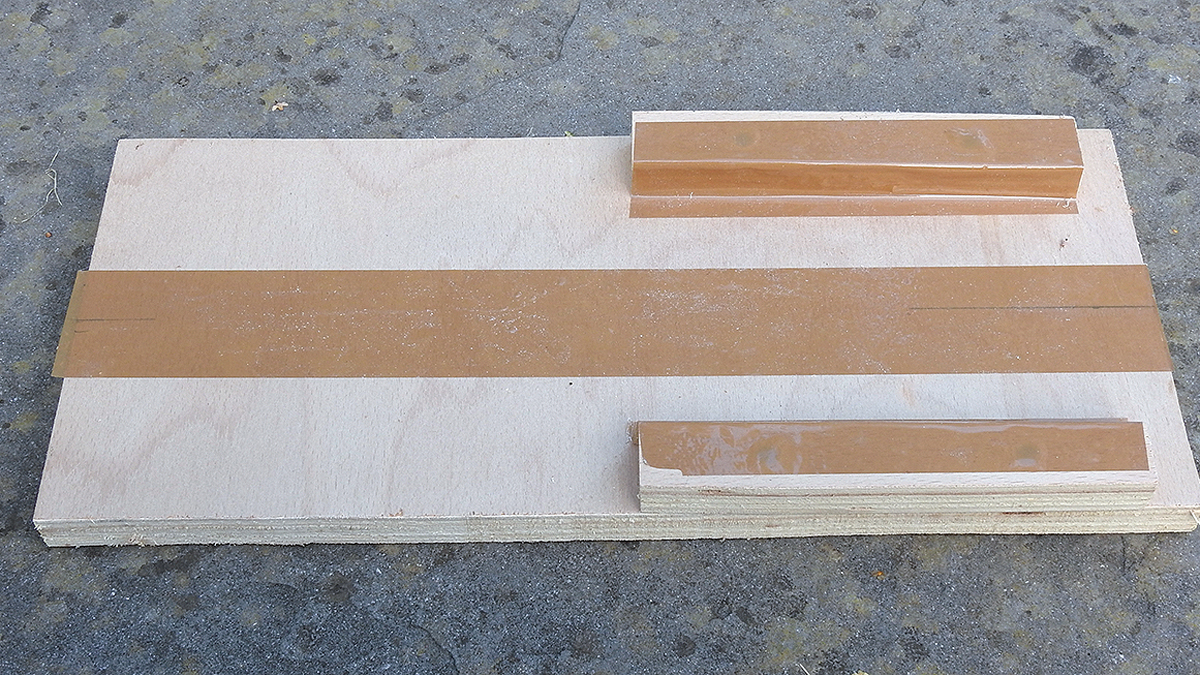
Paddle former is a base with two blocks of wood fixed to it. Parcel tape stops the paddle being glued to the former
We make a very simple mould for the paddle blades by fixing two pieces of wood, 170mm long and 18mm thick, 115mm apart on a bit of flat wood. Each blade consists of two pieces of 1.5mm ply, epoxied together while forced down in the mould to give a dished blade.
The blades are then glued into a shaft of 18mm diameter dowel, and secured in position with 6mm dowel pins. The blades are parallel to each other (not feathered) to make paddling simpler. The complete paddle is coated in polyurethane. It has a total length of 1.40m, weighs only 260g and is surprisingly strong.
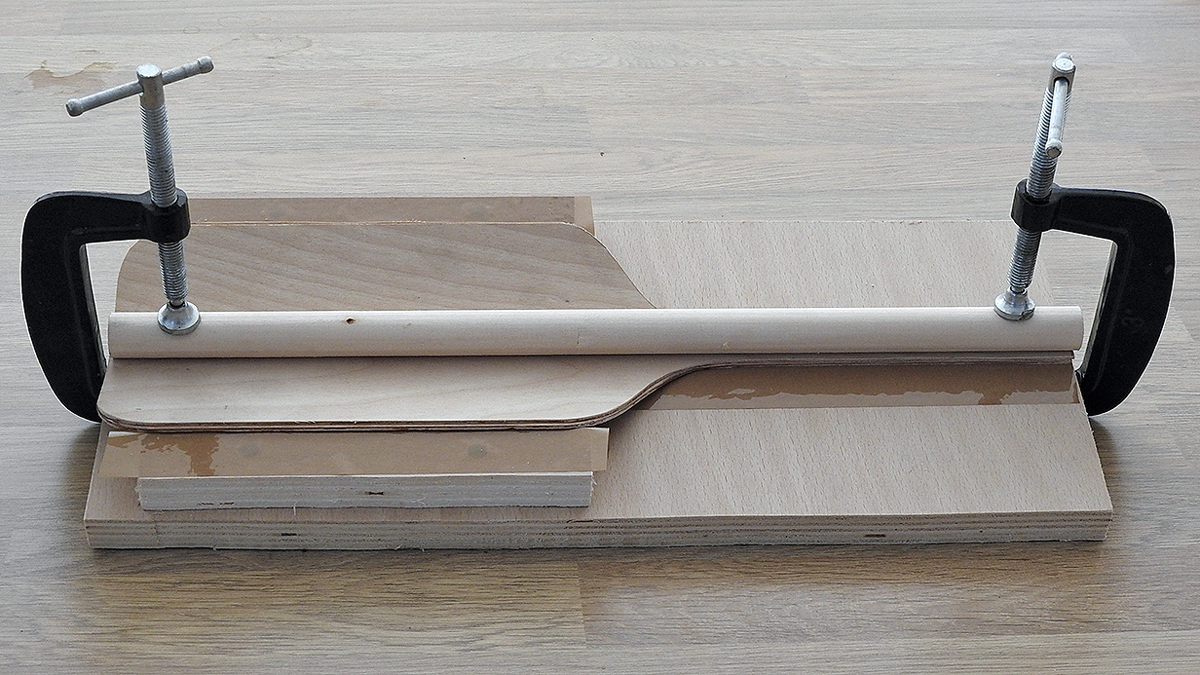
Two layers of 1.5mm ply being glued together, pressed down in the mould by a length of scrap dowel
One blade of the finished paddle, inset in the handle and pinned in place with 6mm dowel
How to make a kayak: Materials and tools
For the mould, we use one sheet (2440 x 1220mm) of 6mm internal quality ply, strengthened by any convenient softwood of about 21mm by 10mm fixed to the ply with standard wood glue. The sheerline and chines are defined by 18mm x 6mm strips; about 20m is required.
Each kayak requires two sheets (2440 x 1220mm) of good quality 1.5mm marine ply. The coaming uses 1.80m of 38 x 5mm pine for the K1 and 3.60m for the Adult and Child.
Half a sheet of 6mm marine ply is ample for the framework. Two 1.8m long pine angle mouldings strengthen the bottom, and two sailing dinghy jamming cleats secure the footrest lines.
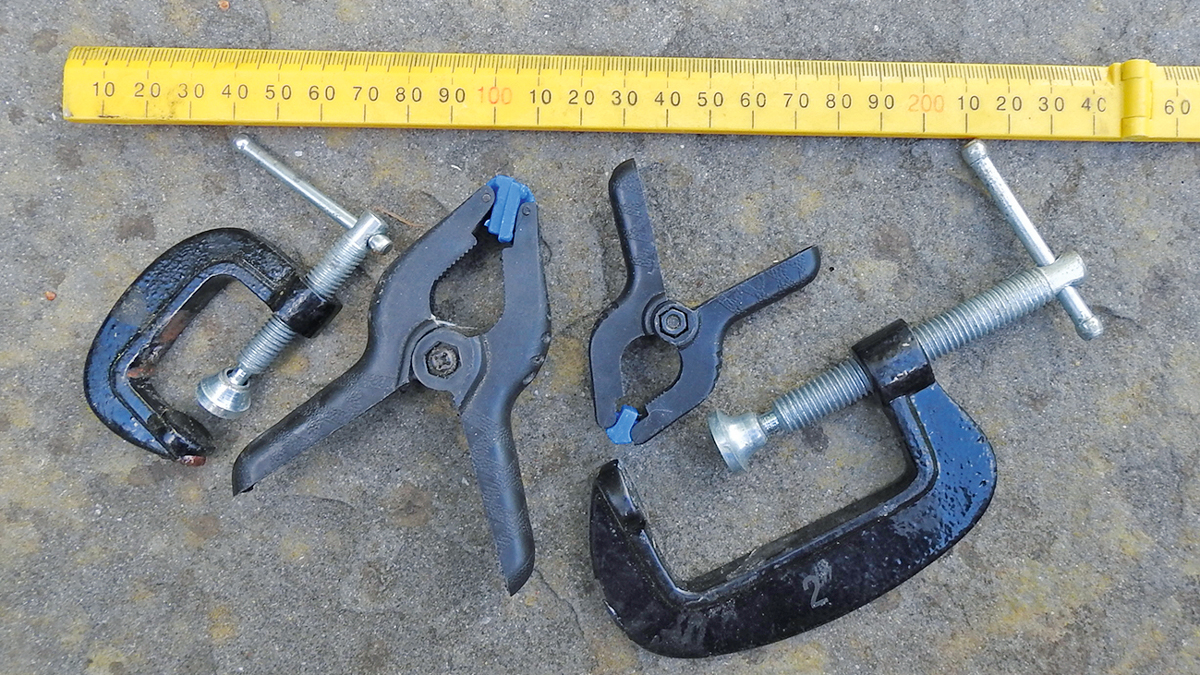
A variety of clamps is required
We use 3kg of Multipurpose Fast Eco Epoxy from Professional Epoxy Coatings. It’s almost odour-free, which makes construction possible indoors. At least 25 filleting/mixing sticks, and 20x 1in low cost bristle brushes are required – they cannot be reused.
Vinyl gloves avoid allergic reaction to the epoxy. Plastic (yoghurt) pots make good one-use pots. A 50m roll of 50mm wide, woven glassfibre tape is required. For the rounded bow, a bit of copper wire is needed – it can be stripped from scrap electrical cable.
Clamps are essential but, given the flexible nature of the ply, must be lightweight. We use up to 30 of them. Strong masking tape and parcel tape are also good for holding panels in place, and parcel tape on the mould stops it from being glued to the hull.
The total cost of the materials in 2021 was under £300.
The finished skeg attached to the stern
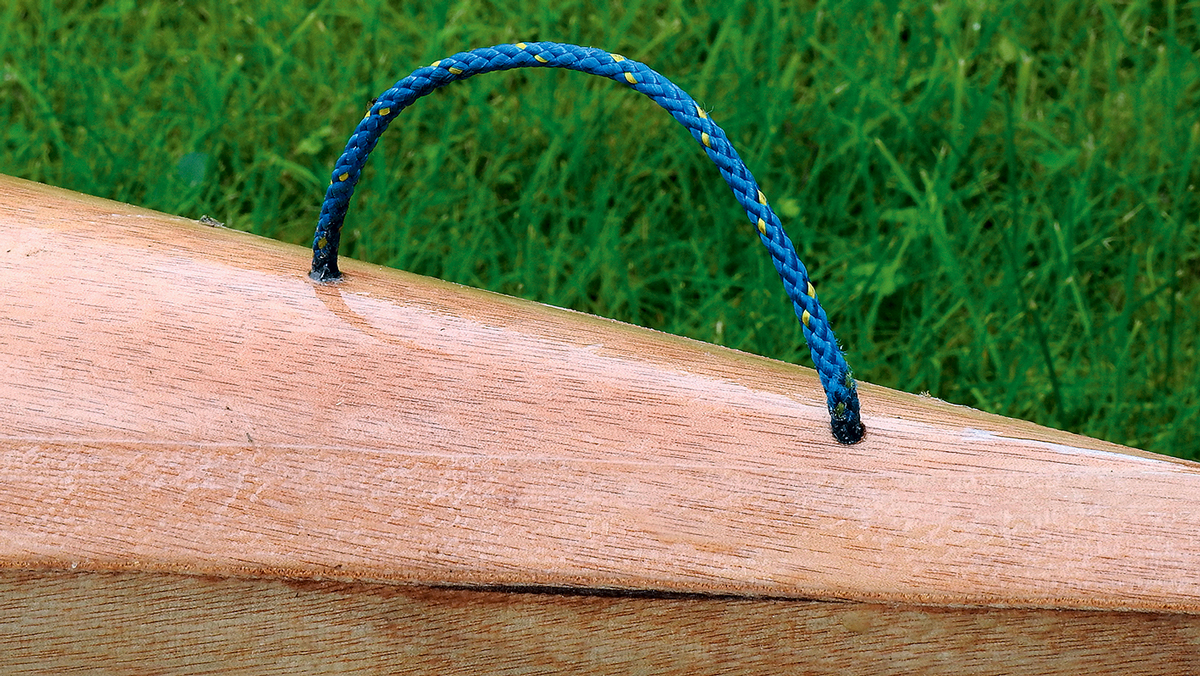
Cord handgrips are secured through fore and aft decks to the centre beams beneath
A note on safety
With a child, only use the boat in safe conditions. A test capsize could be used to establish a procedure but at the risk of frightening the child. We simply tell them that if we capsize, hold on to the loops at the bow or stern and the adult will swim the boat to safety.
Why not subscribe today?
This feature appeared in the December 2022 edition of Practical Boat Owner. For more articles like this, including DIY, money-saving advice, great boat projects, expert tips and ways to improve your boat’s performance, take out a magazine subscription to Britain’s best-selling boating magazine.
Subscribe, or make a gift for someone else, and you’ll always save at least 30% compared to newsstand prices.
See the latest PBO subscription deals on magazinesdirect.com