
Introducing PBO’s new project boat – a Secret 20 which we will be building from a kit

After approximately 11,232NM at sea, our new project boat was craned off a container ship and transferred to a freight-forwarding warehouse in a rainy, grey Southampton Docks. Quite a change from the Queensland sun under which it had been loaded!
See the full set of articles: Building the Secret 20 kit boat with PBO.
To be fair, she doesn’t look much like a boat yet, rather a collection of boxes and oddly-shaped parcels. However, inside said packages are the makings of a beautiful ‘modern gaffer’ – a Secret 20. She’s somewhere between a Brightlingsea smack and a historic Sydney Harbour skiff, with her traditional appearance belying a relatively modern semi-displacement hull shape. Clouds of sail should give her a good turn of speed (especially with the optional large gennaker and trapeze) and there is basic accommodation for two in the cabin – plus two more under a cockpit tent.

Her designer, Derek Ellard, grew up sailing on the East Coast before emigrating to Australia, where he now sells kits for the Scruffie range of boats that he designs. The Secret had taken my eye when researching a feature on kit boats back in 2009, and when looking around for a new project to replace Hantu Biru, we thought – why not? Apart from resulting in a sweet boat, the build process should be sufficiently interesting to hold our attention (and yours) in the coming months, comprising a plywood skeleton of frames which slot onto the
keel before stringers and plywood panels are added and faired.
Epoxy fillets keep the whole thing rigid and make construction easy for the home builder. The turn of the bilge is rounded, using cedar strips – an unusual addition to plywood boats – before the whole thing is glassed and the fairing and fit-out begins. Scruffie have supplied us with extra-thick veneers in Queensland silky oak, with a fascinating grain, for the transom and other exposed woodwork that should make the finished boat a beauty.
Racier rig
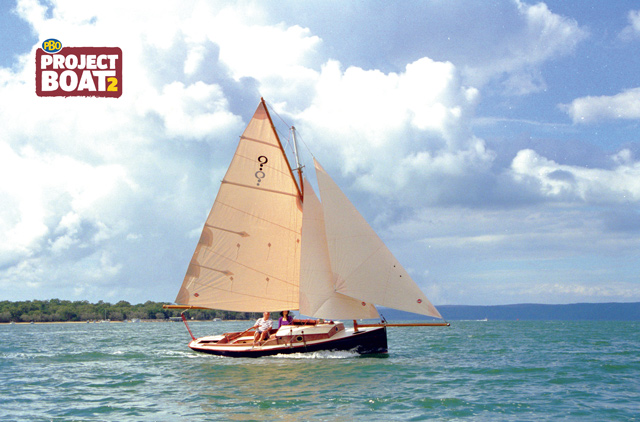
The rig – we’ve chosen the larger, racier rig option – comprises a gaff mainsail with a high peak, jib and flying jib at the end of the bowsprit, with a gennaker as well for offwind sailing. The mast is on a tabernacle for easy trailer-sailing, and the bowsprit can be lifted to make manoeuvring easier and marina bills cheaper.
Boats this size epitomise the fun that can be had sailing small boats on a limited budget (as well as in the building and maintaining), and the project should showcase a range of skills and techniques from woodwork to glassfibre, painting, varnishing and fitting out, that are applicable to most boats: we’re looking forward to getting stuck in!
Having signed the documents and paid the import duties (which we’d embarrassingly neglected to mention in our discussions with PBO’s finance department – we’re on short rations for a while), a forklift truck emerged from the dark bowels of the bonded warehouse, three oddly-shaped packages balanced on its forks. The longest was 5.5m (18ft) long, and contained the spars, stringers and other lengthy timbers; a large, flat, 2.4m x 1.2m (8ft x 4ft) oblong held the promise of plywood sheets to form frames, hull panels and decks, and these could easily be shunted onto our agricultural trailer. But the final package contained the Secret’s long keel – and it weighed 250kg.
Try as we might, we couldn’t shift this one by hand, so the forklift driver – with some impressive manoeuvring – managed to shuffle it over the trailer’s load centre. This done, we could finally lash the whole lot down and hit the road, bound for Poole and the PBO garage.
Getting the garage ready
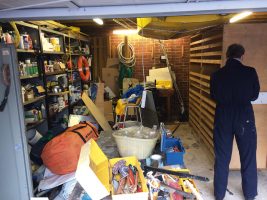
Building any sort of boat needs some form of garage, workshop or undercover storage. The PBO garage – a standard double garage in our car park – was once used for storing magazines and books until the roof collapsed in about 2005. Since then it has been re-roofed, and we have taken load upon load of mildewed magazines to the tip. Eventually we had a reasonable workshop for Hantu Biru’s refit, but there was quite a bit of steel and wooden racking still left in the garage, not to mention years of accumulated junk.
No one would order a kit before checking they had the space, surely? Well… We had paced out the garage floor before placing the order and it seemed as though the boat would fit, so we thought little of it. But once the container was on its way we had a qualm or two, and marched down to the garage sharpish with a tape measure. It soon transpired that the boat would fit – just – but we had to do some more tip runs.
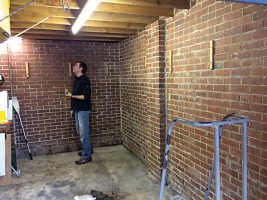
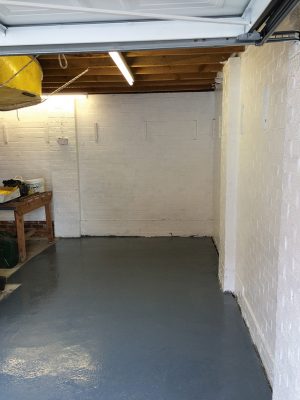
We dismantled three large, elderly shelving racks and took another five loads of detritus to the tip – leaving us with a dingy, dark cave that would just about accommodate the boat. Two days later, the garage was transformed. We removed the junk, painted the walls white and installed extra lighting to make it a better place in which to build a boat, finishing off by painting the floor with Screwfix floor paint. We’ve now got a pleasant, usable workspace that we can work in come rain or shine.
Lifting off the keel
With the kit finally in Poole, the time had come to lift it from the trailer – but here we hit a snag. The keel, which our friendly forklift driver had loaded so nonchalantly back in the docks, weighed 250kg, and we could barely lift it. Derek, the designer, had advised that we needed ‘a few blokes – or strong girls’ to lift the packages off, but we went for an easier method.
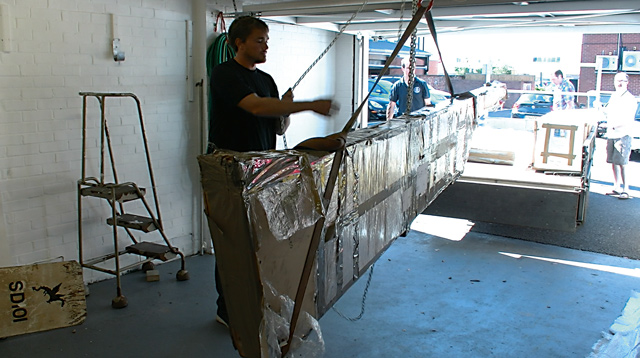
Our solution was to drill two large holes in the hefty overhead joists, installing a length of scaffold pole to create a strongpoint in the roof. This done, we wheeled the trailer underneath and used a chain hoist, clipped to a ratchet-strap bridle, to gingerly lift off the keel. With the package dangling in the air, we backed the trailer out again and lowered the keel to the floor with a huge sense of relief. Removing the packaging took a surprising amount of time, the keel having been carefully chocked and wrapped up for its long journey back in Australia. We soon had the keel assembly, which had been ballasted with lead and fibreglassed back in Derek’s workshop, on the floor and ready to build. The huge quantity of hardwood and spars (thankfully labelled!) were stored in racks, and we unloaded the plywood to lean against the walls.
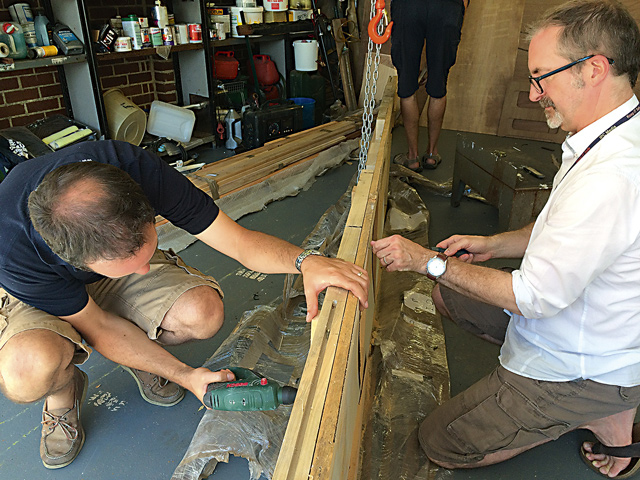
She’s now ready to build – and we’re excited to get going at last. The next step is to chock the keel up perfectly square and level, and to start building on top of it with the stem and the frames. Check back next issue to see how we get on in the next few weeks!
As published in the October 2016 issue of Practical Boat Owner magazine.