
The best paint finishes look stunning when professionally applied, but can be eye-wateringly expensive. Rupert Holmes shows how a DIY job can achieve a tough, glossy result for a fraction of the cost

Normally I strongly counter against painting boats, arguing that even the most neglected of gelcoats can often be brought back to a decent and long-lasting condition.
The technique is to fill and fair damage with colour-matched gelcoat and then sand the whole hull with progressively finer grades of abrasive paper, to at least 800-grit, and then finish by polishing.
It’s a process that’s generally more cost-effective at the outset than painting and reduces the amount of long-term maintenance needed.
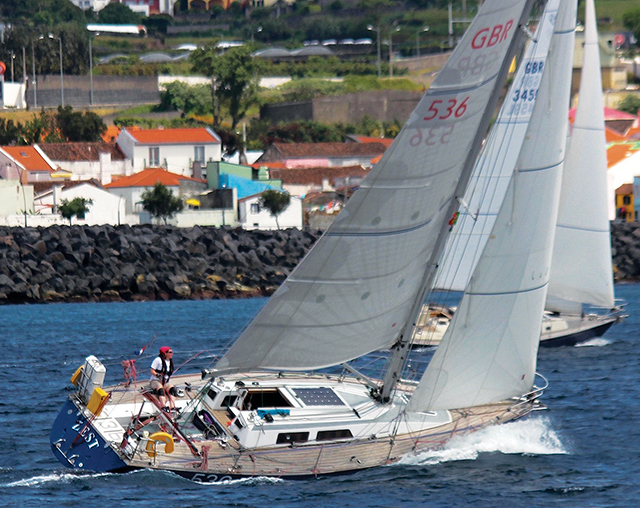
Zest is a one-off Rob Humphreys 36-footer owned by Kass Schmitt
However, there are times when this approach won’t work and I’ve therefore found myself painting boats for more than 30 years, starting with an International Cadet, Mirror dinghy and Cherub when barely a teenager, and moving on to small yachts including a 19ft Caprice, a 25ft Folksong, and more recently a Quarter Tonner.
For all of them I used one-pot marine paints – a popular option that’s reasonably economical, easy to apply and produces a decent finish.
However, one-pot finishes have drawbacks, arguably the biggest being that, although they are tougher than household paints, they are still relatively soft.
This can be an issue for boats kept on an alongside mooring, even if a fender blanket or fender cushion is used to protect the hull from abrasion.
These paints can also fade in the sun relatively quickly, especially the darker colours.
Zest’s original colour scheme was blue above stripes of white and grey – time consuming to replicate
A couple of years ago Zest, my partner’s 36ft Rob Humphreys designed one-off, needed a repaint for a couple of reasons. The most pressing was following repairs to topsides damage (PBO June 2018) following a dismasting.
The boat is of a high-tech strip cedar and epoxy construction and doesn’t have a conventional gelcoat. Instead the hull has an outer layer of epoxy and glass that’s faired and then painted.
Zest had last been painted 18 years earlier, with a top-quality professional job in Awlgrip carried out by boatbuilder David Heritage.
The fact this had lasted so long, even though it had long lost its original deep lustre, is a testament to the quality of the paint, which is harder than gelcoat.
The age of the existing finish made the chances of being able to neatly touch in the damaged areas infinitesimally small.
Close to finishing the first coat of primer – this is the only part of the task that didn’t go according to plan
The way forward
A professional repaint, at a potential cost of around £5,000, was out of the question. Yet we were reluctant to revert to a significantly inferior paint system.
In an attempt to figure out a solution we talked to fellow long-distance solo racer, Jeremy Moore, who’s a former boatbuilder and technical sales rep for marine paints.
He strongly recommended the Epifanes Polyurethane range of two-pot gloss as being a DIY friendly product that’s hard wearing and that cures to a deep lustrous finish.
His was invaluable advice, as was that from the technical sales staff at Marineware, the UK distributor, who are very approachable and have a huge amount of knowledge.
The recommendation was for one or two coats of epoxy primer, depending on the condition of the existing substrate, followed by four top coats.
While we knew the previous paint was a two-part product, that’s not always obvious, but it’s an important point.
Two-pack paints can’t be applied over a single-part paint.
If you’re in doubt as to what’s already on your boat there’s a simple test – use a cloth to apply some thinners/reducer for two-part coatings to a test area.
If it’s a single part paint the reducer will lift or dissolve the coating.
Having decided which paint to use, we still had to figure out the colour scheme. Zest had been painted with three broad stripes, with most of the hull in a dark navy blue, above broad grey and white stripes.
We considered retaining this scheme as she’s a distinctive and well-known boat, but we were paying by the day to keep the boat in a shed and running out of budget at the end of a big refit.
A complex colour scheme would at least double the time needed for painting, so that plan had to fall by the wayside.
An obvious option was navy blue all over, which had the potential to look great and would still have been in keeping with the original appearance.
However, Zest’s surveyor, Hugo Morgan-Harris, cautioned against this, pointing out that dark colours are not ideal for wooden structures as they absorb a lot of heat.
While that may not be a big issue during stereotypical British summers, in the future Zest may spend time in the Med, Caribbean and other hot and sunny locations, so this was certainly a concern.
In the end we decided on lighter blue – it’s still distinctive, but is a sufficiently light shade that hot sun won’t harm the timber beneath the outer skin of epoxy.
We also considered painting a wide white stripe above the waterline, to echo the previous style, but discounted this on the basis of a lack of time.
In any case, we figured if we didn’t like the hull in a single block of colour then we could easily achieve this effect with vinyl at a later stage.
Preparation
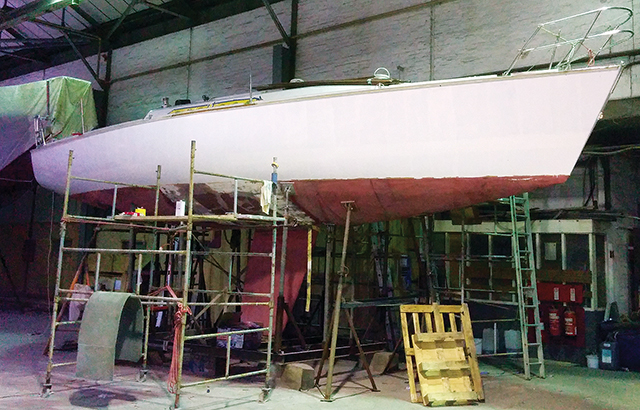
The first stage is to create safe access to the boat. Zest is a light displacement design with a 2.2m (7ft 2in) draught, so painting the topsides involves working at height – with the boat in a cradle the bow is around 12ft off the ground.
We used a couple of scaffold towers on castors, repositioning them as the job progressed.
This wasn’t ideal, but the interruption to the painting was minimal and it was safe way of working at a much lower cost than erecting staging right round the boat.
It’s well known that the secret to a great paint job is in the preparation.
The first stage is degreasing, a step often missed in the mistaken belief that it’s best done immediately before painting.
While it’s true that dust on the surface must be eliminated before painting, failing to remove grease before sanding simply moves the contaminates around and risks embedded them in the groves created by sanding.
Zest’s hull was in general very fair to start with, although there were some old repairs that were not as good as the original finish and needed a couple of rounds of sanding and filling with a mix of epoxy and microballoons.
After that, Jeremy recommended long boarding the hull by hand with 60-, 80- and 120-grit abrasive paper, before applying a high-build primer in the areas around any repairs.
The high-build primer then needed to be machine sanded (we used a 6in random orbit sander) with 180- to 240-grit abrasive paper before applying an epoxy primer to the whole boat.
The surface preparation continues after the application of the epoxy primer, which needs to be sanded back with 220-grit paper after each coat.
Ideally the final coat should also be sanded with 400-grit. Depending on the temperature, sanding between top coats is not needed as long as they’re applied 24-48 hours apart.
Application errors
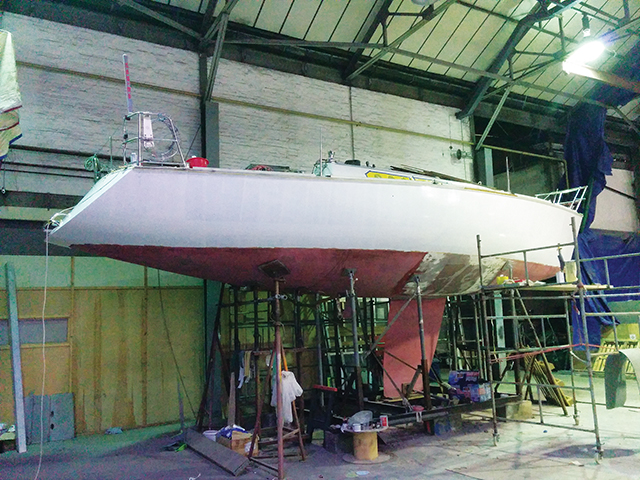
Applying the first top coat, with a 4in roller on a long handle. Setting the staging to the correct height was crucial for efficient painting
Over the years I’d become reasonably skilled at applying one-pot paints with a roller and tipping off with a brush.
It’s a technique that can produce a result close to a sprayed finish, especially if polished after application of the final coat.
However, two-pot paints are much more difficult to apply in this manner.
The problems are two-fold – firstly the working time before they skin over is very short – potentially as little as tens of seconds, rather than tens of minutes.
Even during this time there’s a limit to how much the paint can be moved around once applied. It’s a very different situation to that with one-pot paints, where any runs or heavy brush marks can be smoothed out without creating a bigger problem.
One of Jeremy’s instructions was ‘never go back over areas you’ve already done’. I tried repeating the mantra to myself: ‘don’t go back…’ but it wasn’t easy.
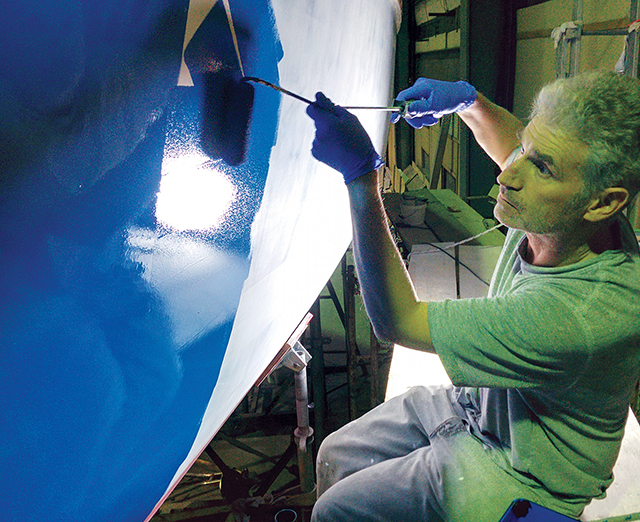
The high-build primer went on simply enough, but that wasn’t the case for the epoxy primer. I was applying it with a roller, with Kass following behind using vertical strokes on a wide, high quality brush to tip it off.
The problem was that the super-light touch normally needed to lay paint off neatly made no significant impression, but applying more pressure left brush marks.
On reflection, we should have added more reducer to make the paint less viscous, but we didn’t figure that at the time.
At that point we should have stopped – maybe having only painted the transom – to figure out what we were doing wrong.
However, conscious of time pressure we ploughed on around the whole boat.
A right old mess?
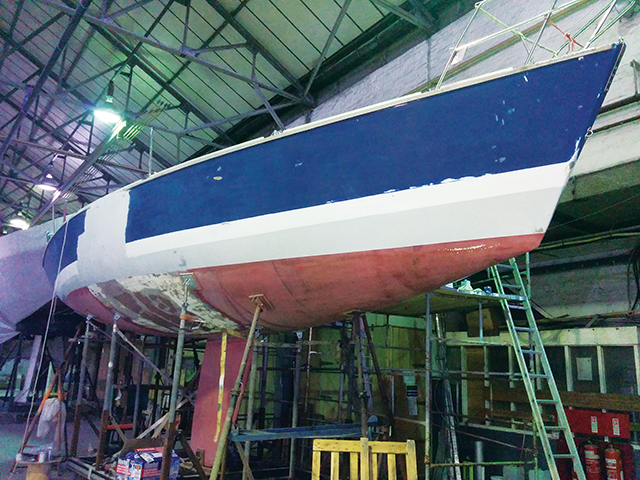
It looked fine from a distance, but the misapplied primer was deeply ridged…
The following morning it was clear we had a potential disaster on our hands – the primer was deeply ridged.
At that point we regretted not following the advice to try the paint on test areas first.
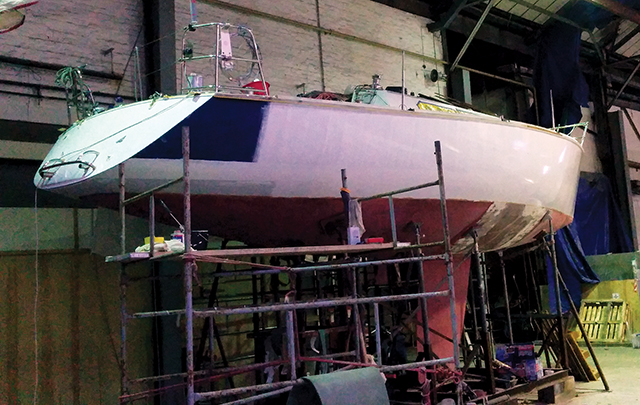
Epoxy primer is extremely tough and it took two frustrating, long, energetic and tiring days to sand it back to a smooth finish.
Fortunately, there still appeared to be enough primer left that applying another coat wasn’t essential.
We had heard of the possibility of tipping paint off using the roller it’s applied with, so thought we would give it a try with the first of the top coats.
Before re-loading the roller after applying paint to an area, you go back over that area with the lightest possible touch.
It’s just enough to smooth out the bumps and enable the inherent properties in the paint to self-level.
Poor primer application took two days to sand back to a smooth finish
This worked amazing well using a 4in roller over an area of around three to five square feet. It was amazing to watch the paint form itself into an almost mirror-like surface immediately after tipping off with the roller.
Even under the patchy artificial light in the shed it was easy to let the nearly empty roller glide over the surface than it was to judge exactly where to place the tip of a brush.
It was also quicker and turned the process into a one-person job, making it possible to get right round the boat in a couple of hours.
This success, however, was not simply a result of improved application technique. Mixing in the correct amount of reducer was just as important.
This performs a similar role to thinners in single-pot paints, optimising the viscosity of the liquid and improving the flow when it’s applied.
In simple terms, getting the paint mix right makes it much easier to apply successfully.
In our case this also meant topping up the reducer half-way through each batch of mixed paint to allow for evaporation.
Success at last
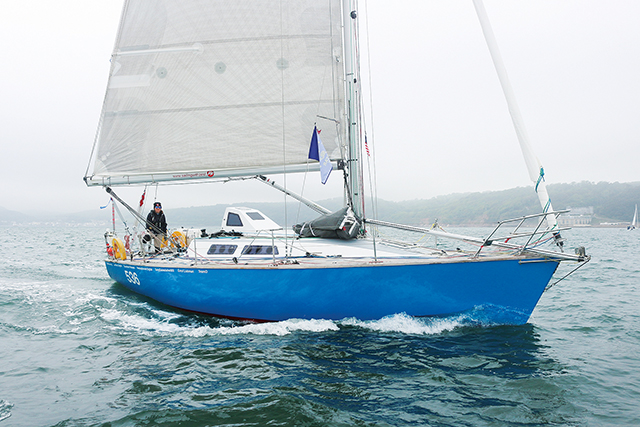
The result of our efforts: a deep shine and great reflections, even on a dull day
Nevertheless, it was a still stressful experience – working for four consecutive days with my eyes only inches from the hull meant I could see every small blemish.
I therefore worried that when Zest emerged into the daylight it would obviously look like an amateur finish.
However, my concern was unfounded. If you’re more than a metre away the paint looks mirror smooth, with a deep gloss.
Two years on it appears as good as the day it was applied, with no discernible loss of shine or fading.
With any luck, a quick sand back plus one or two extra maintenance coats applied in three or four years time will help to keep a great finish more or less indefinitely.
We’ll do that outside to keep costs in check – most likely in late April, May or early June.
And I’ll be a lot more relaxed about applying the paint next time.
- Time taken: 10 days
- Cost: £600
- Saving: £4,000
Mixing two-pot paints
Never be tempted to mix more paint in one go than you’re sure you can use before it starts to cure – the pot life is relatively short.
Electronic scales are a quick way to measure exactly the right amounts of paint and hardener.
Be sure to stir it well – we timed ourselves to ensure we didn’t skimp on this stage.
Adding the correct amount of reducer is essential.
The starting point for this is the manufacturer’s recommendations – you can then tweak the amount to get optimal viscosity.
Over time evaporation will cause the paint to become more sticky as it’s being applied – this is a sure sign more reducer needs to be added.