
Highly polished metalwork – stainless steel in particular – shows off a boat to its best, and helps protect the metal itself. Tony Davies shows how to polish stainless steel

Once you know how to polish stainless steel from its raw milled state to a high gloss finish then it’s possible to make all sorts of trims from flat bar, angle or sheet.

It’s not difficult to achieve a mirror finish on raw stainless – although it is time consuming and can be a bit tedious. However, the end result will always be worth it.
There are various methods of achieving the desired result and here I’ll be describing how I go about it. My two main tools are a mini-grinder and a 750W bench grinder/polisher.
With each product is a ‘Buy Now’ or ‘Best Deal’ link. If you click on this then we may receive a small amount of money from the retailer when you purchase the item. This doesn’t affect the amount you pay.
I first started polishing using a standard low cost 350W bench grinder and although this worked well I decided to upgrade to a more powerful machine as the amount of my polishing increased. Even the new machine was not excessively expensive at just over £100.
But, as I said, a bench grinder will do the job just as well although I should mention that the low priced and very low powered 150W bench grinders are not up to the job – you’ll need a minimum of a 350W model.
Grinders needed to be capable of having a grinding wheel removed to allow a ‘pig-tail’ to be fitted to the shaft. This is an auxiliary shaft that has a spiral thread onto which the mops are fitted.
If you don’t have a mini-grinder or bench grinder then it is also quite possible to achieve similar results using just a powerful hand drill fitted with grinding discs to begin with and a ‘pig-tail’ with a shaft designed to fit in the chuck of the drill to take the polishing mops. This arrangement can also be used when polishing old, scratched and rust-stained fittings attached to the boat.
When I want to make a particular trim I generally buy stainless steel in small quantities from suppliers on ebay, while for larger quantities I go to a stainless steel stockholder.
I always use 304 stainless for trims above the waterline although I know many people prefer to pay the extra for 316.
Whatever your choice there is no difference in the work required to polish (or indeed to weld) it.
Preparing strip or angled steel

1. Here’s a length of 3mm flat bar straight from the suppliers. You can just about see that the surface has a rough mottled finish and this must first be ground off flat to give the base finish for polishing.

2. For this job I use the mini-grinder starting with a coarse flap disc to remove the mottle, followed by a finer disc to remove the deep scratches of the first disc. A drill and flap disc could handle this job too, but would be slower.

3. After the first grind the surface is flat but covered in scratches from the flap disc.

4. For removing the scratches on stainless steel I generally use Abracs discs, starting with the coarsest (left) and finishing with the finest (right).

5. As each step progresses a surface shine will begin to appear. If all the deep scratches have been removed the strip is ready for polishing. If any scratches are still present, the process will need to be repeated to remove them.
Preparing stainless steel sheet

1. For wider areas a grinder would tend to dig into the surface, so for stainless steel sheet I use a 3in dual action air sander (an electric version is just as good).

2. Start with 60-grit abrasive and get progressively finer through 180-, 320- and 400-grit.

3. The 60-grit produces a matt brushed finish, and after 180-grit you’ll start to see the first dull shine (the pot of Kurust is only there to show the reflection).

4. After 400-grit I move on to 3,000-grit 3M Trizac discs, designed for high quality finishing of vehicle paintwork. But they are expensive – an alternative is to use standard 3,000-grit discs. This final disc is used wet so care is needed if using an electric sander.
Final polishing with a wheel
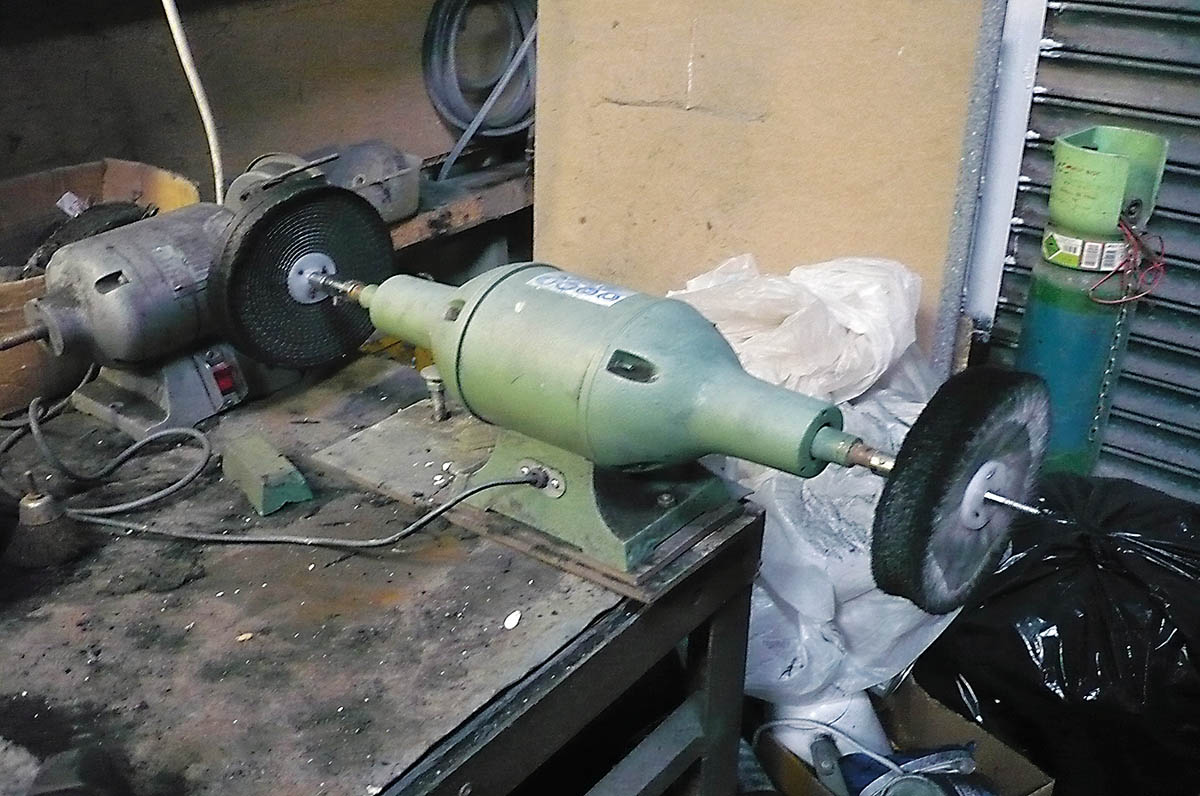
1. This is the Warco 750W grinder/polisher I have in my workshop (the old 350W machine can just be seen in the background). You’ll need a hard sisal wheel and black polishing compound plus a soft cloth wheel with white compound.

2. I start with the hard sisal wheel and black compound. Compound comes in a block and is applied to the wheel as it spins. Work the strip up and down on the wheel (and side to side for sheet steel), applying more compound as required. Then change to the soft wheel and white compound for final polishing.

3. When you’ve finished buffing on the wheel the steel will still have polishing compound stuck to the surface so it won’t be shining. To remove the remains of the compounds I use Solvol metal polish.

4. Using the 3in sander, this time with a woollen buffing pad, makes the final polish a lot easier – and just look at the finish we’ve achieved: a highly polished and reflective surface.

5. Here are a couple of other examples of what can be achieved. This low fiddle rail on the bridgetop and around the companionway was made from one piece of polished stainless steel strip…

6. …while these edge trims were similarly made using 20mm stainless steel angle. Where trim is to be applied to a structure you obviously only need to polish the surfaces that will be seen.
TOP TIP: At each stage check that all scratches and marks from the previous stage have been removed to avoid having to retrace your steps later on.