
Ann Berry shows how she designed a bigger boom tent shade for her cruising yacht at a total cost of £140

We needed more shade on Aderyn Glas, our Moody Eclipse 33 we keep in the Ionian, and our small boom tent was not up to the job. It was time to design a new one – one to go from the base of the mast all the way to the bimini, to give us shade over the saloon as well as the cockpit.

It was clear from the start that the geometry would be difficult: I had to think and measure in three dimensions not two. If I had laid the material out directly onto the floor I would have had wrong angles and distances because the line between the boom and the attachment points on the coachroof and shrouds bent downwards. So I had to recreate this three-dimensional shape.
I hit on the idea of using a single length of string tied to the mast and then taped to each selected attachment point, along the boat length, to the first stainless strut of the bimini. The string followed the basic outline shape that I wanted and gave the angles and edge lengths of the tent.
I used the boom as the mid-point of the design and decided to make the shade in two mirrored halves. I measured at right angles from the mast to the string of the first attachment point, the shroud, and then at spots along the boom to the coachroof handles, and from the string to the other points of contact.
In all there were four contact points per side plus one to the mast itself and a final one to the backstay at the rear of the bimini. So there were only ten attachment points. I wanted simplicity and to be able to put the cover in place fairly easily on my own.
To anchor the tent I decided not to use bungee and hooks as bungee degrades very quickly in the Greek sun, but chose instead knotted rope. To take the strain, along the length of the coachroof and saloon area I thought a rope channel would be best so that was incorporated into the design.
When I considered what material to use I chose a pale coloured material to reflect the sun and lightweight for handling and storing. So my fabric choice was coated Odyssey, a polyester impregnated lightweight canvas.
The tent covers the whole of the saloon and cockpit and gives the shade I wanted, with a breeze from front to back when at anchor as well as keeping the boat much cooler than before. I can also put it up by myself by throwing the whole tent over the boom and attaching the windward side first. It has been a great success in its practicality and ease of use – I wish I’d made it years ago.

1. To work out the boom tent layout I strung blue string from the boom to selected contact points around the boat, attaching it with yellow tape, to form the outline shape of the shade and provide measurement points from the boom.
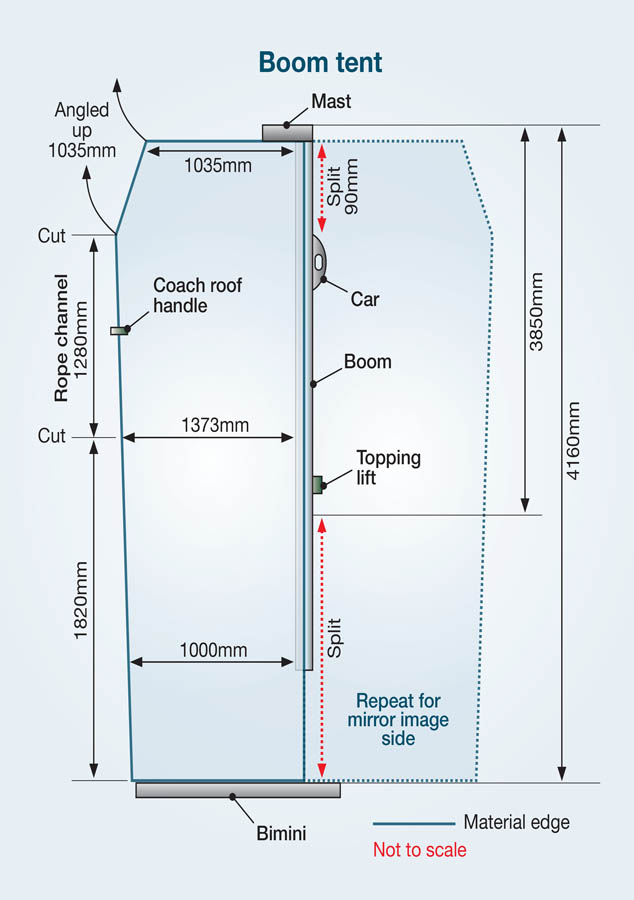
2. Diagram showing measurements from boom baseline to contact points of the string line strung along the boat. To get these measurements to work on the material I had to put the material into the approximate shape of the finished article, otherwise the dimensions wouldn’t work out. For example the forwardmost left corner won’t meet the shroud unless the edge is lifted. All seams are 2.5cm and run around the finished shade. The rope channel is the same 2.5cm depth.

3. Using the dimensions from the diagram, I measured one piece of the fabric and marked the key points on to the ‘wrong’ side (the side with the coated surface) with a soft pencil, and then added an extra 2.5cm for seams all around the outer edge of the shape. This was repeated for the other half of the tent fabric, remembering to take care to first lay the material back to back with the ‘right’ (outer) sides together. This created a mirror image of the opposite side of the tent, again with allowance for a 2.5cm seam. Between the two cuts, one each side of the coachroof handle (one cut shown in image below), the seam once sewn would form the rope channel.
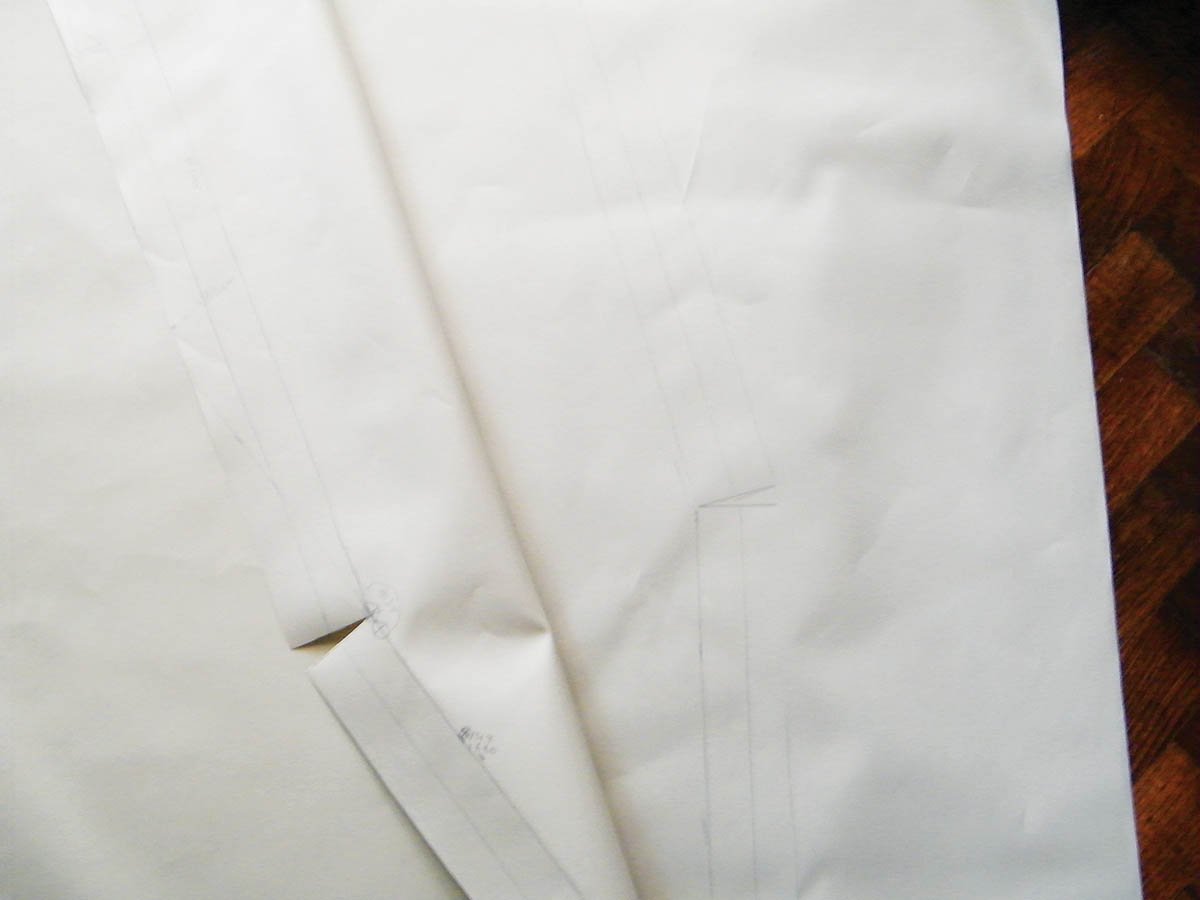
See caption image above

4. When finished, the material cuts at the contact points at the coachroof handle allows the material to curve away and up to the shrouds and mast forming a three dimensional shape.

5. I took the two cut halves of the tent and laid them out with the wrong sides touching. I folded inwards the edges which will form the seams around the mast at the front and topping lift at the rear of the boom. Then I sewed the split section seams with a zigzag stitch for added strength.

6. I folded all the cut edges inwards and sewed them to neaten or form the channels. I use quilting clips to hold the folded edges in place to stop the material sliding around when sewing, although double sided tape is an excellent option.

7. For strengthening at the attachment points I cut out various shaped sections of material to sew into place on the seam lines where I planned to put brass eyelets. The ropes will be fed through the eyelets to the various points of the boat. The fabric patches were sewn in place using a zigzag stitch, which is stronger than a running stitch, onto the underside of the fabric. Here’s how it looks from the outer side of the tent where it splits to fit around the mast.
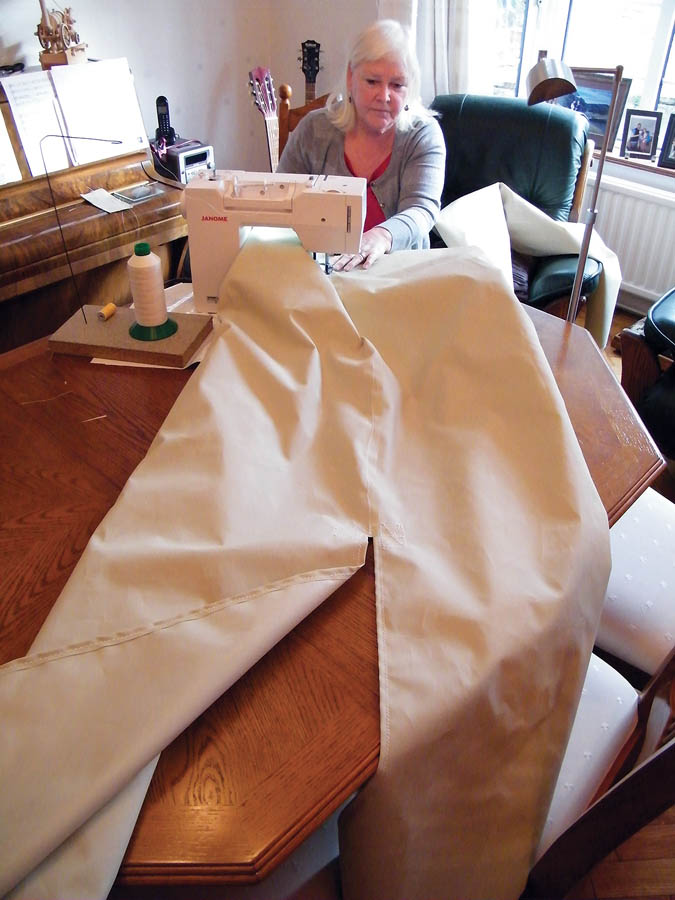
8. After I’d sewn all the patches in place I attached the two halves of the tent together by placing one side over the other and then sewing with a double line of running stitches. This seam runs from the outhaul split at the front of the boom all along the boom to the topping lift. It’s a lot of fabric to handle – over four metres in length – so I had fun doing this part of the job.

9. The rope channel runs across and is held onto the coachroof grabrail by only two attachments points. I didn’t want to attach the tent to the guardrail stanchions as I wanted free access along the side decks. One advantage of the rope channel is that extra attachment points can be made by cutting a hole in the channel to access the rope inside.

10. I attached all the ropes with stopper knots on the outside, an overhand knot on the inside of the eyelet then a locked clove hitch to the shrouds or other attachment points.

11. I put additional small ropes across the stress points at the front of the boom, at the rope car and the rear split.

12. I inserted double eyelets at the mast so there’d be two ropes to take the stresses at that point.
Originally published in PBO May19